
 Hey, everyone, I’m so excited to be sharing this post with other talented bloggers today! Remember when I did the Home Tour Hop in June where we showcased you 10 homes?! Well, today is similar….ish 🙂 Today we are showcasing you 15 different wall art projects. Mine is all about my DIY canvas wall art. Click on the photo at the bottom of this post to check out the different blogs participating! Aren’t they all amazing?
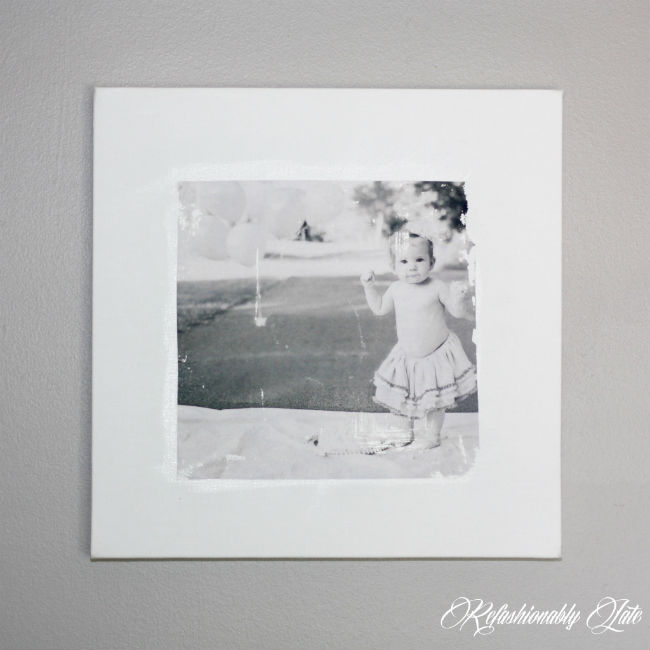
I decided to go with canvas as my base of each photo/picture. I researched online for different tutorials on transferring photos onto canvas. I came across this post by A Beautiful Mess. It shows how to transfer photos from printer paper and adhere it to the canvas with gel medium. I used the same brand of gel medium that they used, Liquitex. The tutorial was spot on but I noticed when I was finished removing the excess paper I still had a white “film” on the top. It didn’t show when the canvas was wet but when it dried it covered the photo. I then resprayed the canvas and tried to take more off but there really wasn’t much excess paper left to be removed. I then thought maybe a coat of the gel medium on top would make it shinier and removed that “film.” Unfortunately no luck. 🙁

I did some research online and read another photo canvas transfer post and came across one on Ruffled Blog. They talked about the same “film” on the photo and they discovered that if you spray some wood furniture cleaner (oil based) onto a cloth and rub it on the canvas then it will remove the film! Guess what it worked! I’m extremely happy with how all of these photo transfers turned out!


I have also been dreaming about this artwork called Lord Bodner Triptych for quite some time. I have been dying to recreate this and put it in my house somewhere because obviously, I can’t spend that kind of money on it.
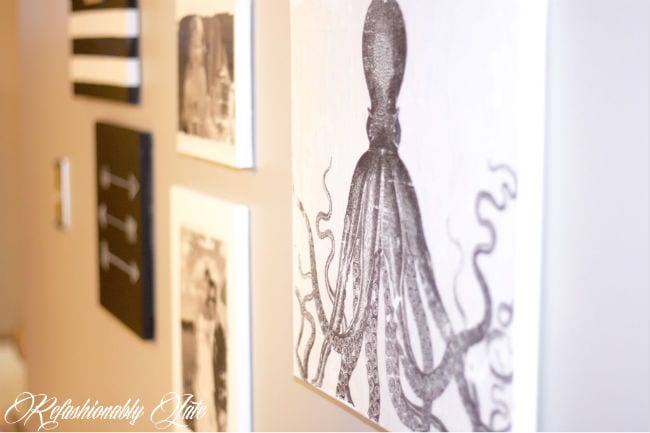
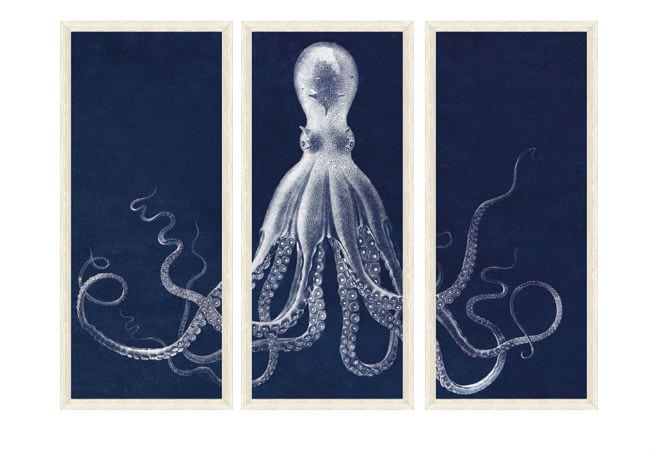 I thought I’d make my own little mini version of it to put with my other hallway wall art. I used the same method that I used with the photo transfers and gel medium. I’m so happy with how it turned out and kind of want to make a large version like the original picture. I think it would look great in my dining room or maybe someday over a crib in a baby boy’s room? Giuliana and Bill Rancic did that for Duke’s nursery and it was adorable! Would go great with a nautical theme. 🙂 We will just have to see where the cards fall….


As you can see from the design of my web page I’m a little obsessed with black and white stripes. I took one of the 16×20 canvases and used Frog Tape to divide the canvas into equal sections. Once I secured it tightly onto the canvas I spray painted the entire canvas.
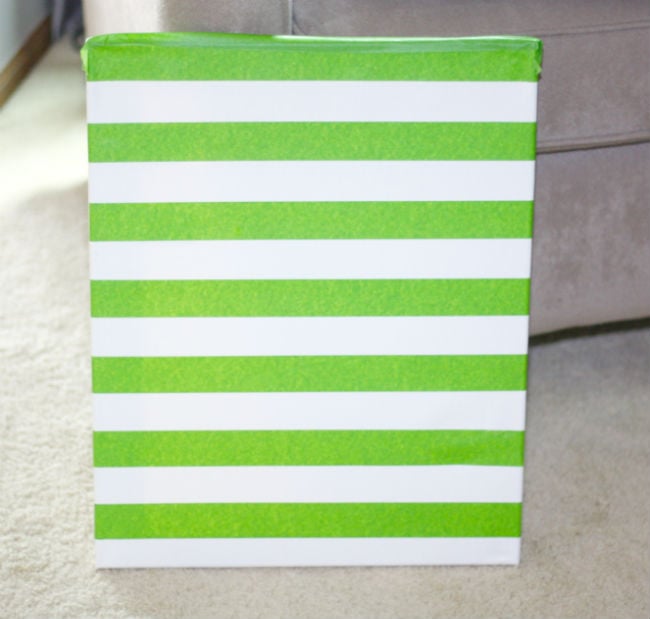
I gave it a while to dry and then I took the frog tape off and revealed a beautifully striped canvas! I also bought a thin wooden “T” from Michaels and spray painted it with Krylon Champagne Nouveau Spray Paint. I glued it onto the canvas with Loctite Super Glue.

Last but not least I spray painted 2 of the canvases with Rust-Oleum Chalkboard Spray Paint. I actually did the stripes above with this because it was the only black spray paint I had on hand. This then gave me the most amazing idea to spray paint an entire canvas with it. After they were dry I decided to draw some arrows on one and the other canvas I hand drew a fun printable I found on Pinterest. I used a Liquid Chalk Marker Pen to draw on the canvases. My original plan was to use carbon paper to trace it on…great tutorial of this by The DIY Mommy…but unfortunately, I couldn’t get my hands on it quickly enough. I guess I had to just try it myself. I was pleasantly surprised at how well it turned out!

Here is the final product!! I was worried it wasn’t going to look good or look sloppy but I love how it turned out. I will say it was hard to photograph wall art that’s in a hallway! 🙂


Now go check out these amazing works of art by all of these fantastic ladies!!!! Click on the links below!
1. Amidst the Chaos 2. Old House to New Home 3. One More Time Events
4. The House Down the Lane 5. A Shade of Teal 6. Vintage, Paint and more ….
7. Penny Loves Projects 8. Uncookie Cutter 9. Green With Decor
10. Casa Watkins 11. Domicile 37 12. Refashionably Late
13. Up to Date Interiors 14. Pocketful of Posies 15. Shabby Grace Blog
I hope you found some inspiration with the variety of wall art I used for my hallway. Please go check out the other blog’s work as they do such amazing things! They are not only amazing bloggers but also are becoming my friends! Happy Monday!
Many outgoing links on Refashionably Late are affiliate links. I may earn a small commission to fund my Diet Mountain Dew drinking habit if you use these links to make a purchase. You will not be charged extra, and you’ll keep me supplied in caffeine. It’s a win for everyone, really. I only link to products I have tried and love! See my full disclosure here.


Hi, Ruthie ~ Your gallery wall looks amazing! I love all of the black and white and the touch of gold! I’m sort of obsessed with black and gold right now. :0) I’m hoping to do some photo transfers to canvas soon, so I’ll come back to your tips. Thanks for sharing!
Thanks, Tiffany! Yeah it was definitely trial and error with the photo transfers but I love how they turned out! Yeah I’m obviously obsessed with black, white and gold…just look at my blog web design 🙂
Amazing Ruthie!! I love it all, the family photos and the octopus is awesome. I’ve been wanting to do photo transfers for a while, I’ll have to try that! Thanks for sharing!
Thanks, April! Yeah I’ve been wanting to do the photo tranfers for quite some time as well and I decided to finally give it a try!! I’m hooked! I want to keep doing it!
I love the pictures on the canvas, I need to do this in my house!
Thanks, Katy! They are super simple once you get the hang of it!
Ruthie! Its adorable. I REALLY like the photo transfers to canvas. The vintage look they have is so great. Thanks for being a part of the Wall Art Hop. Well done!
Thanks, Sara! Yeah I love the look that it gives the picture! Thanks for coordinating the Wall Art Hop!
I love your little projects and all the black and white going on. We definitely have that in common. Beautiful pics of you and your family!
Thanks, Jessica! Yeah I do love me some black and white! 🙂 I have to force myself to incorporate more color into my home! 🙂
WOW all these are gorgeous !
Thanks, Tammy! 🙂
I love each and every piece you did for this gallery wall. I’ve been obsessed with Lord Bodner Triptych too. lol Love how yours turned out. I’ve been wanting to try that technique. Great style!
Thanks, Kathy! Yeah I really want to make a larger Lord Bodner Triptych now! 🙂 I just have to convince my husband. He doesn’t understand my obsession with it!
So pretty Ruthie!! I have been in love with that octopus print as well. Great collection in your gallery wall. You look so happy and beautiful in your wedding photo. 🙂
Oh thanks Stephanie you are so sweet! I am pretty happy! 🙂
I love all of these!! The chalkboard canvases are so pretty – and what a fun way to display photos! What a great gallery wall!
Thanks, Meg! Yeah I kind of stumbled upon the chalkboard canvas and love how it turned out!
I love your gallery wall and each and every one of your pieces you made. I am especially drawn to the canvases you spray painted with the black and used white chalk paint on. Your photo canvases are awesome. Love it all.
Thanks, Cathy!! I’m super pleased with how it turned out!
I’m coping your “T” project :).
Do it!! 🙂
This looks like an party and post, thanks for linking it up at this weeks Merry Mondays!
Thanks 🙂