
 Hey everyone! Happy New Year!! I want to welcome Melissa today from Welcome to the Woods to Refashionably Late. She is being a dear and sharing some of her creative work on here to help out during these busy times with a newborn. I love what she has created and I hope you enjoy her tutorial as much as I do!
Hi there! My name is Melissa and I write for the homemaker in you at Welcome to the Woods blog. I am excited to guest post for Ruthie during her babymoon because we are both Minnesota-native creatives. I am also always fashionably late and love to refurbish furniture, small world! Today, I am going to show you a new way to bring the outdoors in that results in a creative piece of DIY decor.
The other day I was perusing home decor aisles in Target (they really do have great stuff) and I came across this piece I knew instantly that I could make myself.

This decor accent was modern and shiny, definitely something I would go for in my house. But the price tag was $14.99 or something and I knew I could make it for next to nothing.

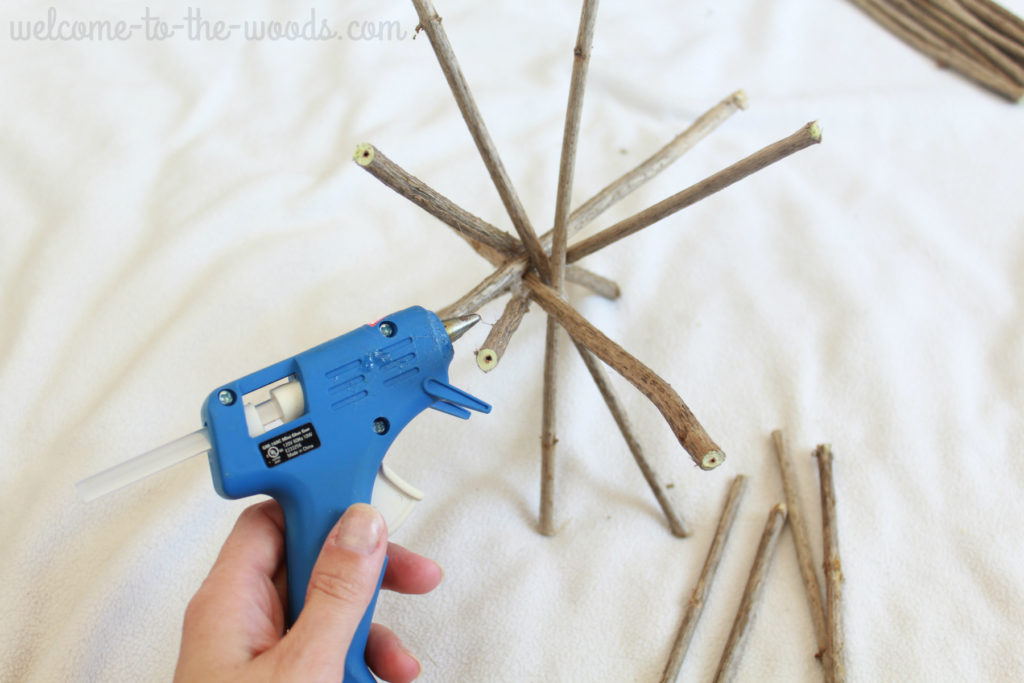
I gathered a bunch of straight sticks. In hindsight, I should have sanded them or stripped the bark, but I didn’t. I clipped them into similar length pieces.

Using a hot glue gun, I began to glue the sticks together in a spherical shape.

It was arbitrary, I just did what looked good.
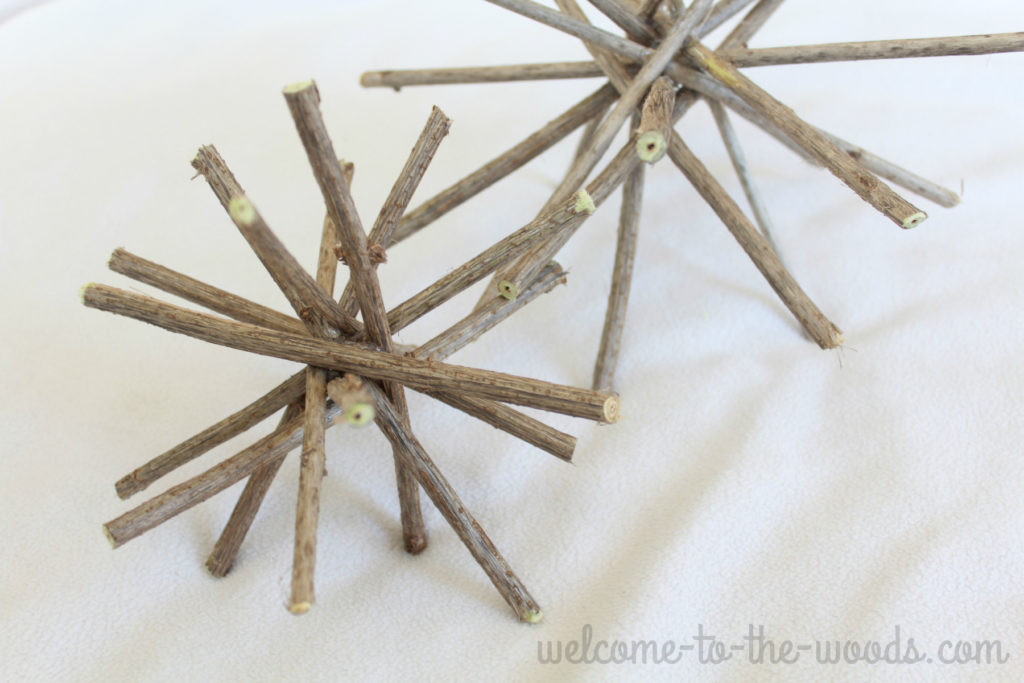
When I was done, I had two of these stick creations and they were ready to get spray painted!
I picked up leftover spray paint from my local household hazardous waste facility for free. You can check if your area has one, otherwise splurge and buy a $3 can.

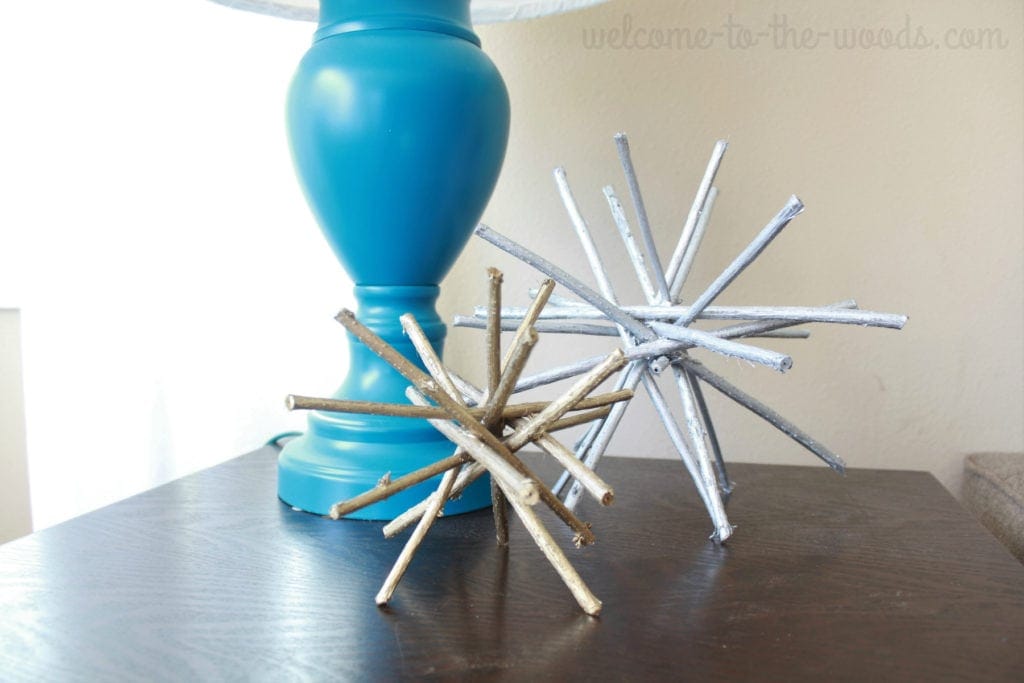
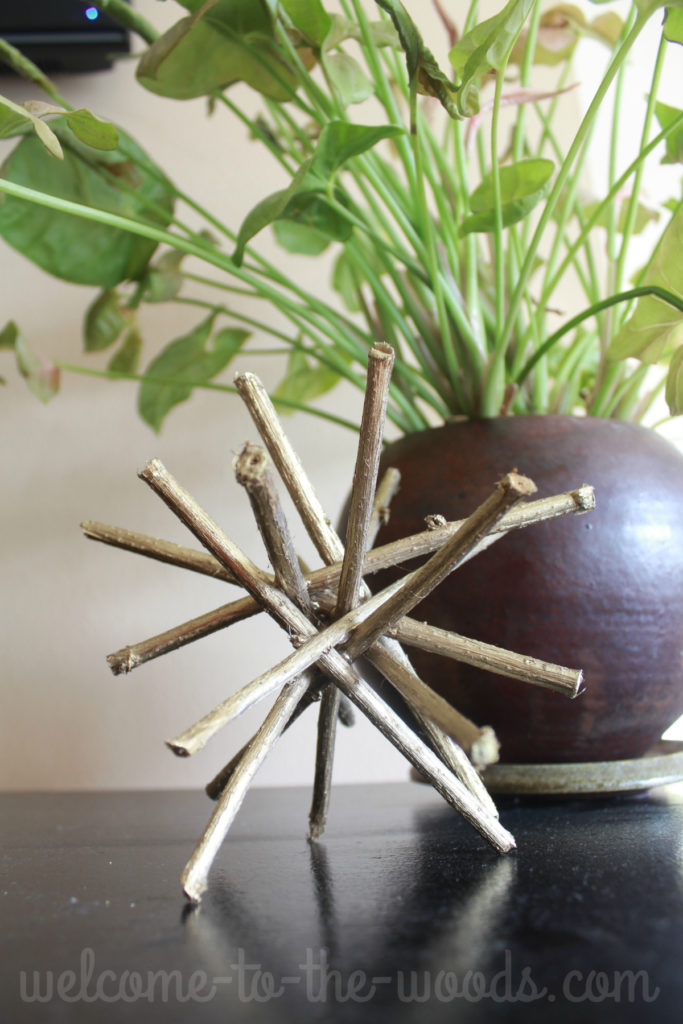
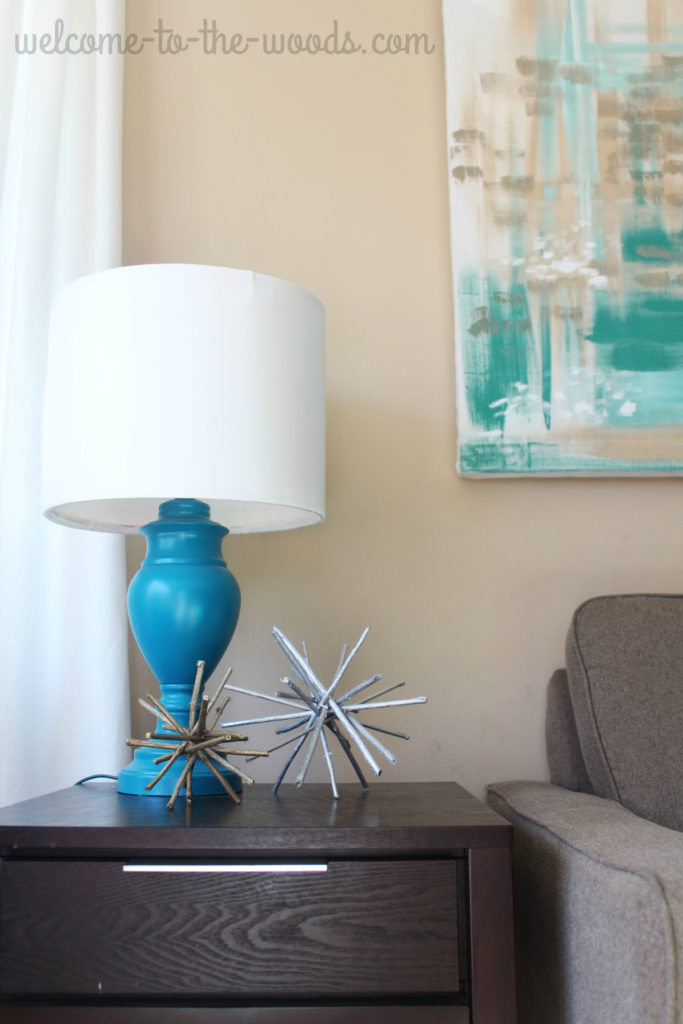
I love how they turned out! One in silver, one in gold, and oh so shiny!
They do have some fuzzies on them from being sticks and all, I think if you sanded them that wouldn’t happen. I did consider using a smooth medium like straws for this project, but I didn’t think straws would be strong enough to stand on its own.

This modern decor is so cheap; you would never know they were sticks unless you took a close look!
I hope you liked my easy decor idea and found my tutorial photos helpful. Tell me, would you try making this for your home?
Stop by my blog after this and check out more of my creative projects. I recently rebuilt our staircase railing to something very modern and would love for you to see it! Click on over to my blog, Welcome to the Woods!
Thank you so much to Melissa for helping me out during this busy time! I hope everyone is having a great start to their new year!


Thanks for having me, Ruthie!
Melissa
Thank you so much for sharing your talents on Refashionably Late!!