
 I’m a new contributor to a really great website you should check out, Pinkwhen. Jen has some really great crafts, DIYs and recipes. I shared this with her readers a little over a month ago and today I wanted to share it with you! I’m going to share with you a transformation I made for my guest room. This last fall I participated in a 6-week room transformation challenge called the One Room Challenge. You can see the entire progress of my room here. Our guest room went from basically a storage area to a beautiful, elegant room for guests. I shared a lot of I did to transform that room within those 6 weeks but I haven’t shared how I redid this old headboard I scored on Craigslist for $20!

I was so excited to give this wooden beauty a mini facelift. I started by sanding the headboard in preparation for paint. The base board had a chunk of wood missing so I had to perform a little surgery. I used some wood filler to fill in the empty spot. I didn’t worry about making it super pretty as I planned to evenly sand it down. When using wood filler, remember the thicker the amount of wood filler the longer it takes to dry.

Of course, I was a little impatient to wait for the wood filler to dry so I started spray painting the headboard while avoiding the wood filler area. After it was dry I evened out the wood filler and spray painted that area. Spray paint is a great, easy and quick fix for furniture but you do have to remember that larger areas are harder to cover without spray marks. I wasn’t worried about spray marks because I was going for the distressed look. I gave it a good 2 to 3 coats of white spray paint and then I took sand paper and sanded around the edges and in random spots on the headboard. I think this would be right up Joanna Gaines ally! 🙂 A little spray paint and sand paper gave this old headboard new life! And that was that! Short and simple!
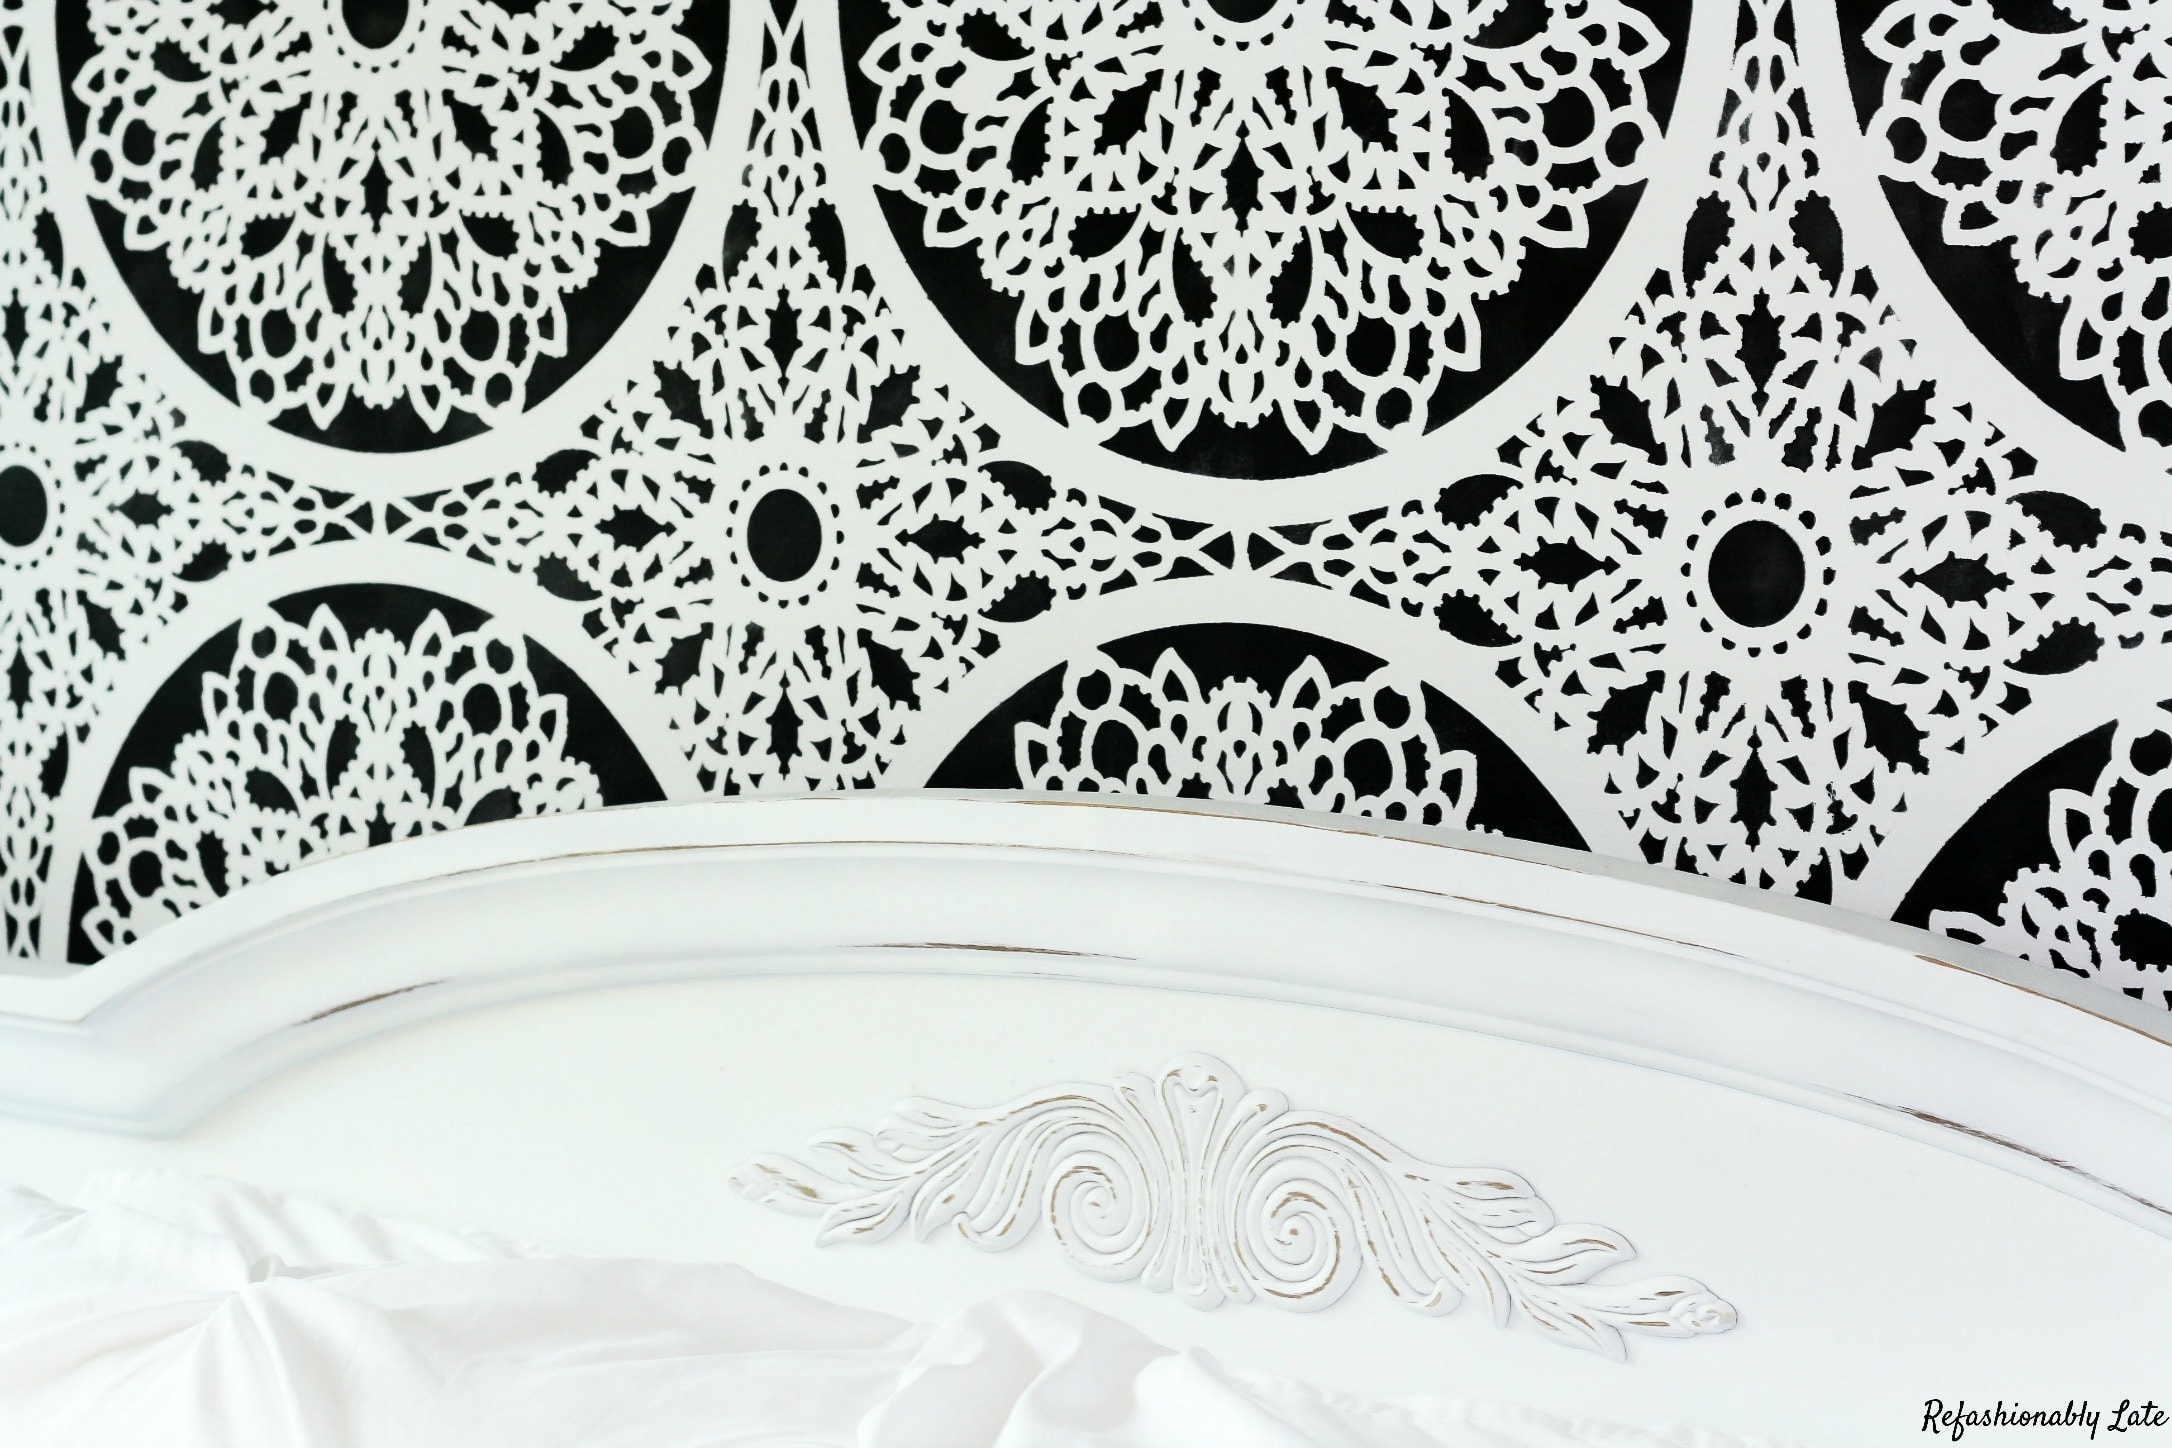


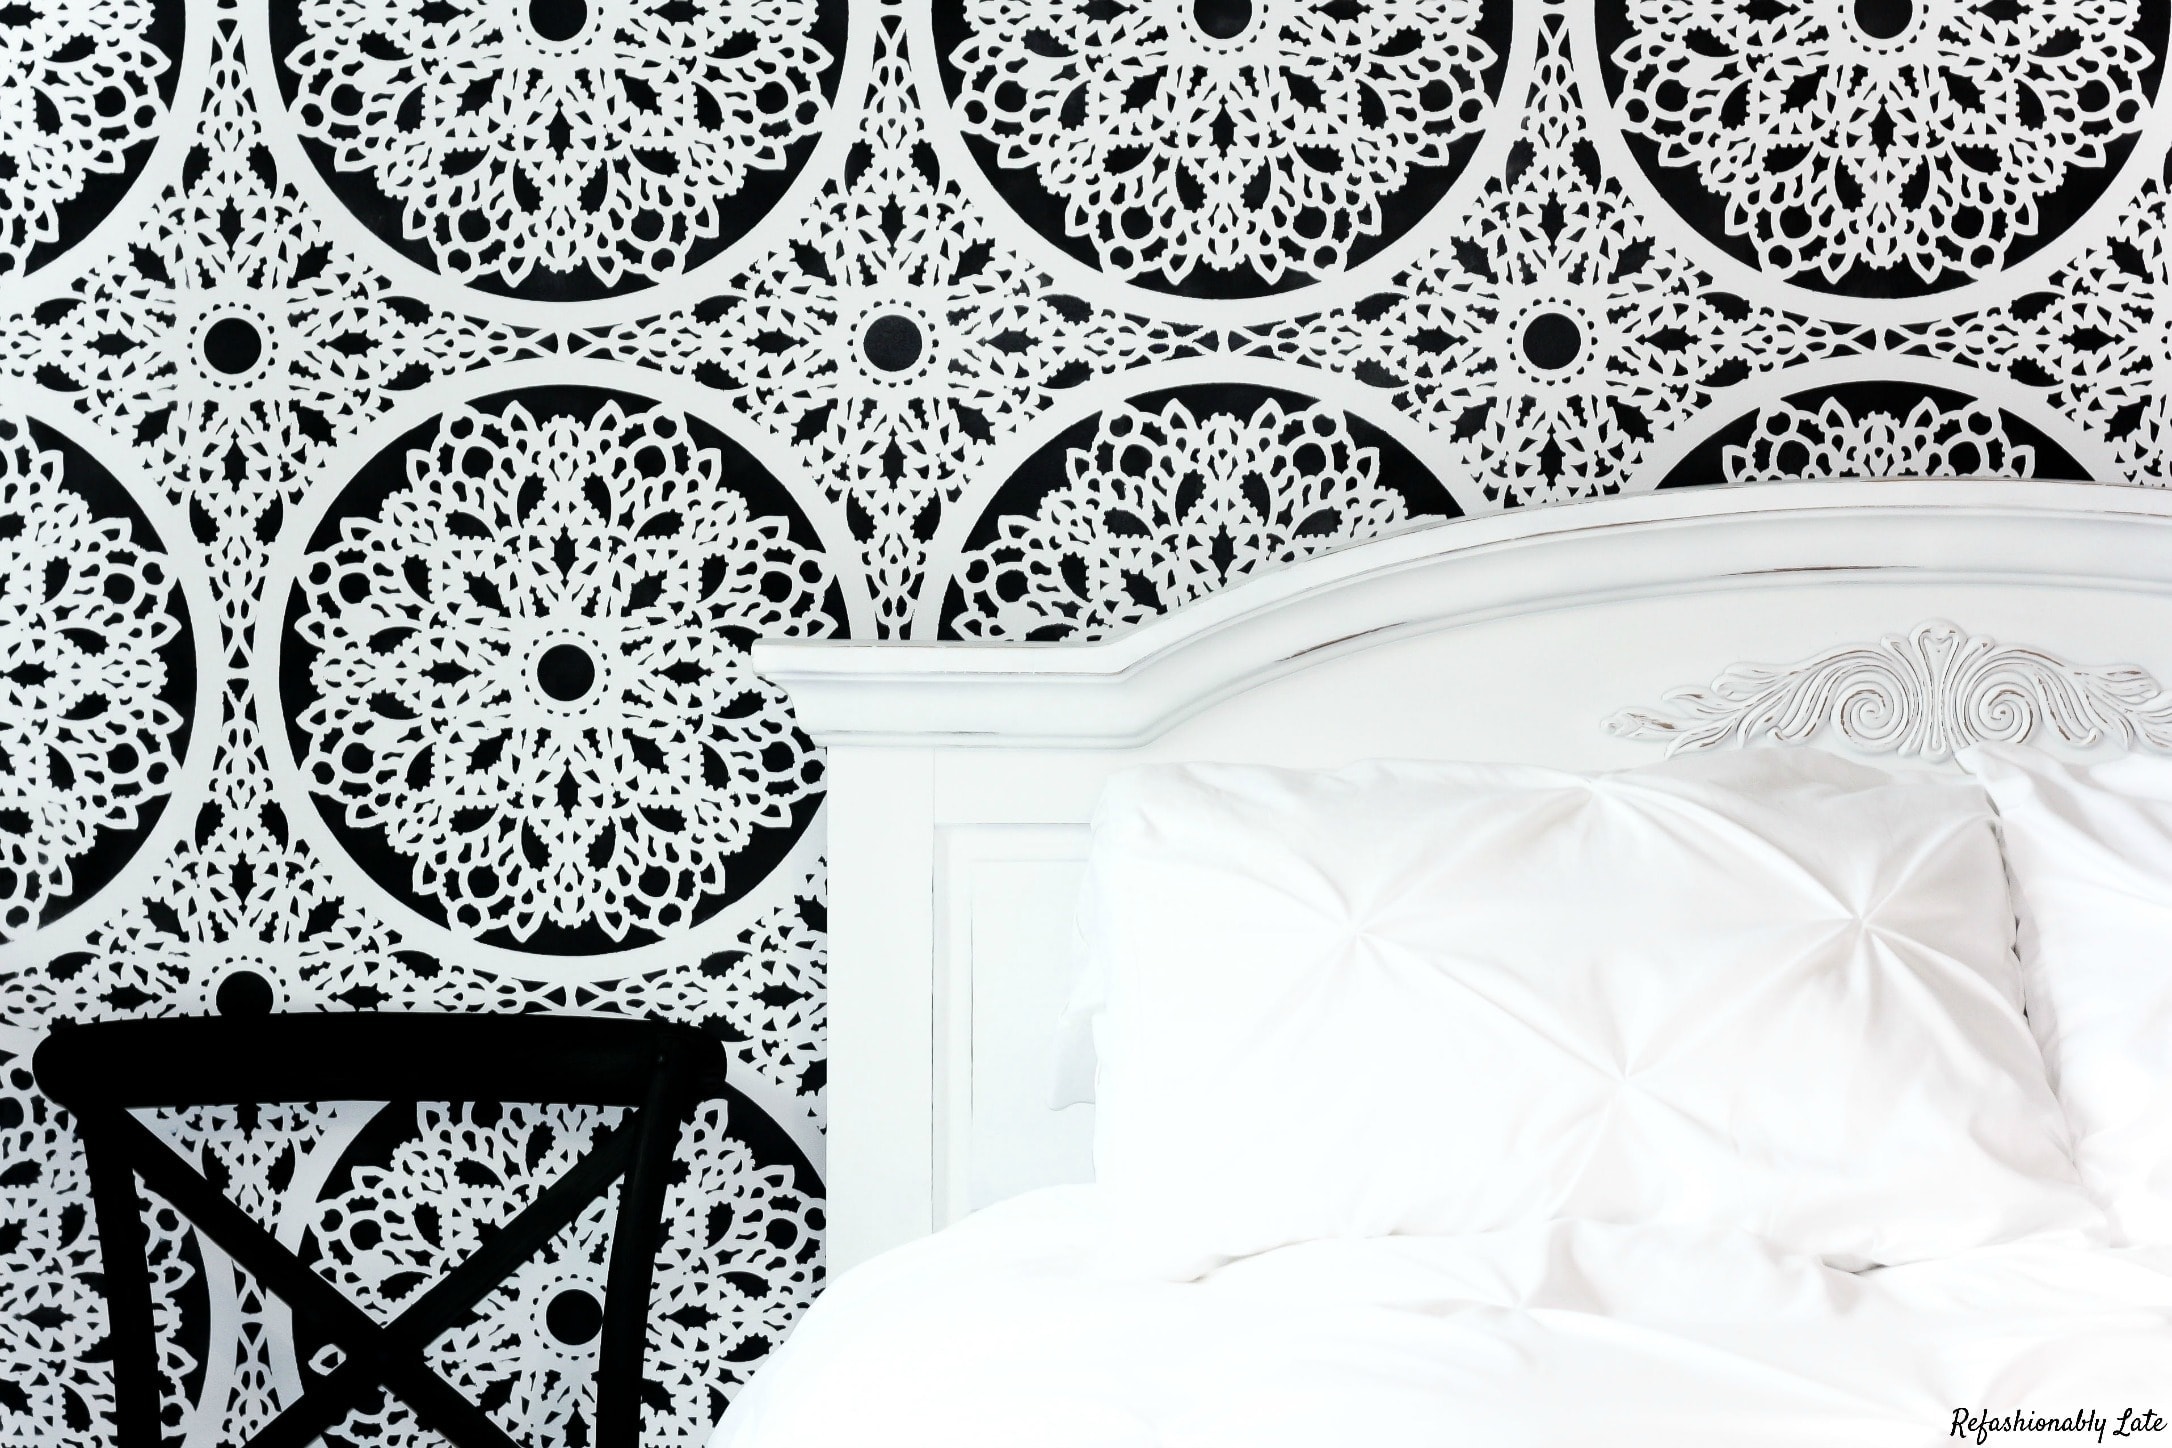
 The headboard has been such a great addition to my guest room and I love having people come and visit and stay at Chateau RuPaul! (My husband’s name is Paul, so it’s our names combined! Haha) The combination of the stenciled lace wall and the “new” headboard create a stunning feature wall. It’s the first thing you see when walking in the door! Well I hope you aren’t having the Monday blues! I was childless all weekend so I had some nice R & R but I’m so happy to have her back home and get my morning cuddles. 🙂


What a score indeed for $20 and I love how you’ve transformed it!
Thanks so much Kimberly! I really love how it transformed!
Wow! Looks good as new. Great work, Ruthie!
Thanks Heather!
WOW Ruthie, first, what a great find for $20! You did a great job distressing this piece! Love it.
Thank you so much Sara! That says a lot from someone who does it quite often! 🙂 Everything you distress is gorg!
Beautiful transformation! LOVE the new headboard.
Thank you so much Lindi!
Looks fabulous and I love that room!! Nice work on the headboard, can’t wait to see what you do for the next one room challenge!! Pinning
Thanks April! I love how the room all came together! I’m anxious to get started on the next room for ORC! Lots more work this time around!
That really is a stunning feature wall! I would totally stay at the Chateau RuPaul, lol. Great job!
Haha thanks Roxanne! If you are ever in the Minneapolis area you are so welcome to stay at Chateau RuPaul! 🙂
This turned out beautiful Ruthie! It looks very classic now, and that wall paper is stunning!
Thanks Emily! The wall is actually a stencil (isn’t that cool?!) and I love it so much! 🙂