
*this post may contain affiliate links
 A few weeks ago I was checking out free items on Craigslist and came across a coffee table that was close by so I thought I’d go pick it up. While I was there a man and woman were pretty much completely getting rid of everything in this house. I don’t know who’s home it was but guessing it may have been a grandmother or grandfather who had passed away. Most of the funiture was dated and either needed to be thrown away or made over! It was kind of a dream for me! 🙂
The man helped me carry the coffee table down to the car and then proceeded to tell me I could take anything I wanted! I kind of got giddy and started looking around. I came across a two tiered end table similar to the one I had redone before. I’m so excited to try a different look with that table. I also found 2 HUGE outdated lamps. I’m talking super huge…the shades alone are 17 inches tall. I decided to redo this lamp first because I loved the lines in the base of the lamp.

All you need are few items:
1. Spray Paint
2. Fabric
4. Hot Glue Gun
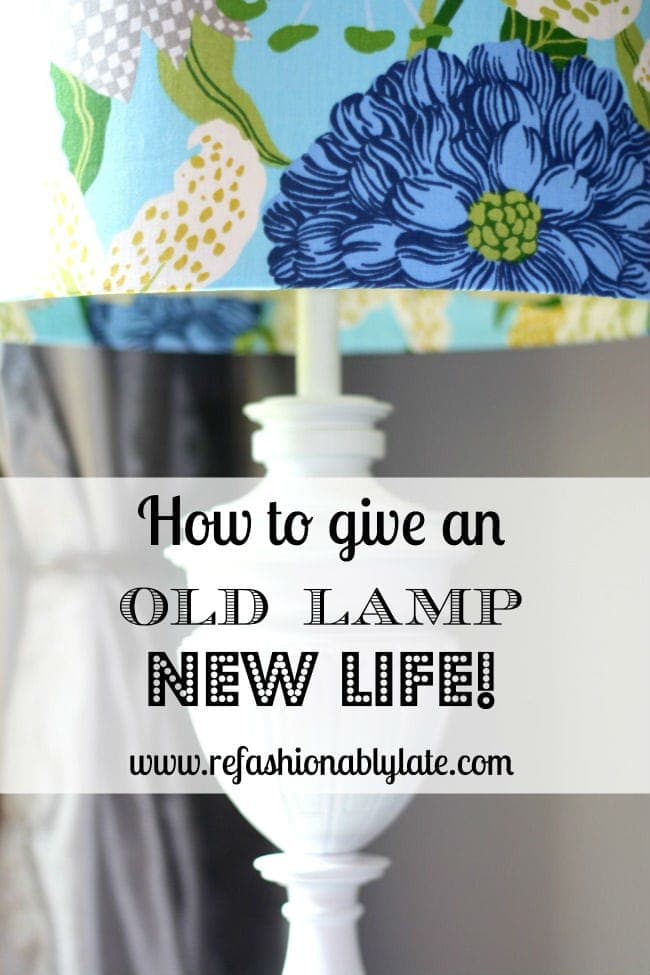
The process is fairly simple. I started by spray painting the base of the lamp with a white primer by Rustoleum. I actually loved the matte look so I left it the way it was. It had great coverage and looked beautiful so why mess with something that’s not broken?! I also gave the cord a little bit of spray paint so it matched nicely and didn’t have a brown cord.

My original plan was to use a gold oil-based paint pen and fill in the indented areas, but as I started doing it I wasn’t a huge fan. I really liked it just plain ‘ole white! I spray painted that area again to cover up the paint pen. I like how the base of the lamp is simple but also dramatic with its detailed lines.

I wanted to create focus on the lamp shade so I found a fun, bold floral pattern that matched with the colors and decor in my living room. I adhered the fabric to the original lamp shade with spray adhesive. You can use most multi-purpose adhesives but make sure it is compatible with fabrics. (Side note…I sprayed the shade with fabreze a day earlier because it had an old “smokey” smell to it.)
I sprayed the adhesive onto the lamp shade itself with a generous coat. I then layed the fabric onto the lamp shade and rubbed my hand around the area to ensure that it was laying flat. I would then rotate the shade and do the next section. I did this until it was completely adhered to the entire lamp shade. I then folded the ends of the fabric to have a crisp, clean line that would go in the back of the lamp shade. I let it dry for about an hour and then I folded the edges over on the top and bottom of the lamp shade and glued the fabric to the lamp shade with a hot glue gun.


I kind of am obsessed with the end product and I’m even more excited that I completed the project for about $5. I already owned the primer, spray adhesive and hot glue gun. I have one more lamp that I got for free at this house and I am excited to try something completely different with that lamp. I also plan to give a more detailed tutorial on how to recover a lamp with that DIY lamp revamp.
Have you ever given a lamp a makeover? Has it completely transformed your room? Well I’m hanging out in Lake Okoboji this week with my family and I’m really looking forward to the 4th of July. It’s kind of a big deal in our family and in Okoboji. While I’ve been here I’ve taken some photos of my parents cabin and I can’t wait to share with you the before and afters on Wednesday! Happy Monday!


I am loving the bold floral pattern against the white! So glad you left it simple. It looks great!
Thanks Kim! I love the simplicity of the base with the bold fabric on the shade!
I love this!! What a great idea to paint it white. I love RustOleum paint!
Thanks, Meg!
I have spray painted all my lamps for a new look too! They are so expensive so if the shape is good, they are worth painting! Yours looks great and I love the fabric!!
Thanks, Amanda! Isn’t it amazing what a little paint and fabric can do!?
What a find!! I LOVE the fabric you chose for the shade. They turned out great! Can’t wait to see what else you make with your treasures 🙂
Thanks, Sydney! I’m anxious to start working on the other lamp!
Ruthie, what a major transformation! I love the fabric!
Thanks, Roxanne! The fabric is pretty great huh?!
This is a beautiful transformation! I am in love with the lamp shade!!! Great tutorial on how to recover a lampshade as well. pinned!!
Thanks, Stephanie! I’m in love with the transformation as well!
Wow! Awesome before and after! The print and colors are amazing!
Thanks, Sara! I kind of love it too!
I love up cycling and working with lamps is one of my favorites. You did a fantastic job, love the fabric on the shade!
Thank you Annie! I had never done it before and I’m really anxious to try it again! I love how they can be exactly how you want them this way and WAY cheaper than buying in a store!
Wow, looks awesome! Great idea! Thanks for sharing this how-to project. Made me think I might could try something like that. 🙂
Thanks, Angel! You can totally do it! It wasn’t too hard! Let me know if you have any questions and I’d love to see your finished product if you decide to do it!
Another great transformation! I agree, the clean white base was a good call, and I adore your bright and bold fabric choice! Thank you so much for sharing this with us at Merry Monday and we hope you’ll join us again next week! 🙂
Thanks, Christine! I love this lamp and super happy with how it turned out! Thanks for hosting Merry Monday!
Thank you so much!
Ruthie,
I recovered two lamps several years ago with a matching blue toile fabric similar to our comforter and drapes in our bedroom/bathroom. I used the spray adhesive and found it to be pretty easy. I also some trim along the edges. I enjoy reading your DIY projects. Congrats on your upcoming new arrival, I’m sure Lucy is very excited to be a big sister.
I bet your lamps look great! I love how a little fabric can completely transform an old lamp! I like the item of the trim on the edges. Thanks for reading my blog! I absolutely love doing it. And we are so excited for Lucy to have a baby sister! She is very excited!