
*This post contains affiliate links but all products I stand behind 100%. If you were to purchase any of the products it would be at no extra cost to you.*
This week for the One Room Challenge has been a busy one but I don’t feel like I have much to show for it. This week we focused mainly on the closet to finish painting it. Two weeks ago I had asked whether I should paint stripes on the closet wall or paint/sew stripes onto the curtains itself. That was my original plan but the thought of sewing stripes on curtains when I didn’t know how to sew seemed quite intimidating. I’m happy to say though that last weekend my mom gave me a tutorial on how to sew! Now I do NOT call myself a seamstress by any means but I can hem some pants and now some curtains! That’s pretty good right?!
In 6 short weeks I have done a ton to get this room reveal ready but I’m feeling the pressure to have it completely finished by next week. I do feel like the stuff that needs to be done is the fun part…organizing! I don’t claim to be the cleanest person in the world but I do love organizing. If you are new here or you want to rewind and review the process so far check out the previous weeks.
Week 1 | Week 2 | Week 3 | Week 4
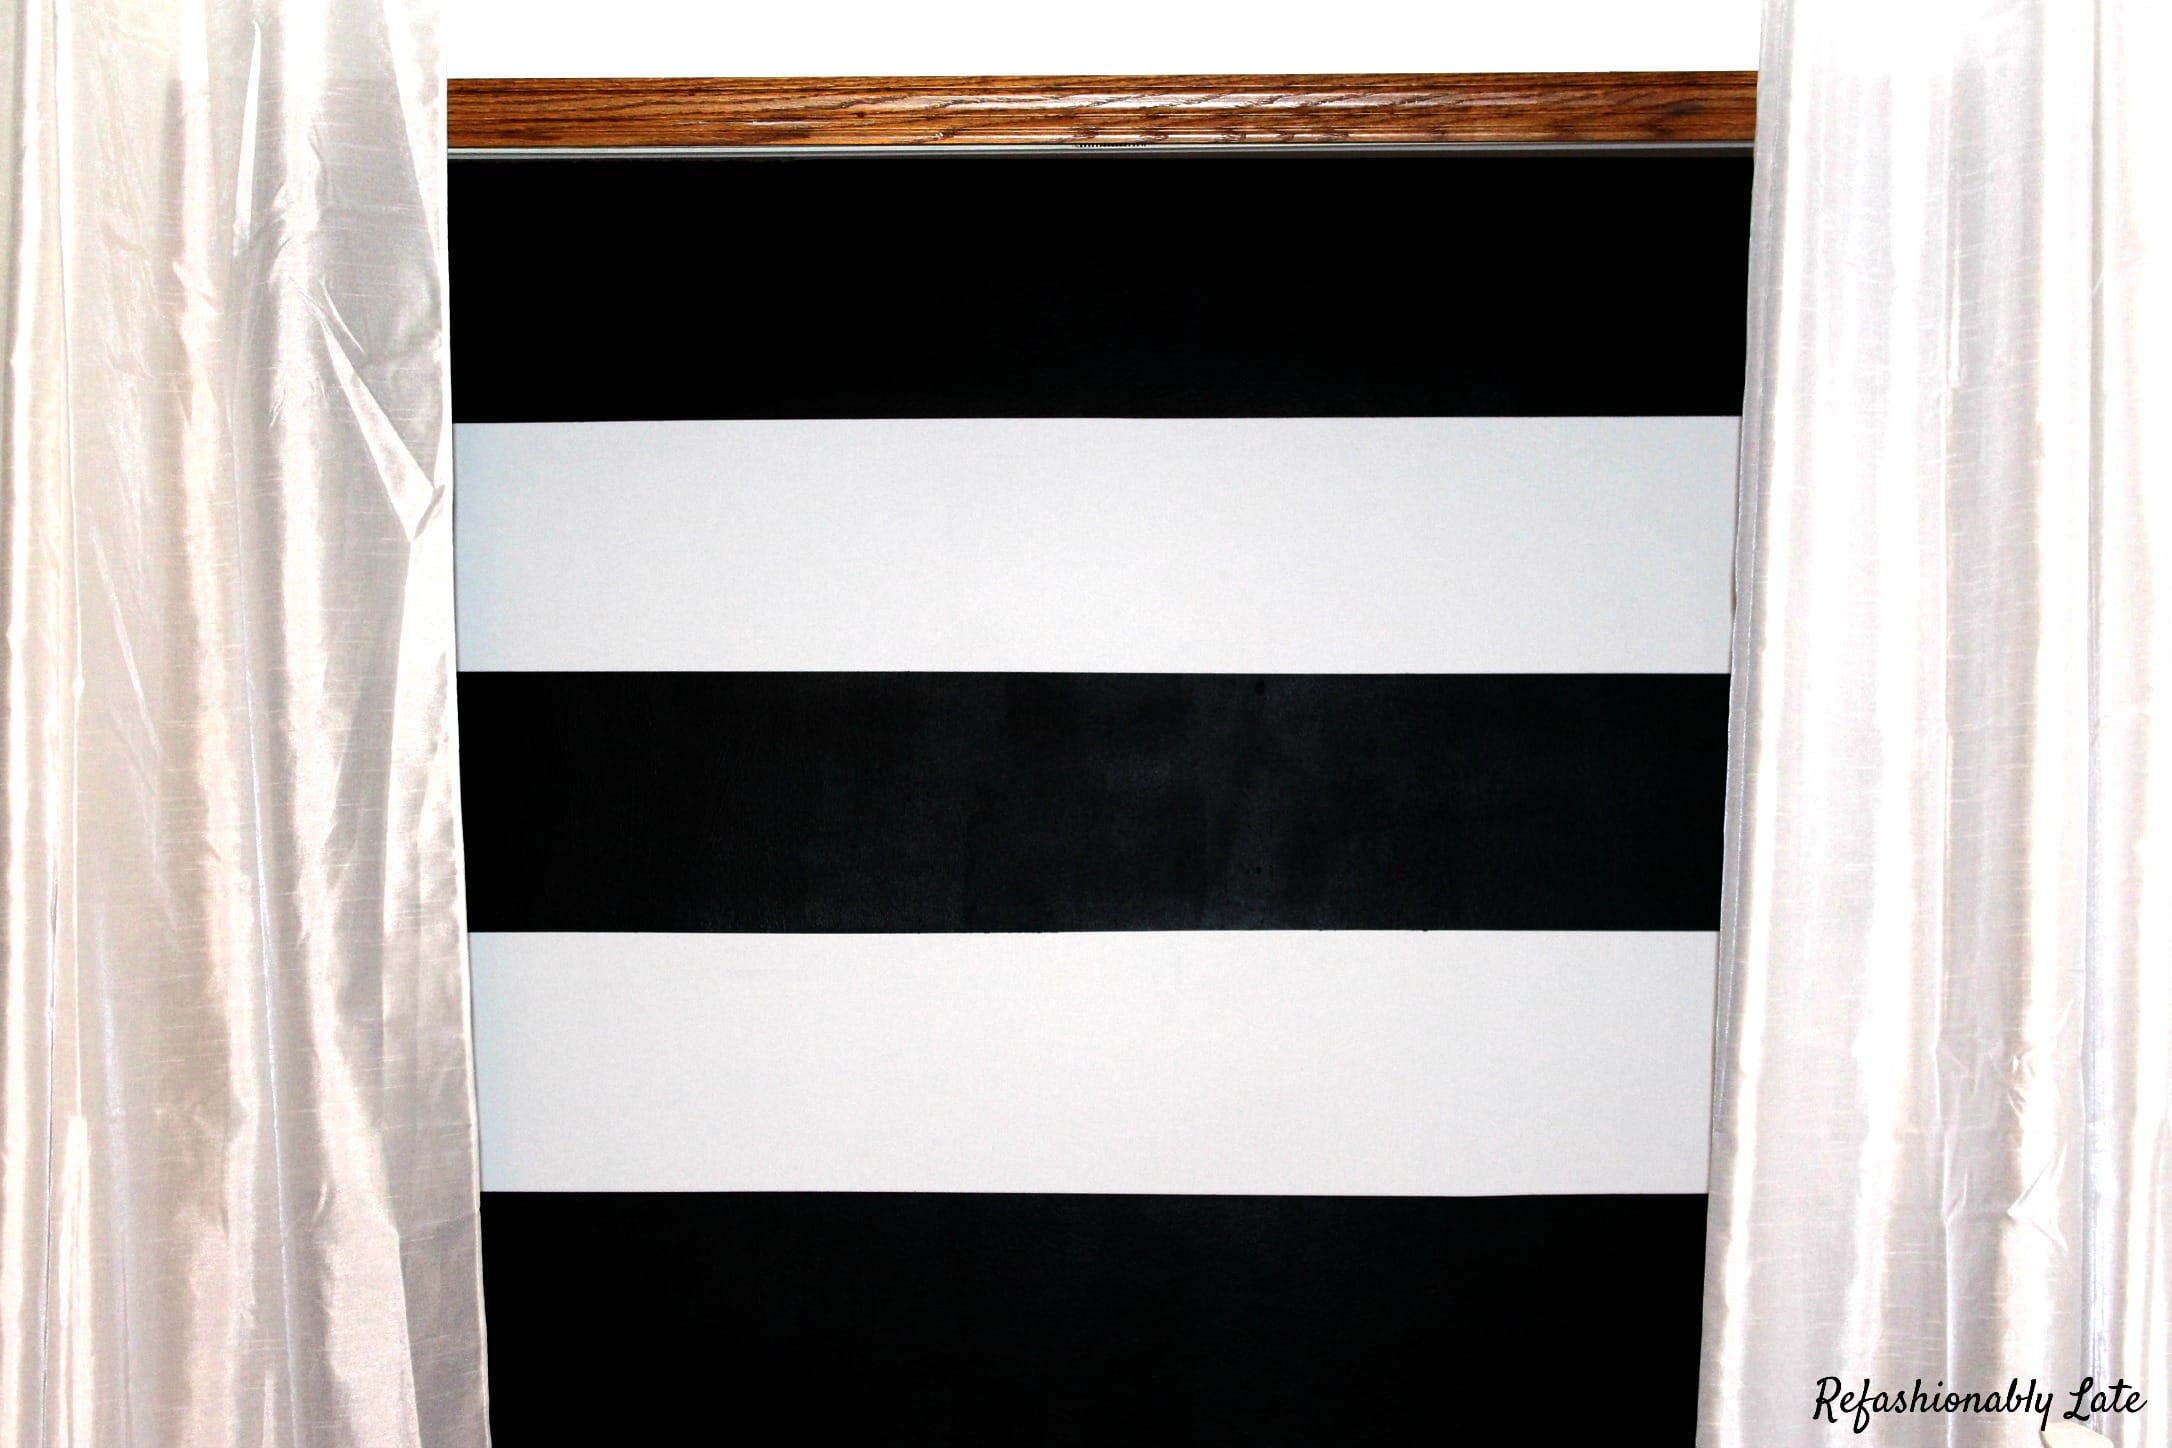
This week, as I said before, was focused on painting the closet so I wanted to give a quick tutorial on how to paint perfect stripes on a wall.
How to Paint Perfect Stripes on a Wall
First you need to paint the wall your base color, mine was white. After the paint is dry then you can decide the width of the stripes that you want on your wall. In my case I went with the width of dropped ceiling on the left hand side. I started with the white stripe on the top and right below that dropped ceiling area I began with the first black stripe. The area measured to 10 3/8 inches, so that was my magic number. Here is a reminder of what the closet looked like beforehand.

It was now time to tape the walls. I taped the walls with my favorite painters tape, frog tape. I made sure the stripes were level by using a laser level. I highly recommend using one as it will create a perfectly straight line across your wall which will guide in placing the tape on the wall. I held the level while my husband taped. Note: You can find levels that will attach to the wall or stand on a tripod so it can be a one person project.
A tip that I figured out on my own (as I’m sure you would too), you have to tape above or below the laser line depending on which stripe you are working on. Example: When you are leaving the stripe the color of the wall you want to tape on top of the laser line as you aren’t painting there again. The next line down you want to tape below the laser line so that it is on the next white stripe. It can get confusing while you are taping as it doesn’t look perfectly even but I promise it makes sense. 🙂 You want the tape to always be in the white stripes. Also create an “x” with your tape on the areas that aren’t going to be painted. It just helps keep your mind clear when starting to paint.


The next step is to paint over the tape with the base color, in my case white, where you are going to paint the colored stripes. This step is very important because if any paint is going to bleed through the tape, it will be white. When you paint your colored stripe, the paint won’t leak through as the original coating will seal the tape even more. Frog tape is amazing and shouldn’t leak through but you can never be too careful! Better safe than sorry is always my motto!

All that’s left to do is paint stripes your color of choice! Obviously you want the previous paint to be dry. Since my color of choice was black I needed to do 2 coats of black. Let your first coat of paint dry and then come back to apply your second coat. While the 2nd coat of paint is still wet you want to remove the tape. Here is a pic of the stripes after one coat of paint.

I love how it turned out and now I can’t wait to decorate the room! There isn’t a ton left to do to complete the room but at the same time there is a ton left to do! 🙂 Here is a sneak peak of the painted stripes!

Lets take a look at my to do list and see how I’m doing:
PaintStencil WallsPaint Bed FrameNightstandsBuy new lamp shadesBuy bedspreadPaint desk or not paint desk?– don’t paint desk- Desk Organization & Accessories
- Jazz up Bookshelf
- Curtains for closet & window – paint stripes on curtain? & hem curtains
- Craft Room in Closet
Find Storage for everythingPaint WallsRemove shelf & Rod- Paint desk inside closet/make desk
- Create craft storage/desk storage
I’m slowly but surely moving along and enjoying it the whole way through! Thank you to Linda for creating such a fun and motivating challenge! There have been multiple times this past couple weeks I have lacked motivation to work on the room but the time frame of the challenge motivated me to get off my butt and work! Can I do a challenge for every room?! Haha that would be nice but I think it would get old! Needless to say I look forward to linking up again in the Spring for the One Room Challenge! Have a great weekend everyone!


Love the stripes & Looking forward to next week!
Thank you so much Hollie! I’m feel so anxious and excited for the final reveal next week!
You’re right! That wall is PERFECT! Cannot wait to see how it all comes together next week!
Thanks Kristi! I’m so excited to be finished and have a beautiful room to enjoy!
Your black and white stripes came out perfect! Great tutorial. Can’t wait to see full reveal next week. Good luck!
Thanks Tee! I’m so excited to see how it all turns out next week as well as see everyone else’s amazing reveals!
The stripes came out so well! I am loving it! Can’t wait to see what you come up with for desk accessories!
Thanks Heather! I’m loving how it’s turning out! Now I can’t wait to organize it!
Ruthie I can’t wait to see your room reveal! You have so many lovely patterns that I am excited to see how it all looks. Great tutorial for the stripes. I have yet to paint stripes. I love doing a lot of DIY stuff, but wall painting is not my favorite. Lol.
Haha I hear ya! Wall painting isn’t the most fun but I love how it turned out! I think I’m going to continue the black and white theme to the guest bathroom! And paint more stripes!
I love a good b&w striped wall and Those lines look REALLY crisp! I cannot wait to see the room come together
Thanks Jessica! I was nervous about it but it worked great!
The stripes look amazing my friend!! Love seeing your space come together. Also love that the stripes match your blog background, lol. Very well coordinated! We are almost at the OneRoomChallenge finish line!
Haha can you tell I like black and white stripes?! 🙂 I can’t believe this week is the end of the challenge! I’m nervous and excited all at the same time!
Ruthie, I am loving this and can’t wait to see the full reveal!
Thanks Roxanne! I’m getting nervous and excited for the final reveal this week!
The stripes look SO GOOD!!! And I love the tip on painting over the tape with your base color. That would not be something I would have thought of (probably because I don’t paint often enough). I will definitely use that tip if ever I am pattern painting. Thanks!
Yeah I think it’s great! It gave me the piece of mind while I was nervous painting the stripes! 🙂
That’s how you do it. Good job!
Thank you!