
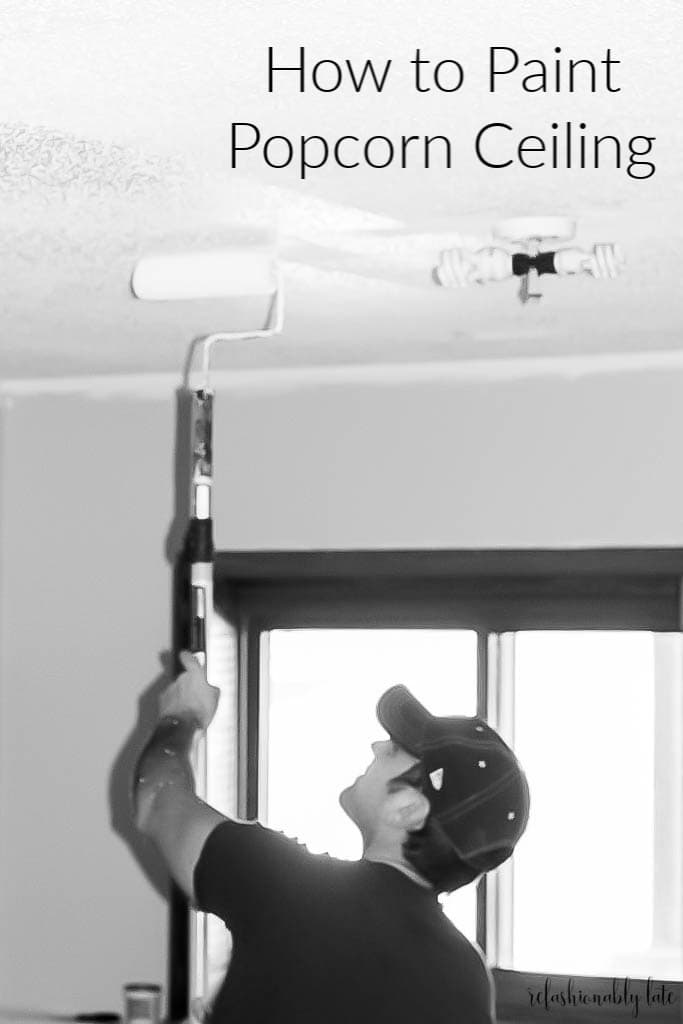
 A couple weekends ago my husband and I spent our time painting the ceiling in our basement. We are pretty much professionals now as we have already painted the entire upper level. 🙂 I’m not really a big fan of popcorn ceiling but unfortunately, it’s not in our budget at the moment to remove it. We did want to update it a little since it was yellowing and just looked worn. We decided to give it a new coat of paint…as well as the rest of the house. By the time we are done, every wall and ceiling will be painted in our house!
Since we are painting the entire house it makes painting the ceiling a little easier because we don’t need to cover the walls or tape anything off. We are always painting the ceiling before we paint the walls. If you already have your walls painted to your liking then just tape them off up at the top. I highly suggest using Frog Tape because it will leave a clean line and it’s easier to remove than other brands.
TOP 10 TO PAINTING POPCORN CEILINGS
10. First, scrape the edges of the ceiling with a flat screwdriver. This removes the popcorn on the edges so that it is easier to cut in when painting the walls. Very important!!!
9. Don’t roll over/brush the same area twice while the paint is wet (especially on the first coat) – once the paint is on the popcorn, it will soak in, and too much rolling will pull it right off the ceiling.
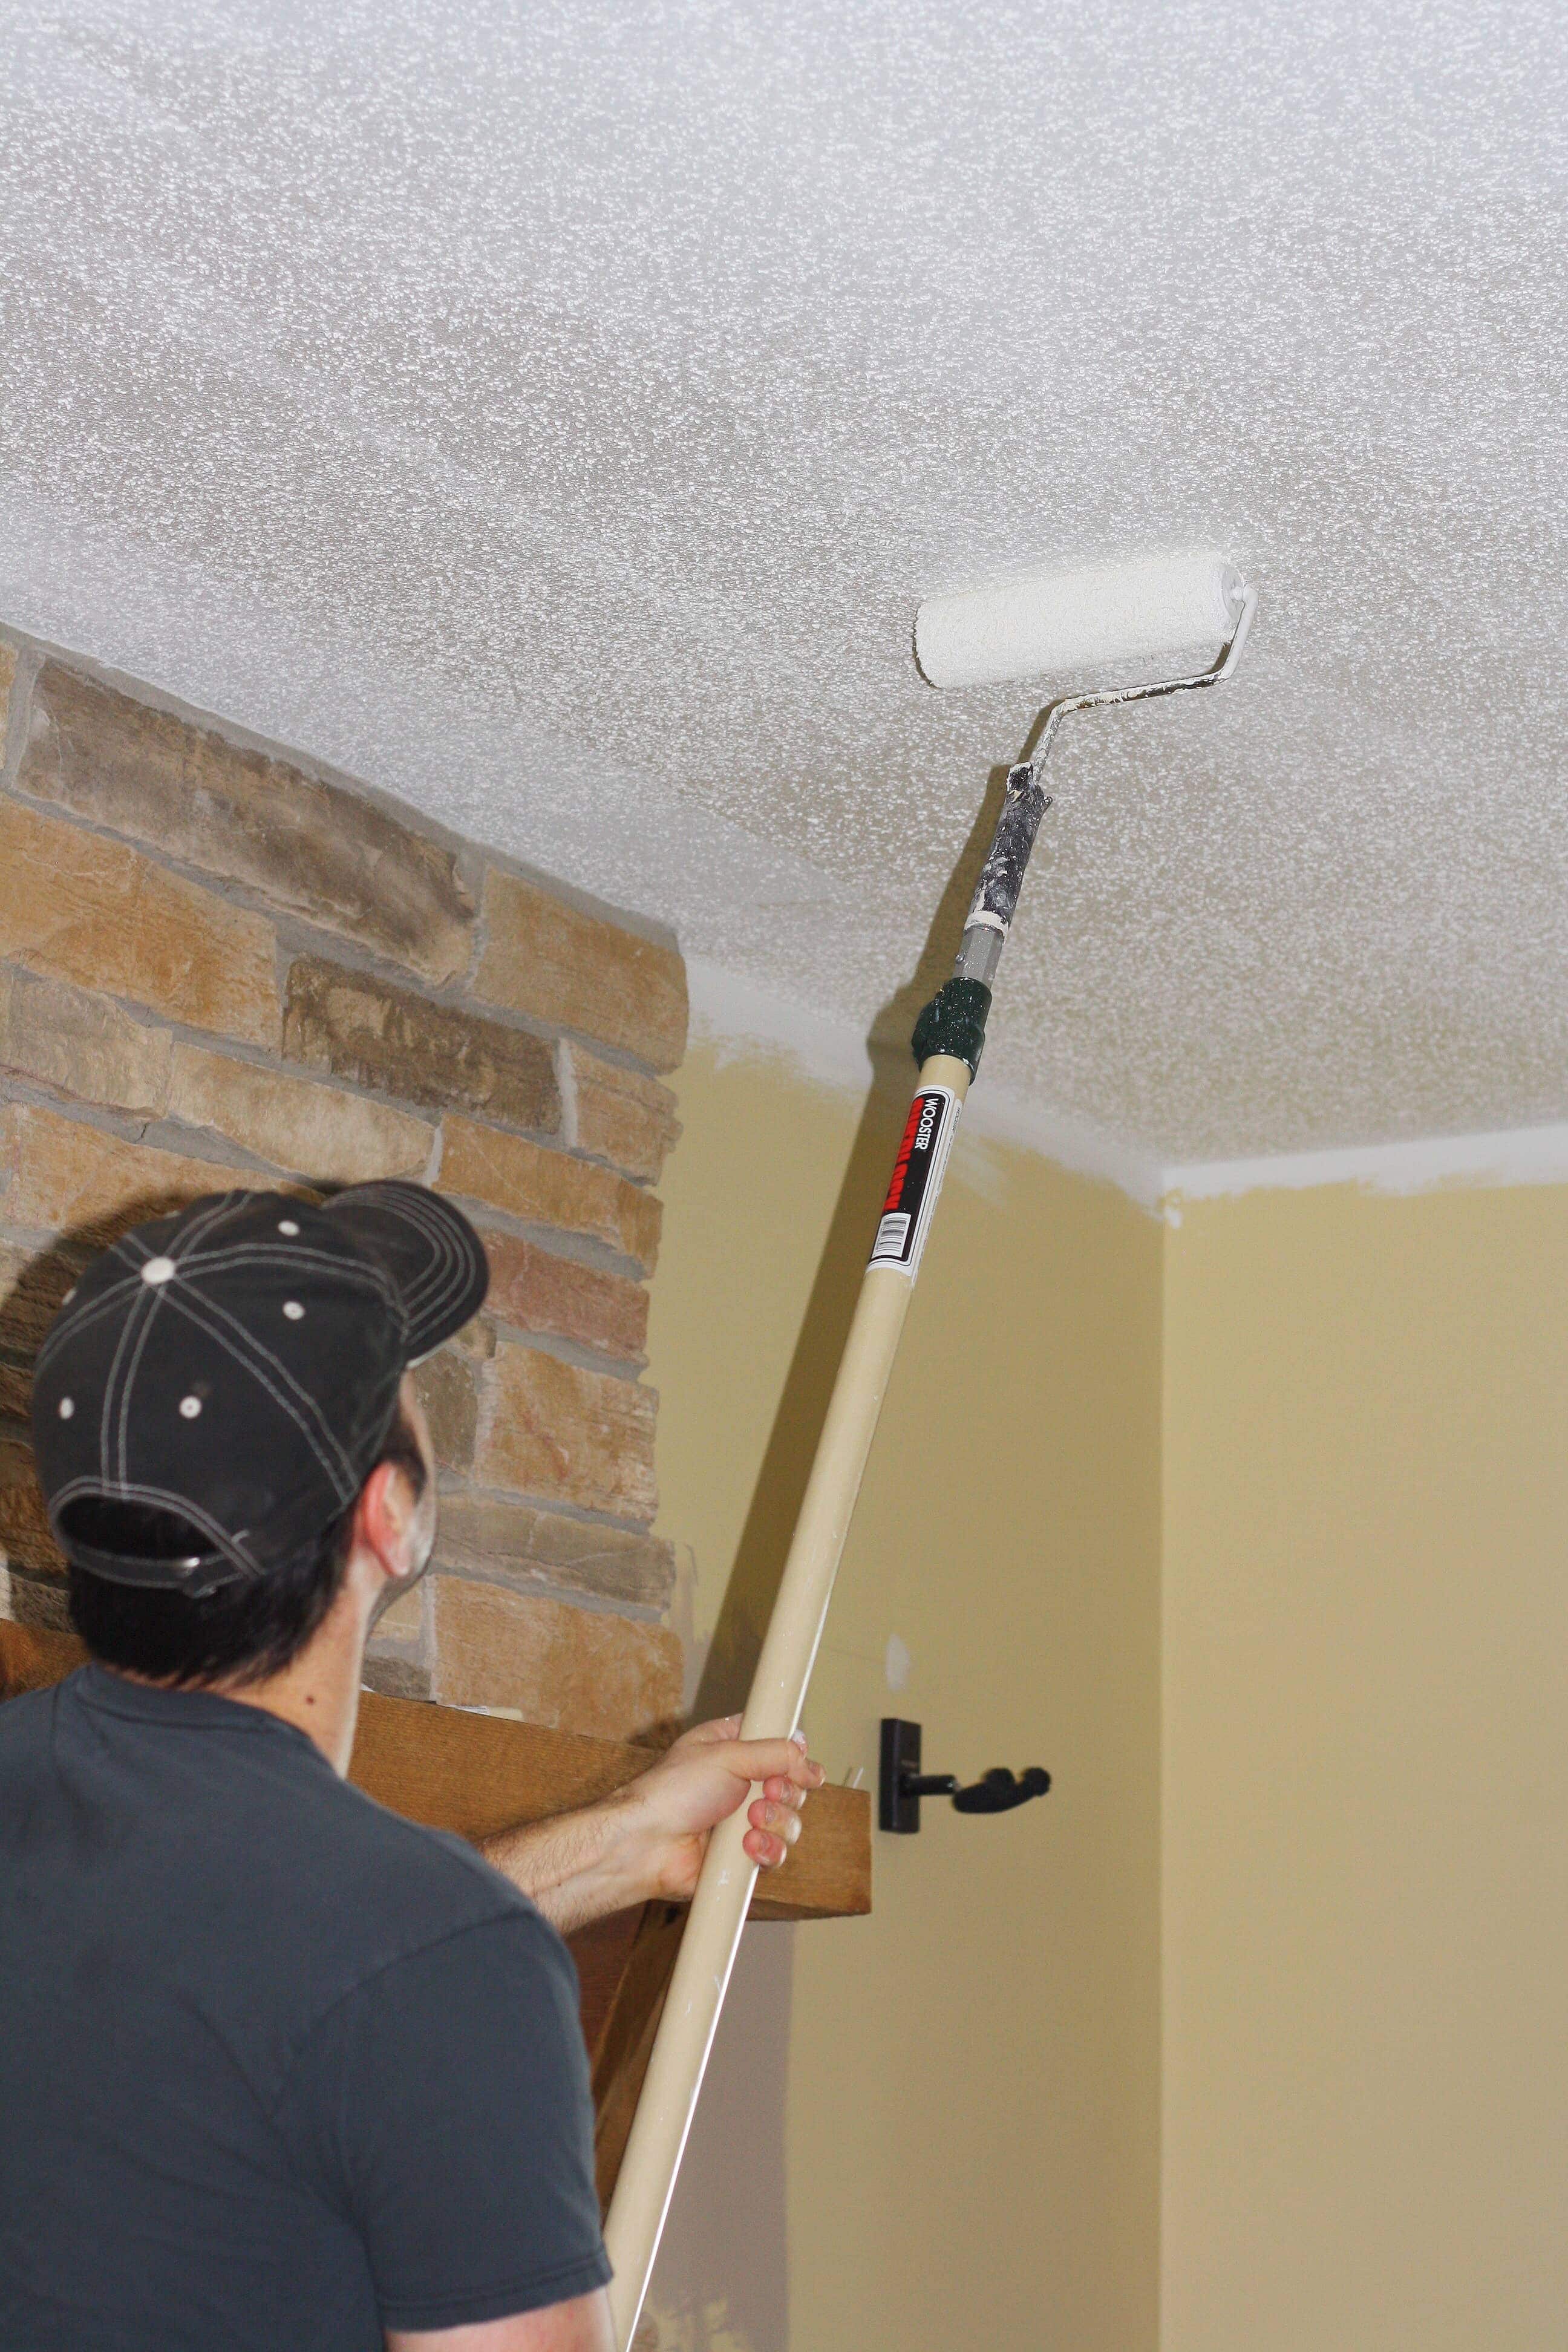
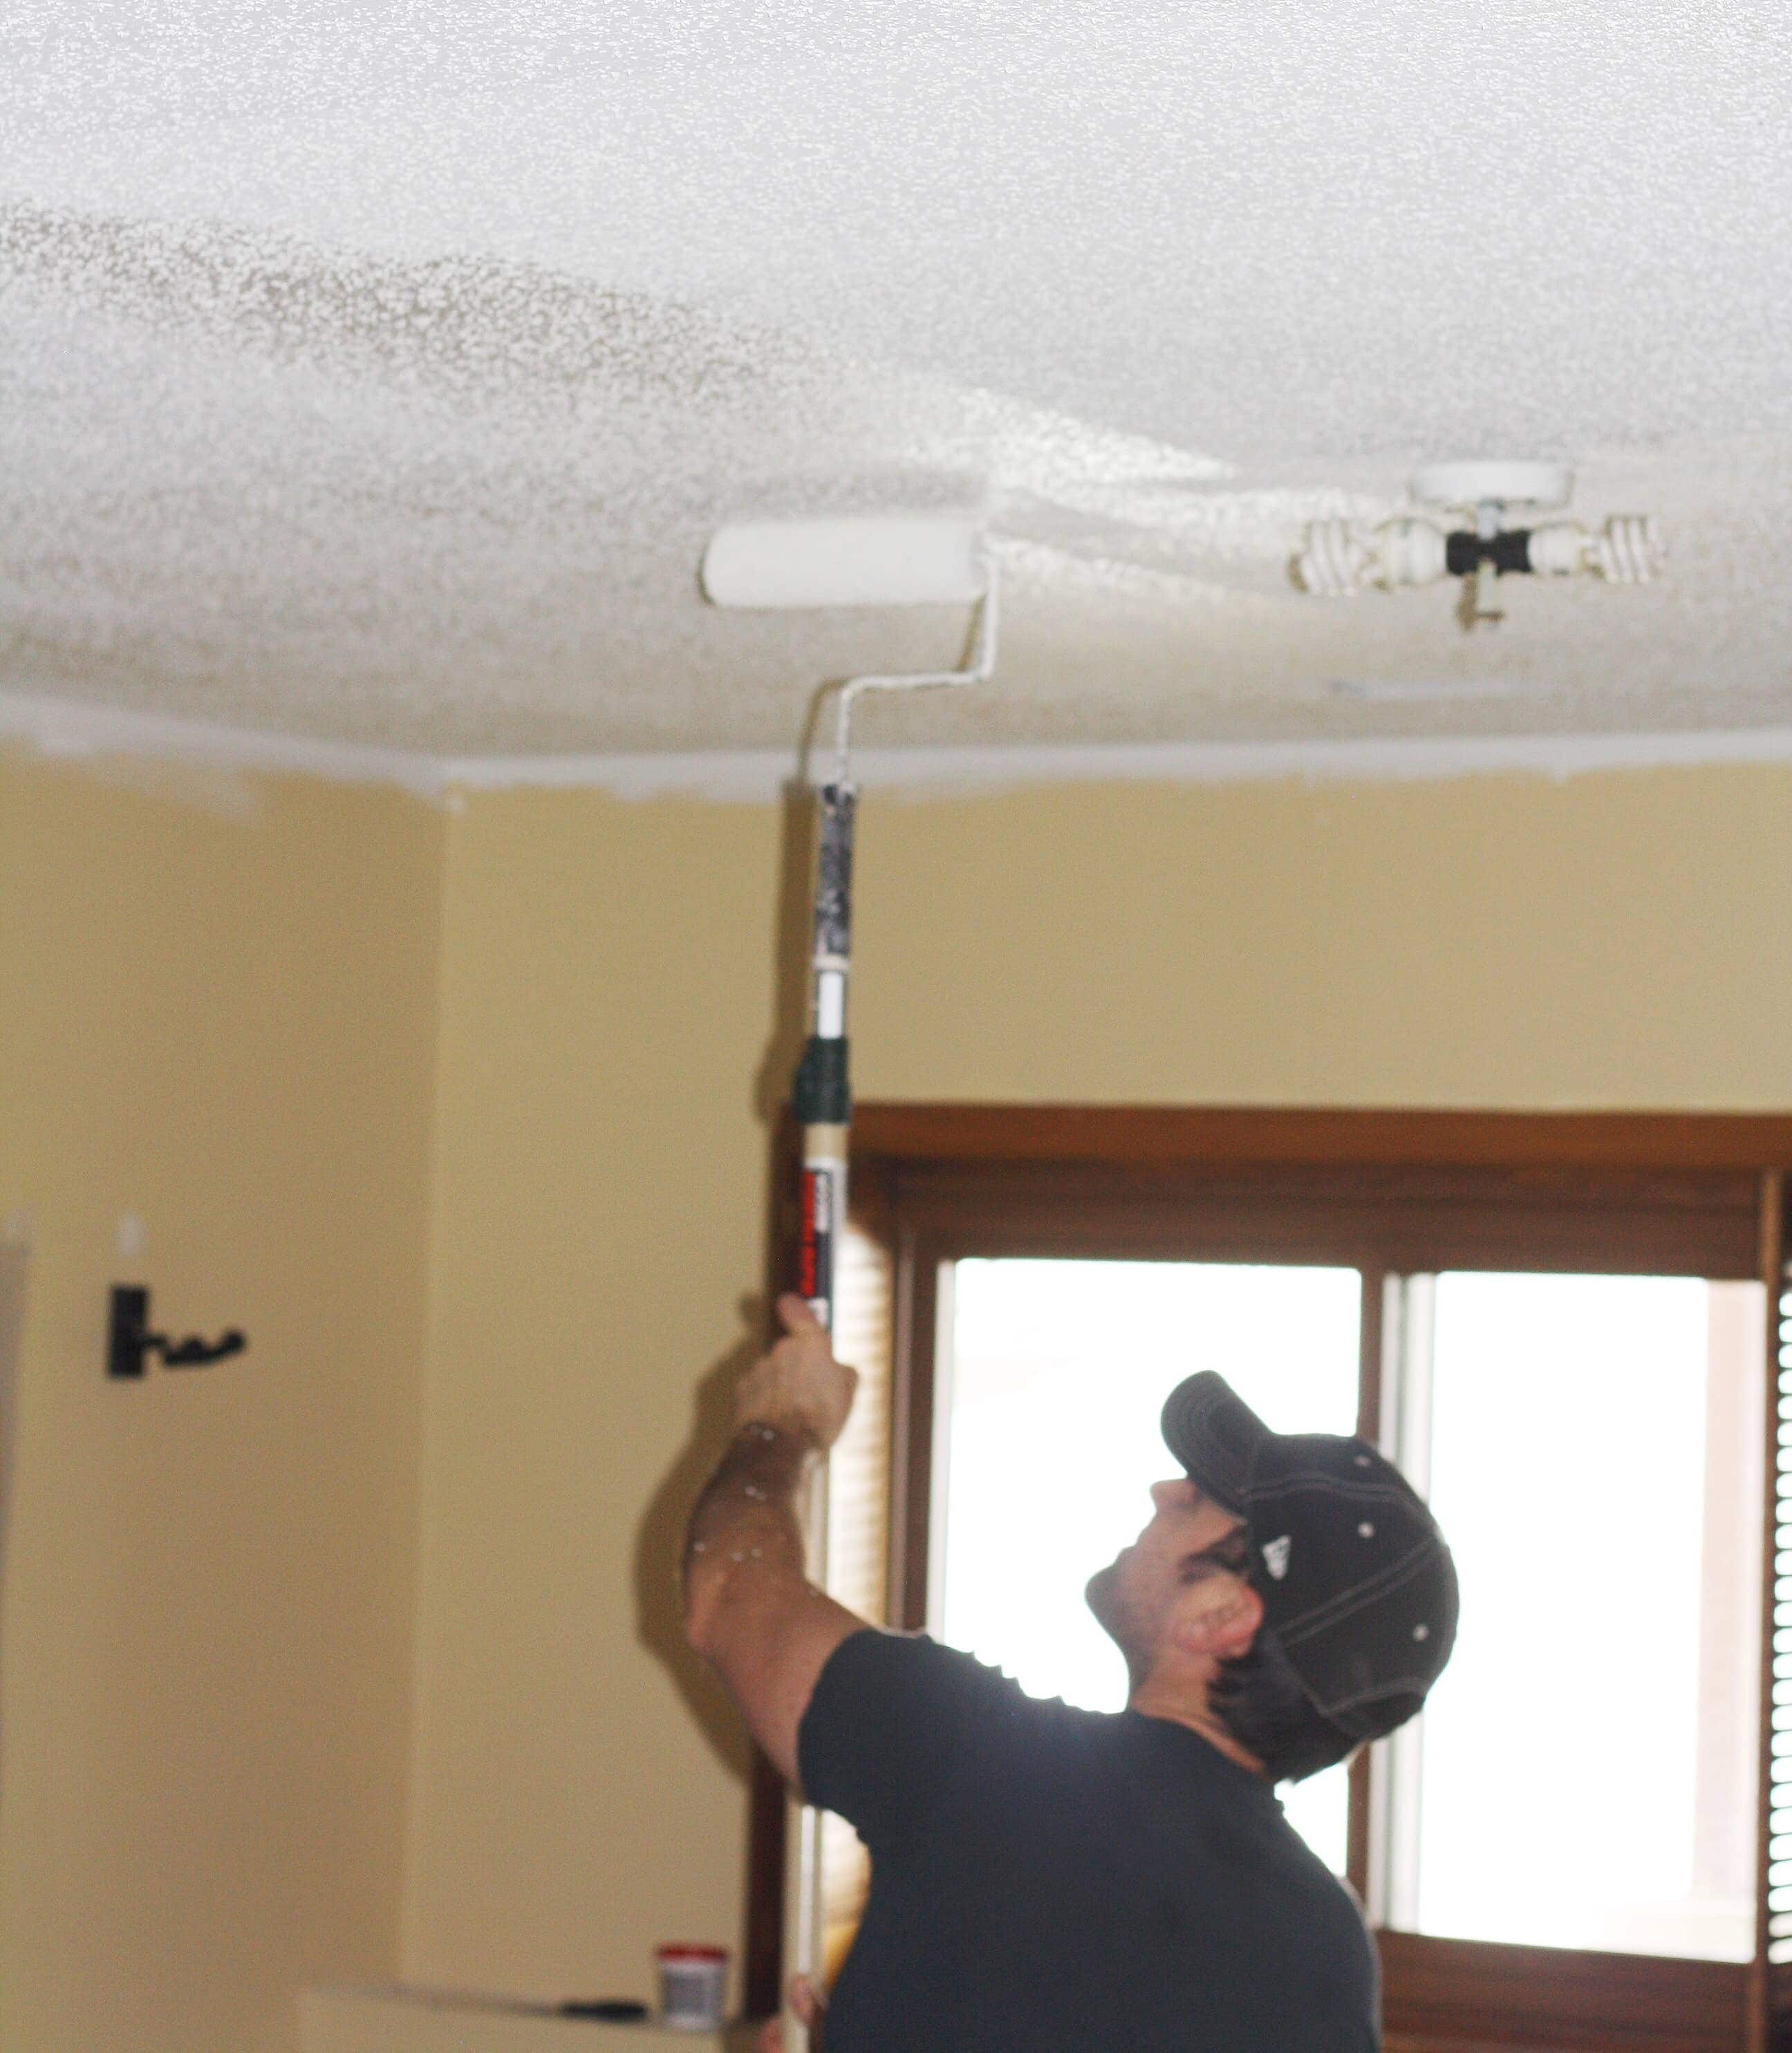
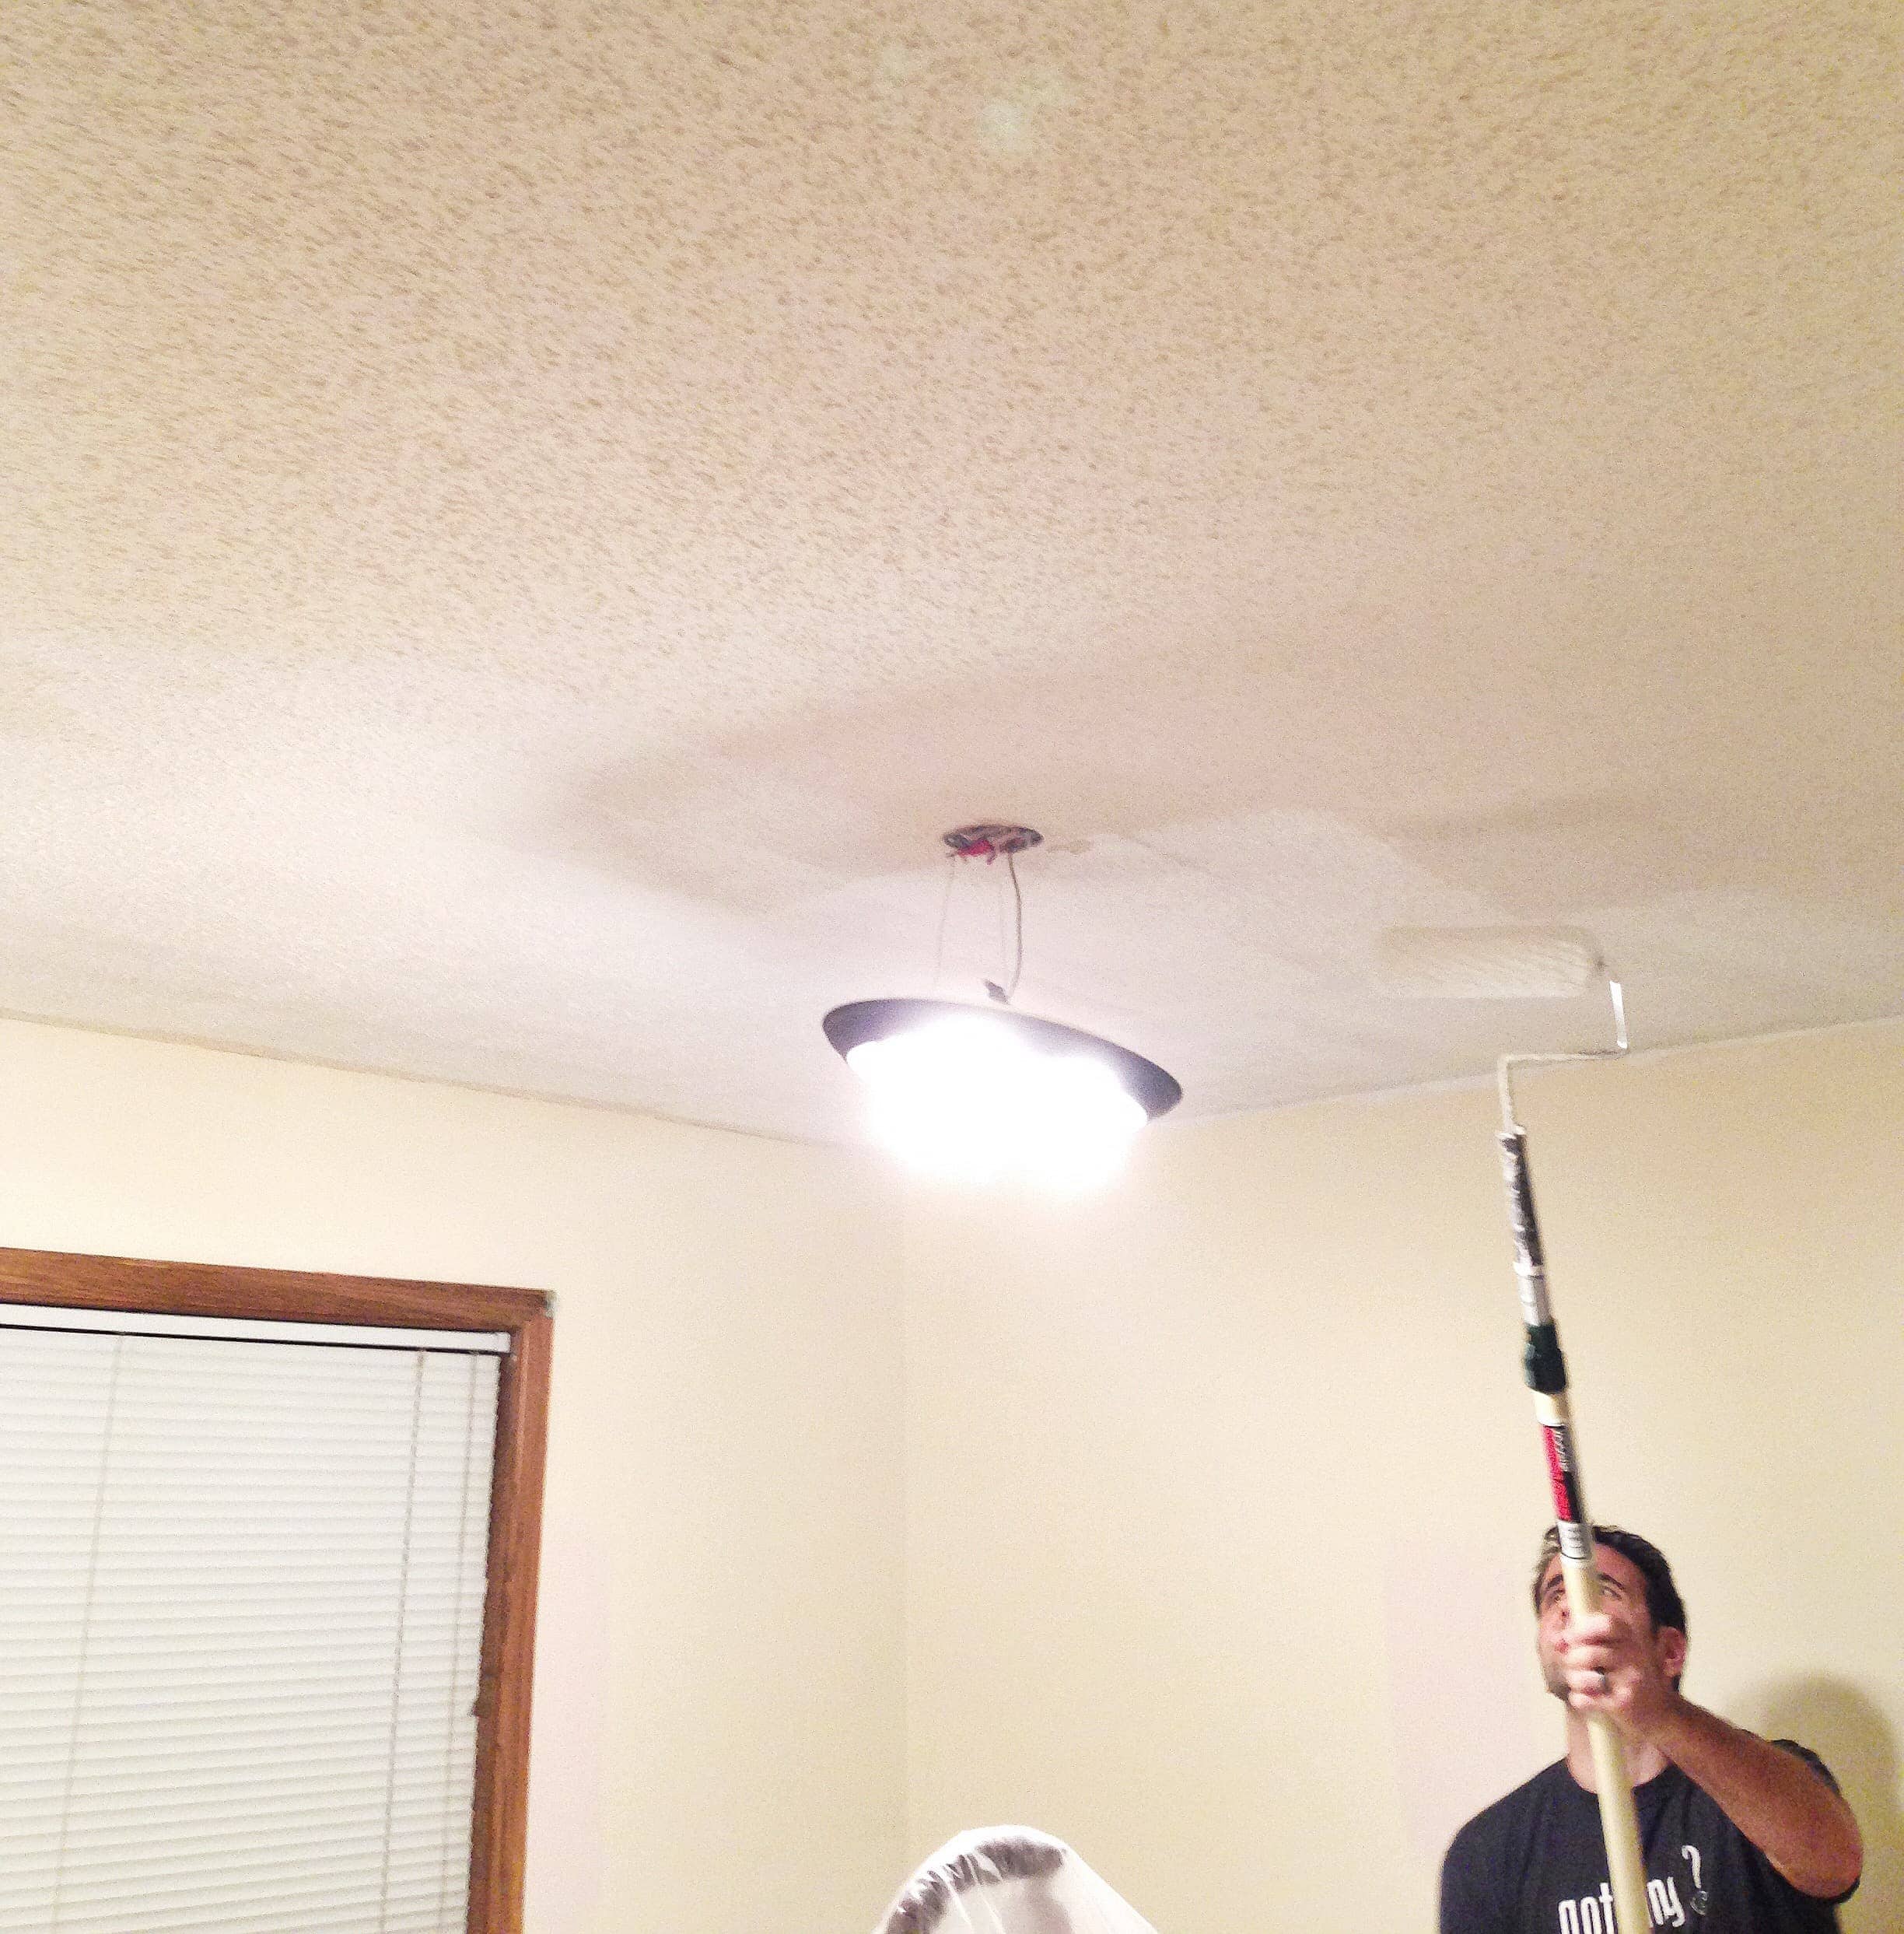
8. Use a 3/4 inch nap roller on a roller handle screwed into an extension pole.
7. Two coats are needed
6. First coat try to stick to rolling in one direction
5. Second coat roll in the perpendicular direction (this will leave no lines and a clean look)
4. Don’t “brush” on paint when cutting in…kind of blob it on so it won’t take the popcorn off
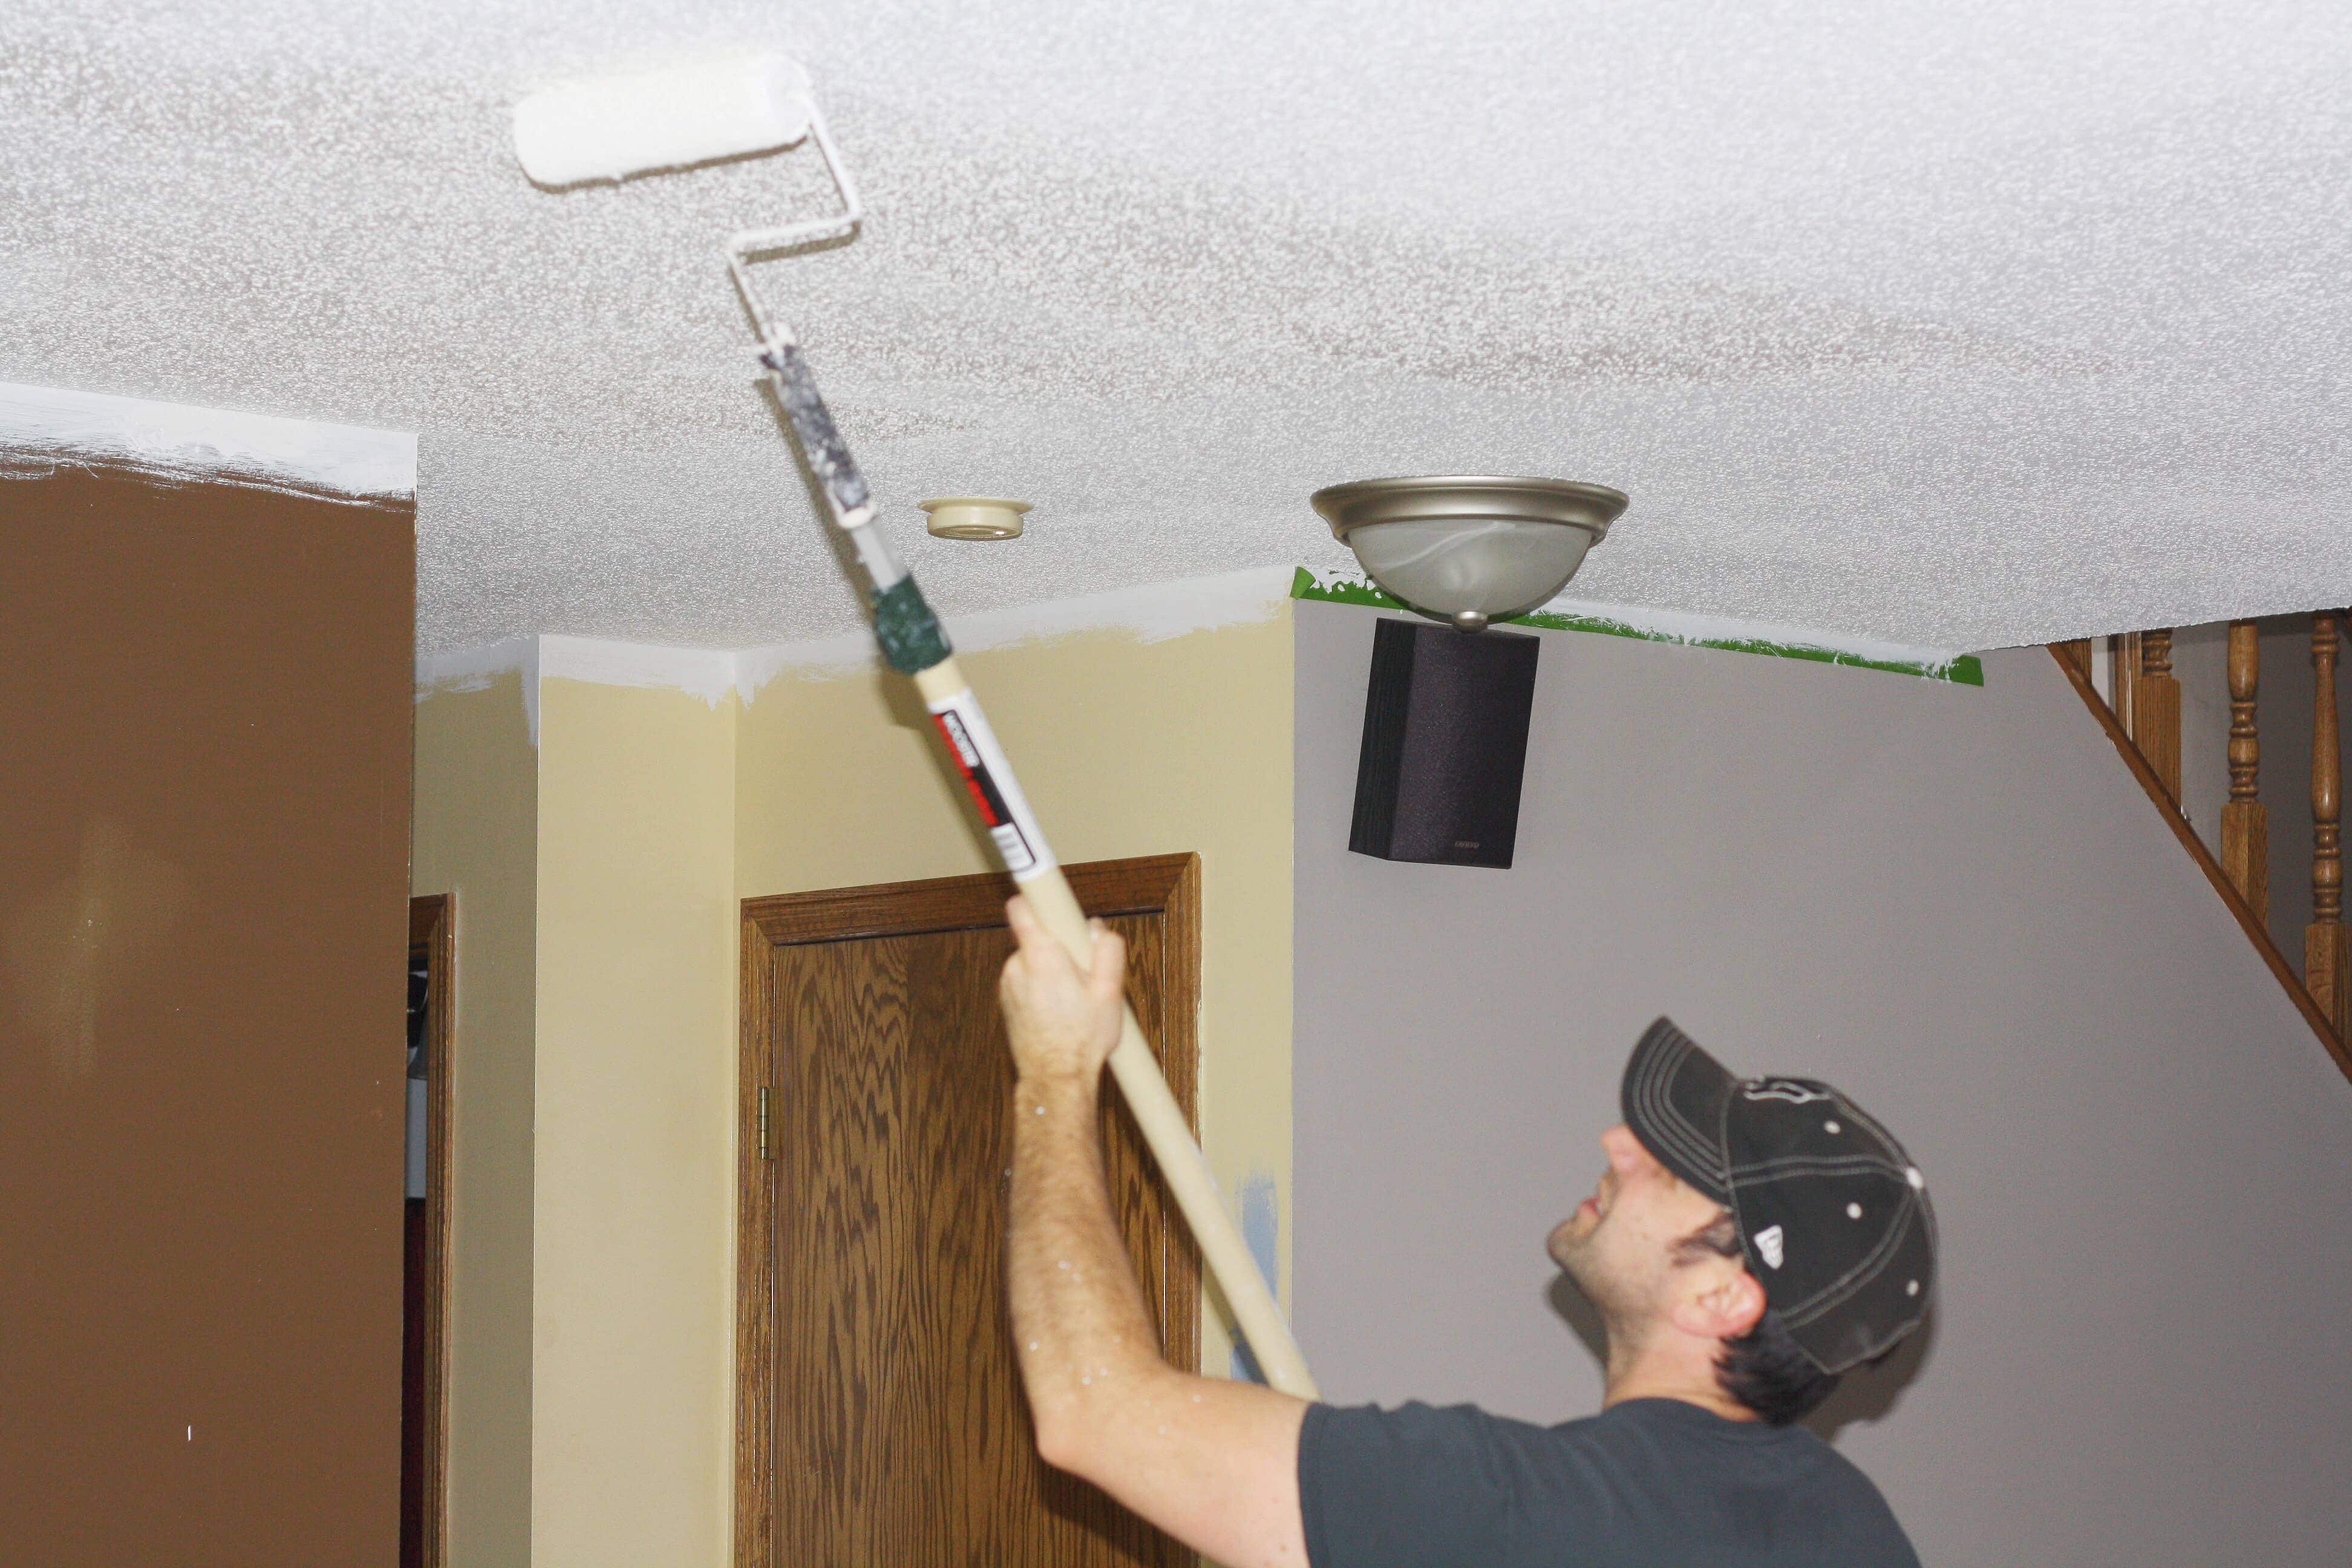
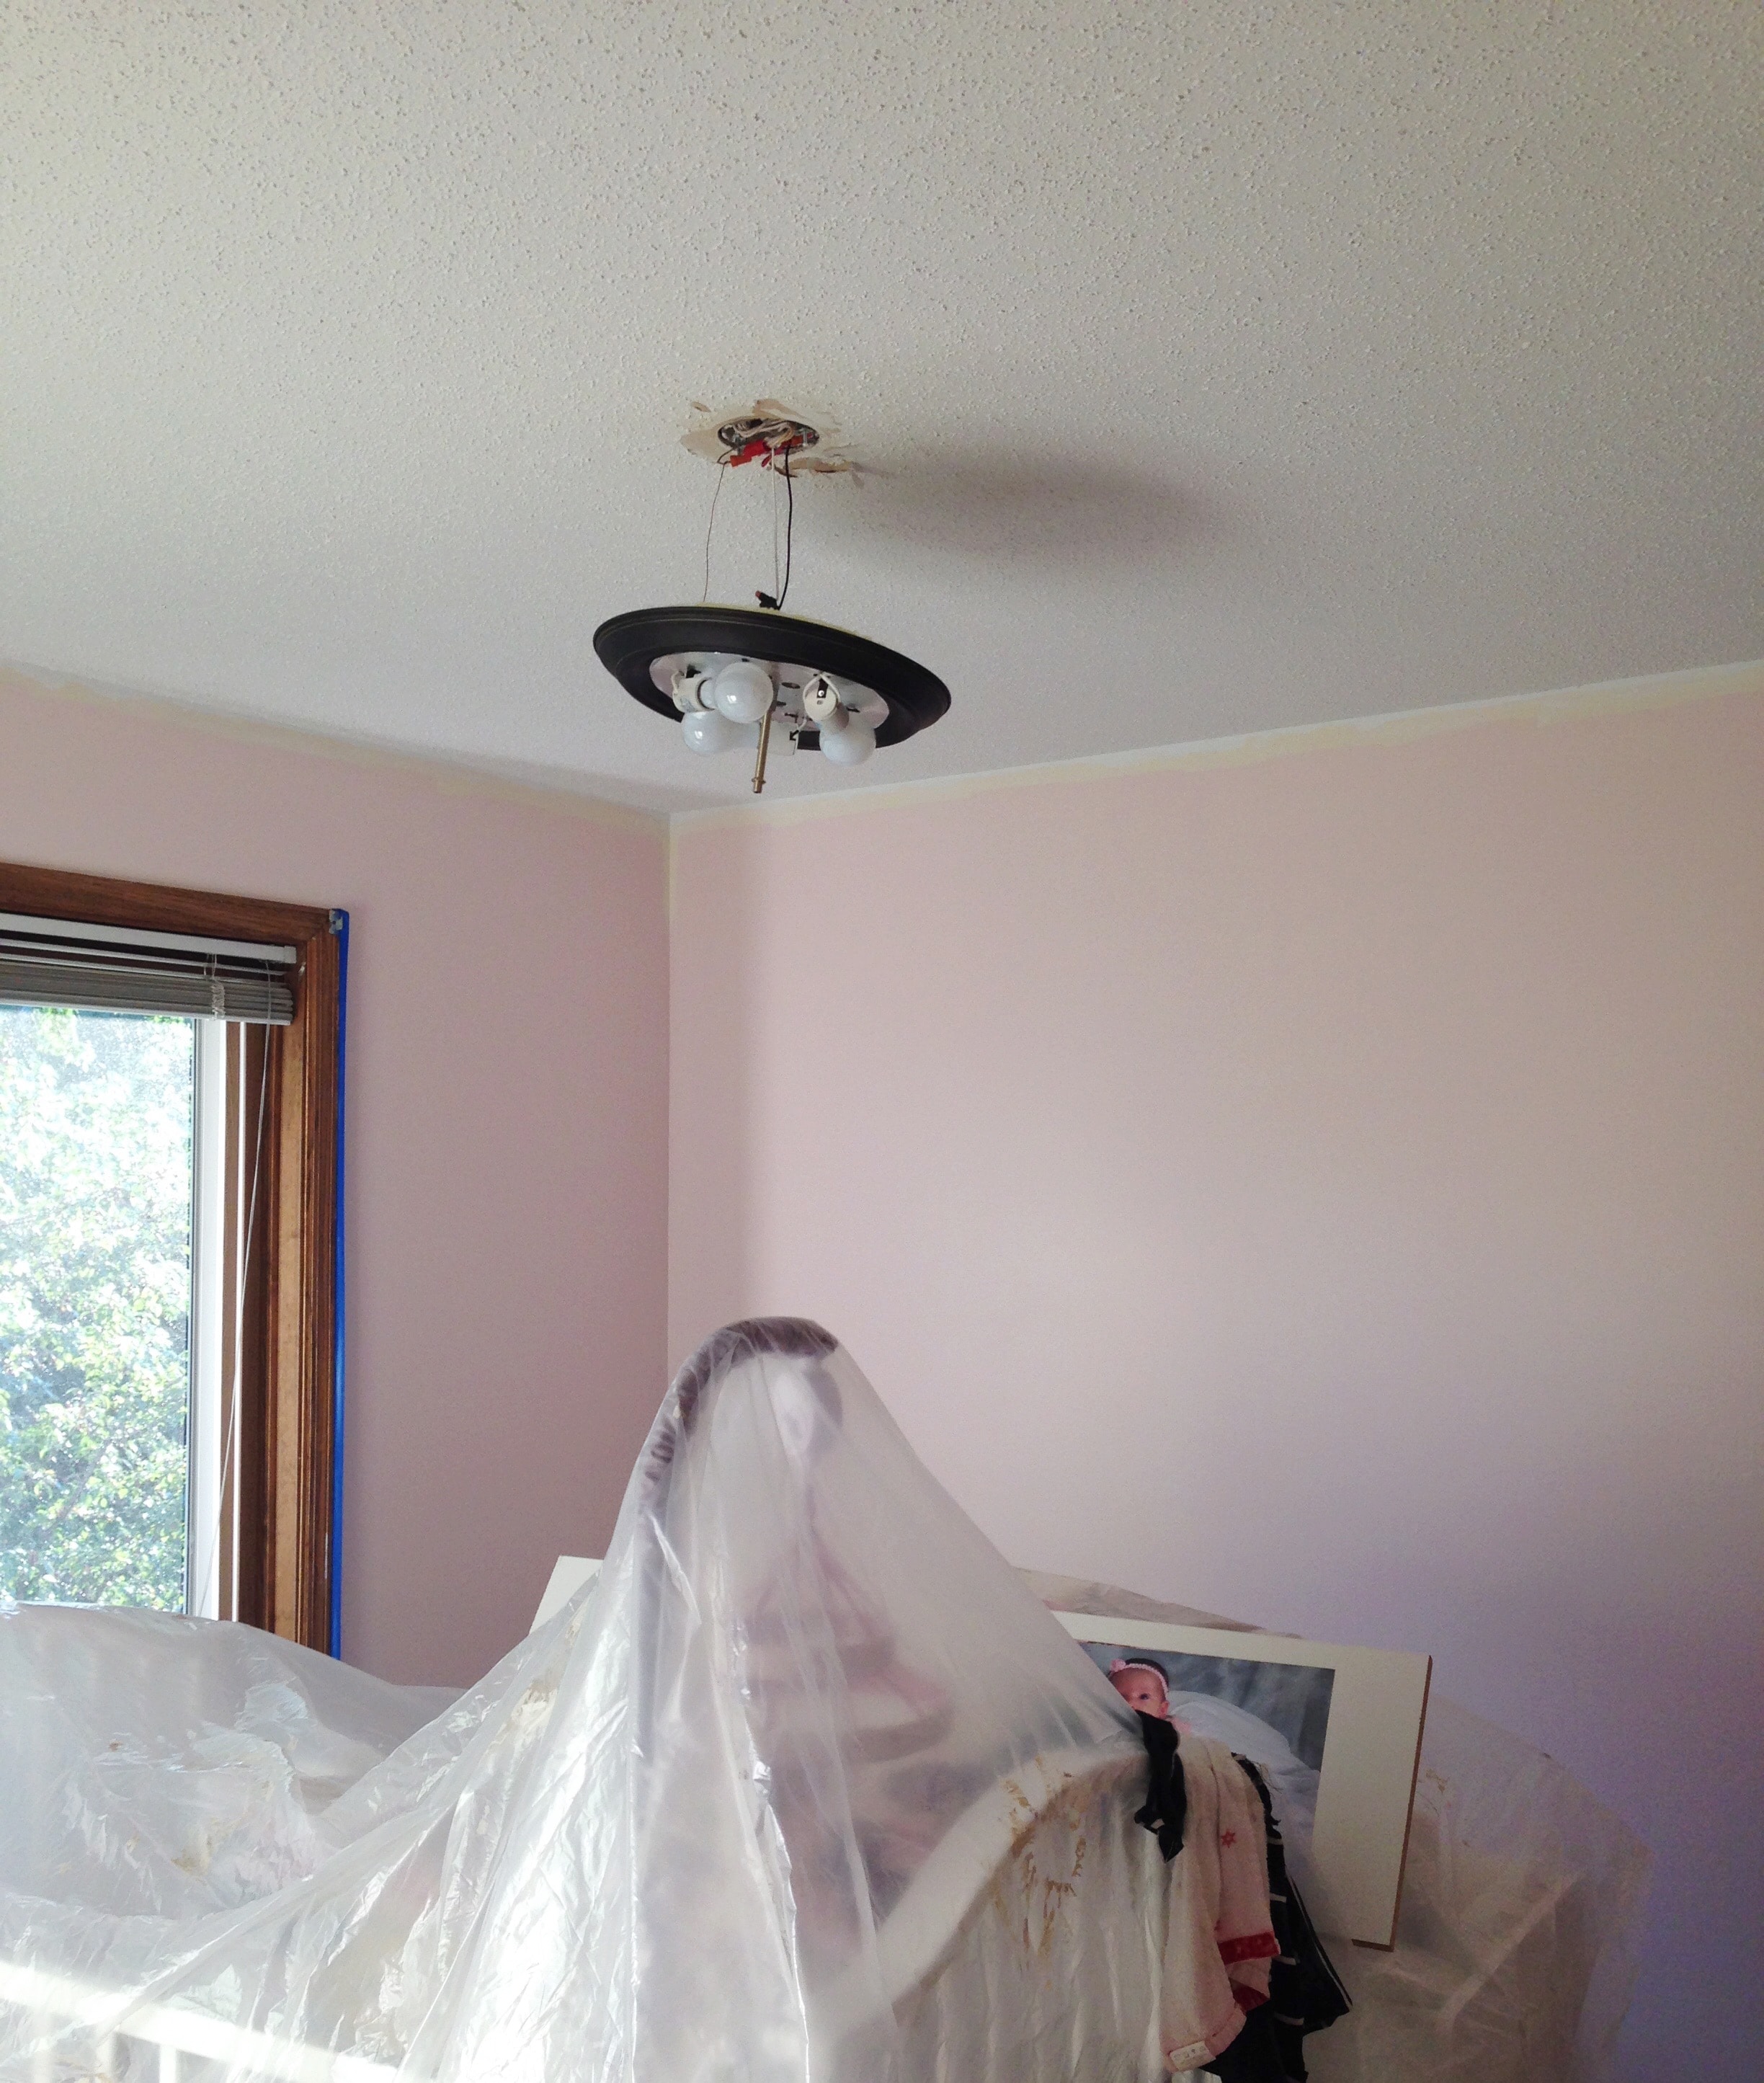
3. Remove light fixtures so you can paint underneath them
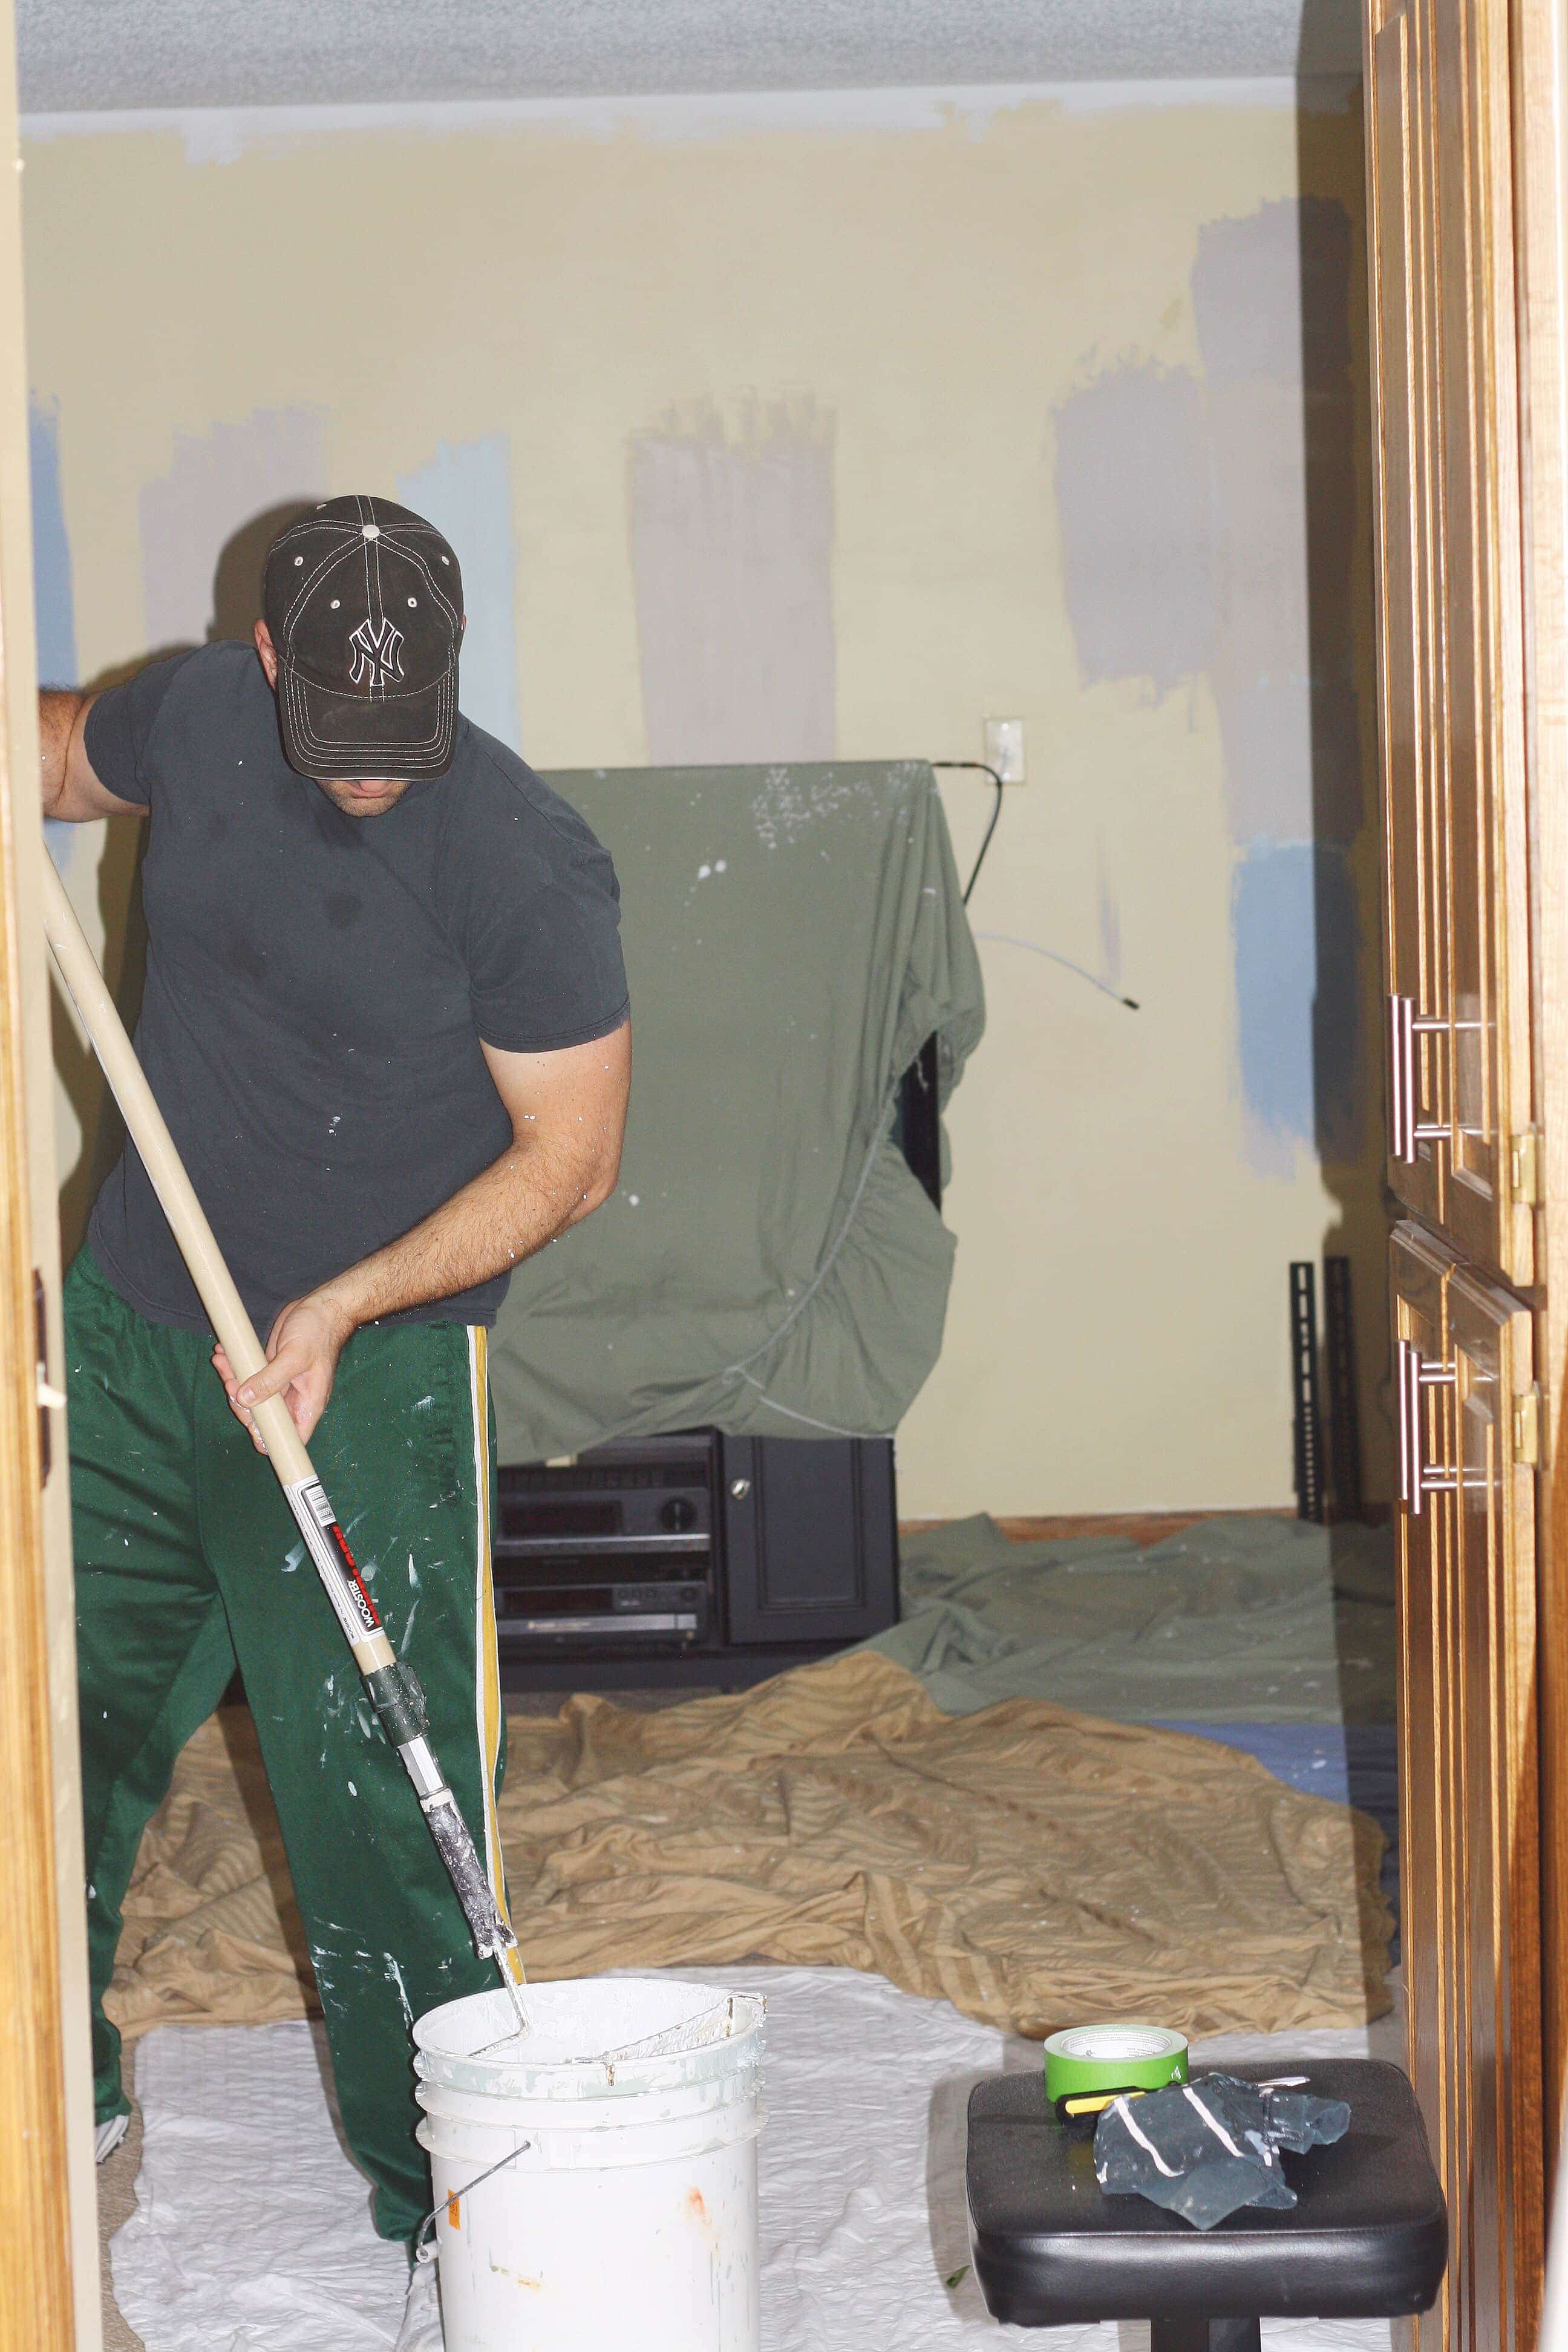
2. Cover the floors with paint drop cloths or old sheets (like us) because the paint can drip because you are putting it on the ceiling very thick
1. Try to paint in natural light. Painting at night with lights on makes it hard to see missed spots.
We used Sherwin Williams Flat Bright White Super Paint on our ceilings. My husband works for a home builder so we are lucky enough to get a discount on this type of paint. It’s amazing especially since we are painting the ceilings in our entire 2,600 square foot home!
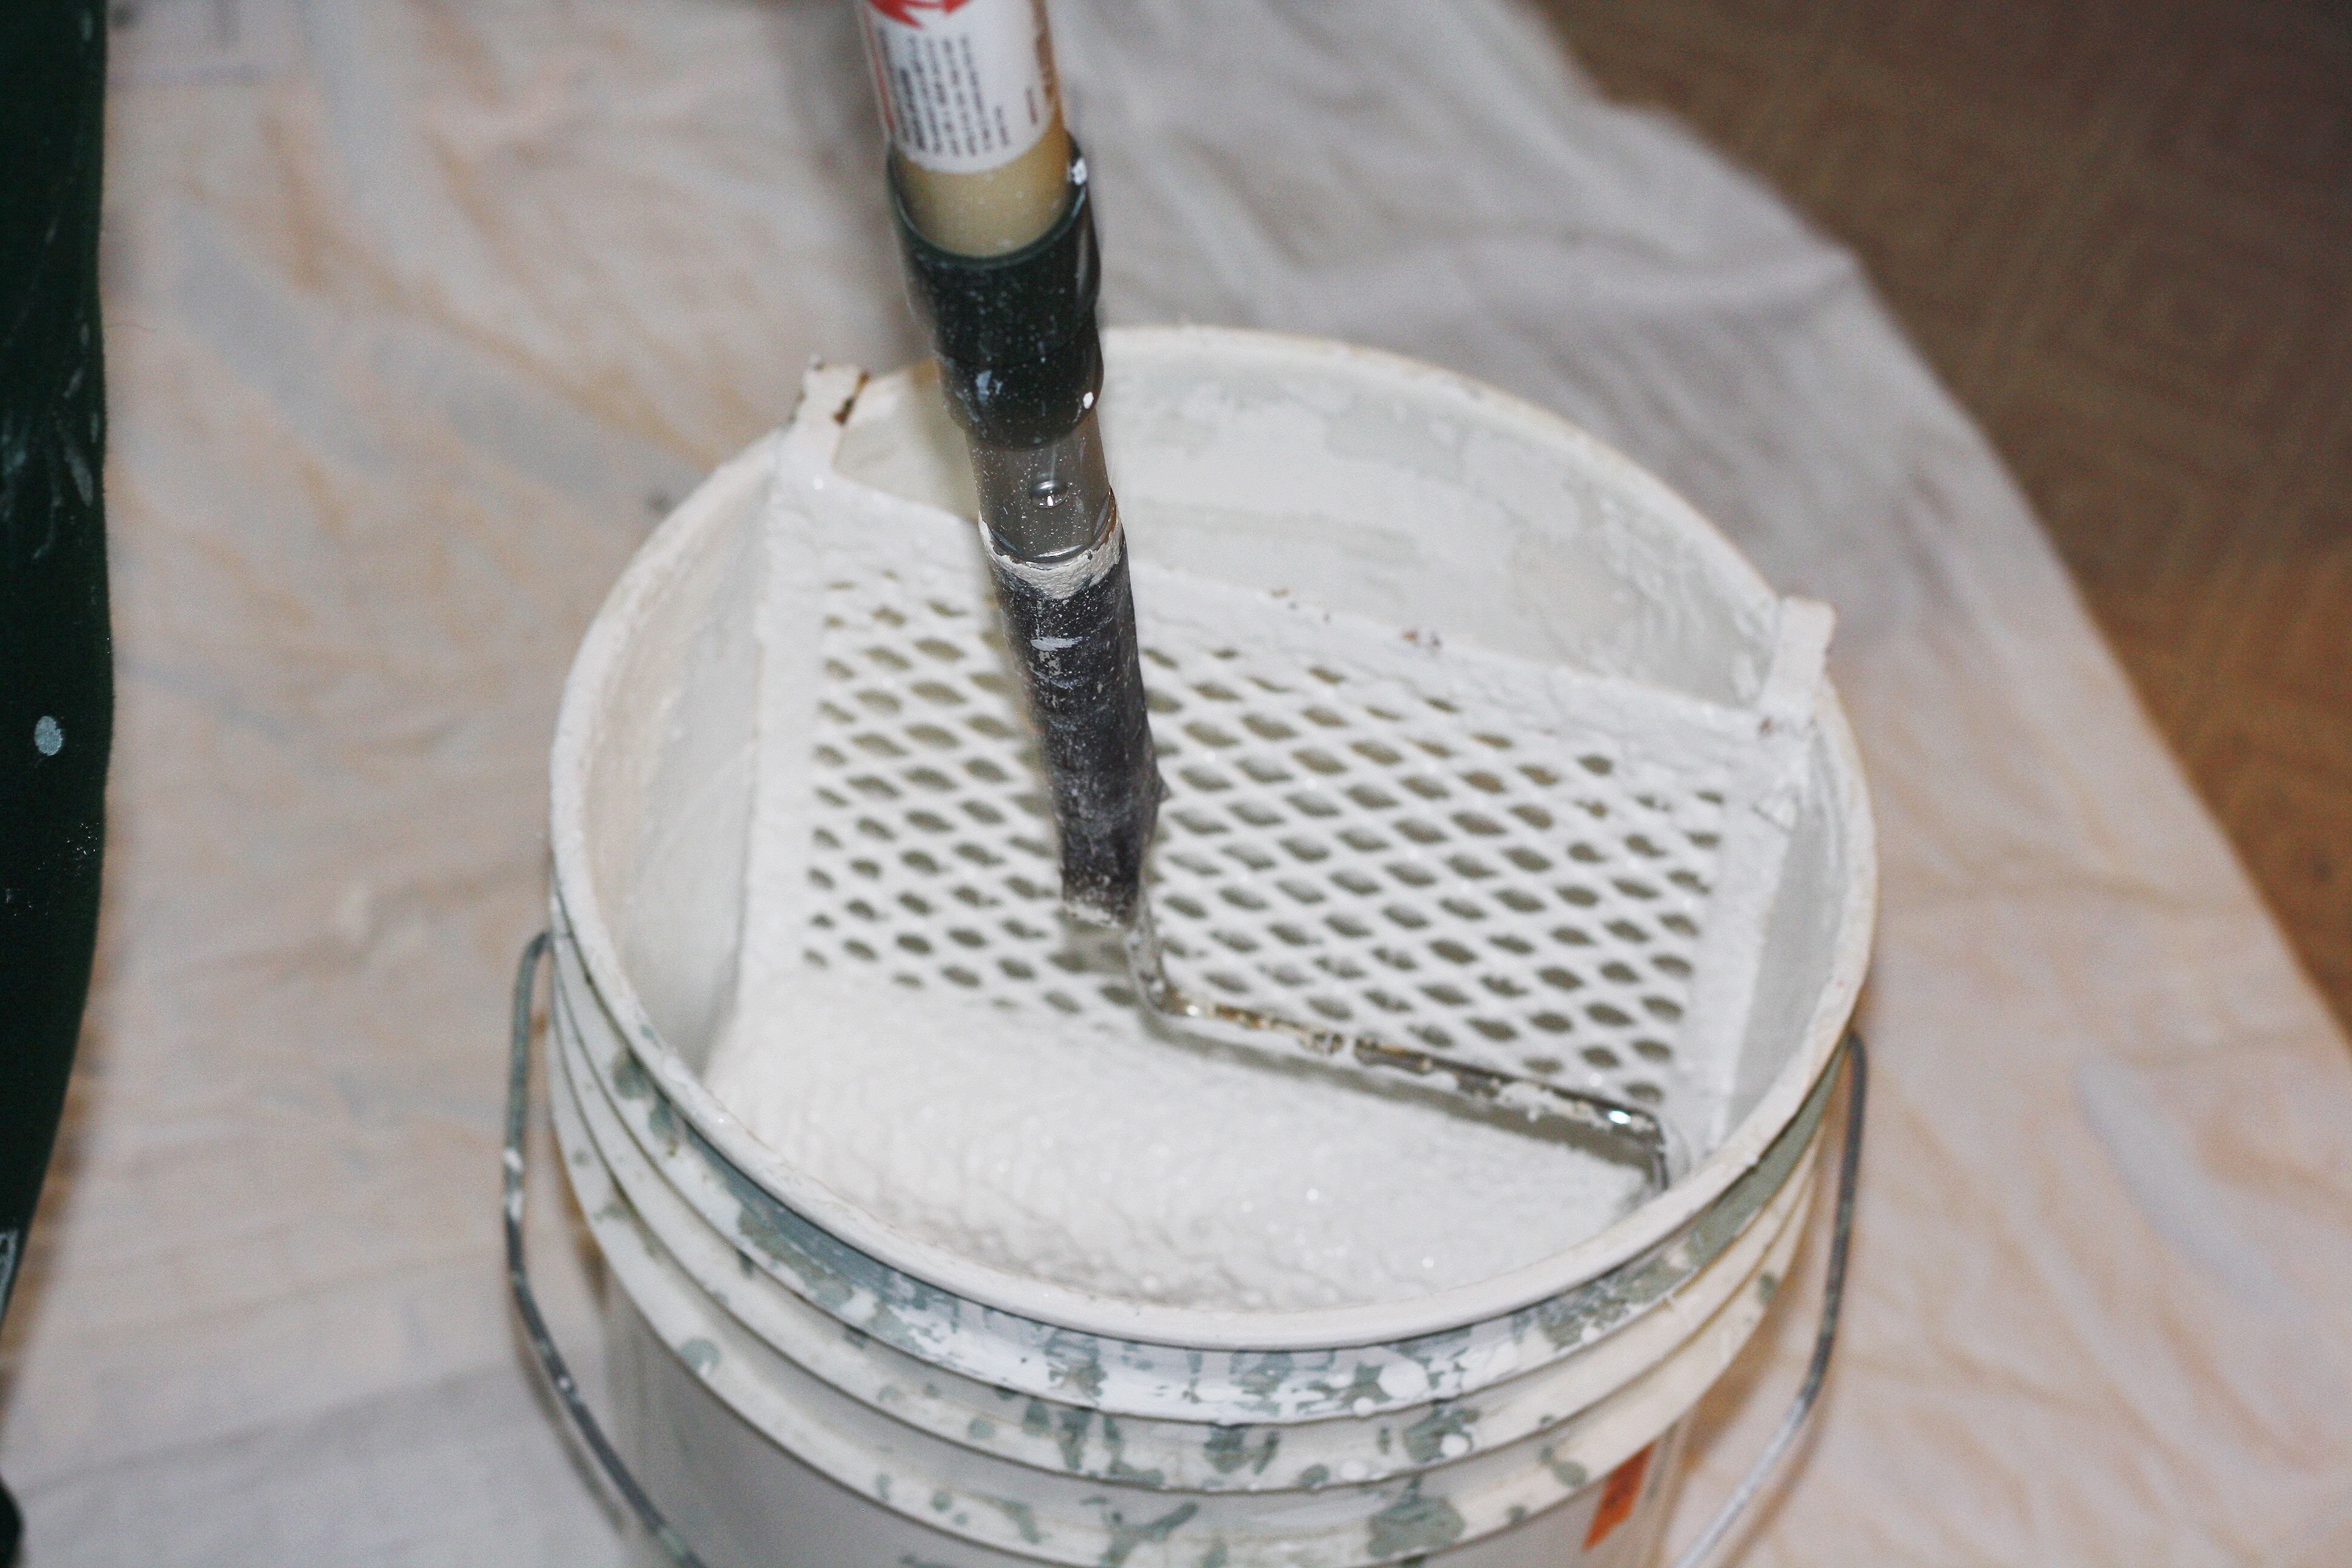
As you can see above my husband puts the paint in a 5-gallon paint bucket and uses a grid to roll the paint on before putting it on the ceiling. I highly recommend using one of these because it makes the paint go on the roller more evenly. You also want to put a pretty generous coat onto the roller because, especially the first coat, the ceiling soaks it up. You will also want to buy an extension pole for your roller so that you can reach the ceiling easily.
Like I said earlier don’t “brush” on the paint when cutting in. You kind of want to blob it on and some paint may drip so you can just smooth the paint out with your brush on the wall. You may want to use an older brush or a brush you don’t mind ruining a little. The bristles on the brush can get bent since you are “blobbing” it onto the ceiling. If you are painting the wall it doesn’t matter that the white paint is on the wall. You can see my excess paint in the pictures.
Above you can see my husband putting on the second coat of paint. Especially with the second coat, it’s good to have a second set of eyes because it can be hard to see where you have painted. You can see that the paint looks shinier where the fresh paint is. The second set of eyes is good because you need to look from all angles.
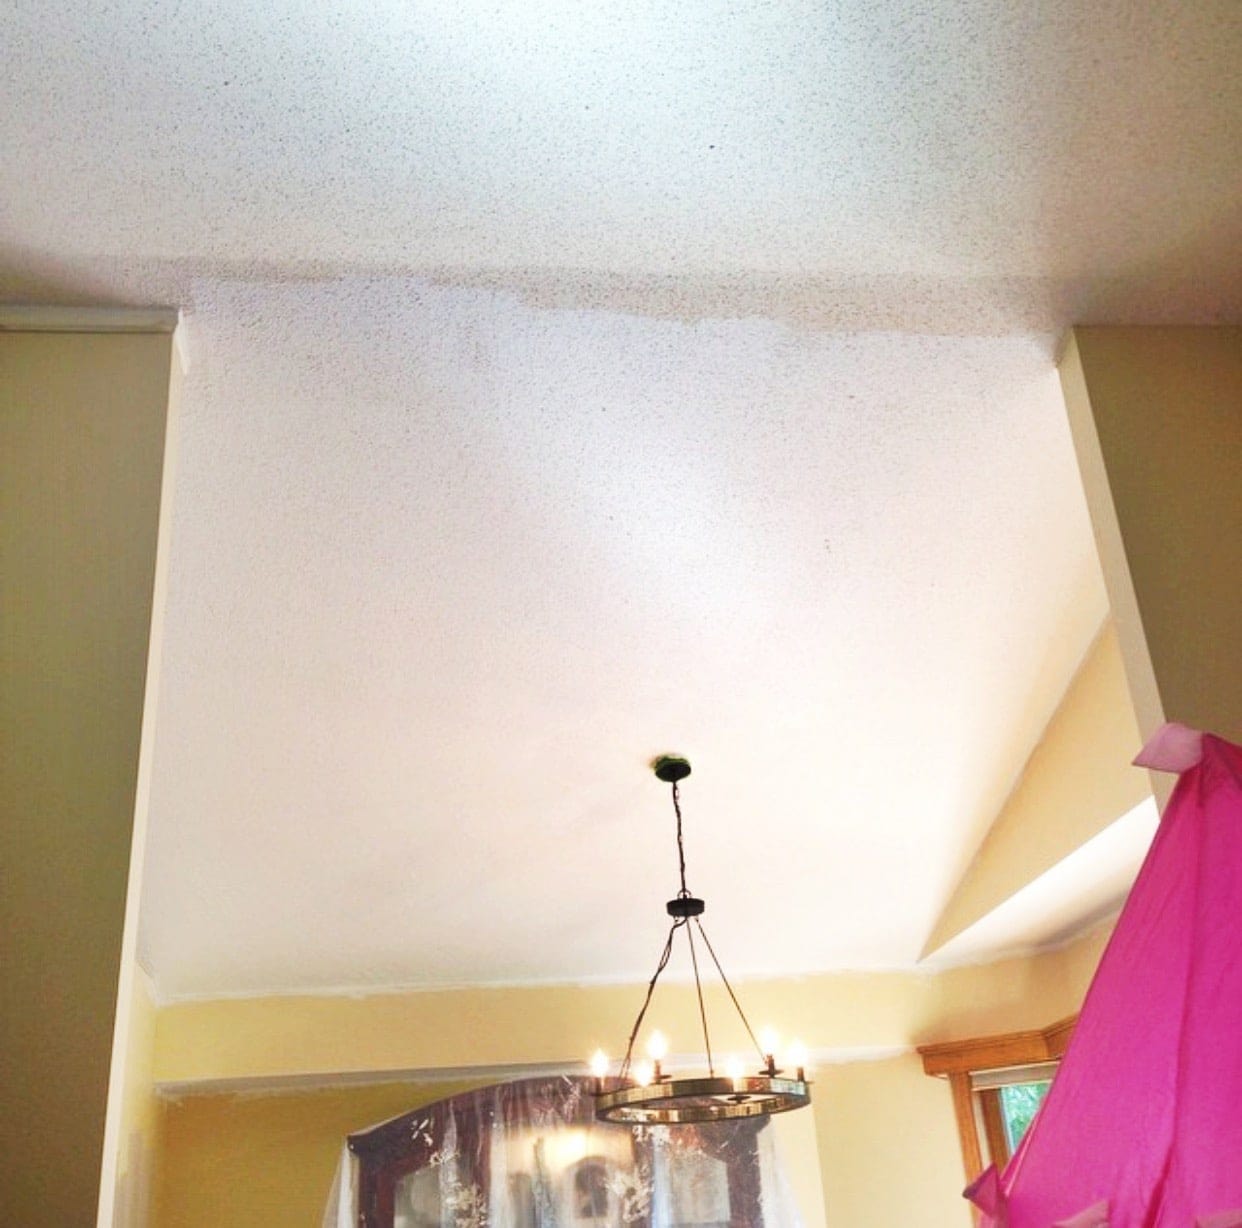
Below you can see where we used Frog Tape on one of our walls. We had painted that wall when we painted our foyer so that when you came in the front door you weren’t looking downstairs to a hideous brown wall. (This week we are painting the basement and getting rid of the brown and yellow walls!)
Painting the ceilings have really made a world’s difference in our house. It made more of a difference in some rooms than others. Our basement wasn’t too bad but most of our upper level had very discolored ceilings. Look below at how big of a difference it makes when you see room to room the difference in ceiling color.
Here is my husband painting our daughter’s room. This was the first ceiling we painted in our house. After the first coat, it looked horrible and we thought we made a huge mistake painting the ceilings and we should have just left it alone. There will be tons of roller lines and it won’t look very good after the first coat. Don’t worry though because when you do the second coat it fills in nicely and looks so much better than it did before.
It looks like it is a lot of work and it is but the process gets faster and faster the more you do it! Painting the basement was a breeze compared to our upper level because there were not any vaulted ceilings! I’m over the moon with how the ceilings are turning out. Our house can be dark and the previous owners used very “dark” colors in paint choices. As we’ve painted the walls and ceilings it has really brightened up our house. The brighter ceilings make the rooms feel larger and the lights reflect off it which create more brightness! I hope you find this as a guide when painting your ceilings and please don’t hesitate to ask any questions because I know everyone’s house is different. I hope everyone has a great weekend! I’m headed to Iowa to visit with my family and for Lucy to hang out with her cousins!


Number two is so important. You can end up easily ruining your floor if you don’t use the cloths. That paint will come down, and depending on your floor, you are going to have to cut or scrape it off.
It is very important! I have made the mistake of not covering my flooring well enough and had some paint spills! I’ve learned my lesson!
I was wondering if you cut in the edges again when you rolled the second time? I would assume that by blobbing the paint on that you would get a heavier coverage than when rolling. Thank you for your detailed and illustrated tutorial.
Hi Jeanne! We did at first cut in again but after a few times of doing (since we did it to our entire house) we stopped doing it. My husband would just roll as close to the wall as possible. It does get a pretty good heavy coat from “blobbing” it on the first time. Let me know if you have any more questions!
a popcorn ceiling is a tough thing to paint, great advice here, thanks.
I once tried with a single hand brush and it took me forever!!
I know that roller extension poles can make a big difference for this type of job too.
Yeah the roller extension pole was the best thing for this project!
Did u vacuum the ceiling first?
Nope we didn’t! We made sure it was clean of cob webs and things and then gave it a good coat of paint 🙂
Great post! I was hesitant to paint over ours, but now I’m sold on doing it! I was nervous that painting them a brighter white would draw more attention to them, but It seems that the paint helped to smooth the texture a bit, making them less distracting. OpticAl illusion? Or no?
I wouldn’t say that it smoothed the texture but painting it a bright white made it a nice solid bright color. You could see the popcorn more clearly with the yellow tints to the ceiling. I also felt it really brightened up our room as a whole having the new coat of paint on there! Good luck with yours!