
 I’m teaming up with 8 girls this month for our monthly create and share! I previously participated in this back in July with my Mini Vase Makeover. I’m excited because this month we have decided to redo a tray that we all purchased on Amazon. It’s your basic walnut unfinished serving tray.
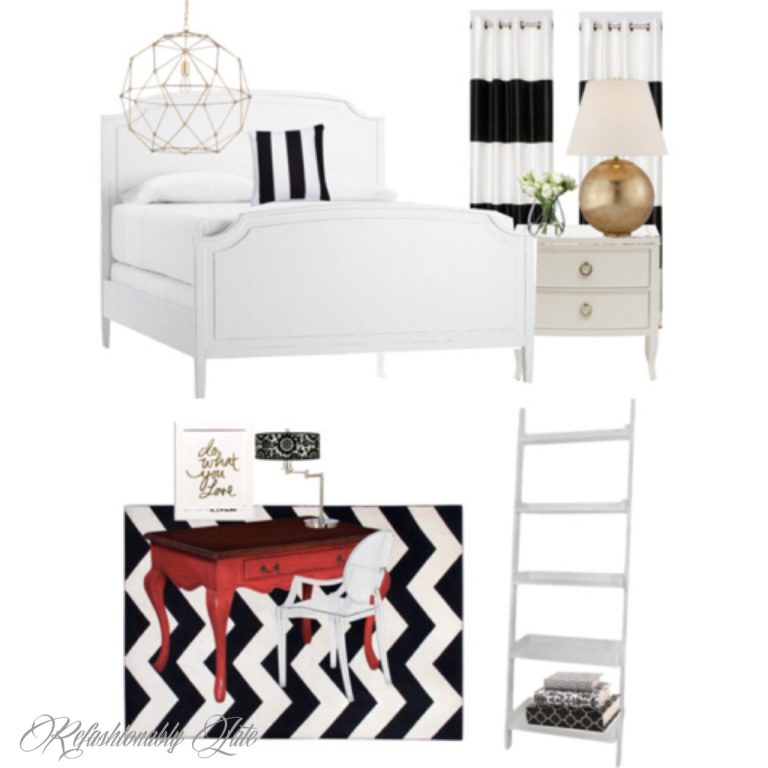
Currently, I’m getting ready to start a room makeover for the One Room Challenge. I know I have been saying this for quite a while now and I’m so excited because it starts next week! I’m so excited to watch my guest room transform into a beautiful getaway for my guests. I want my guests to feel like they are home.
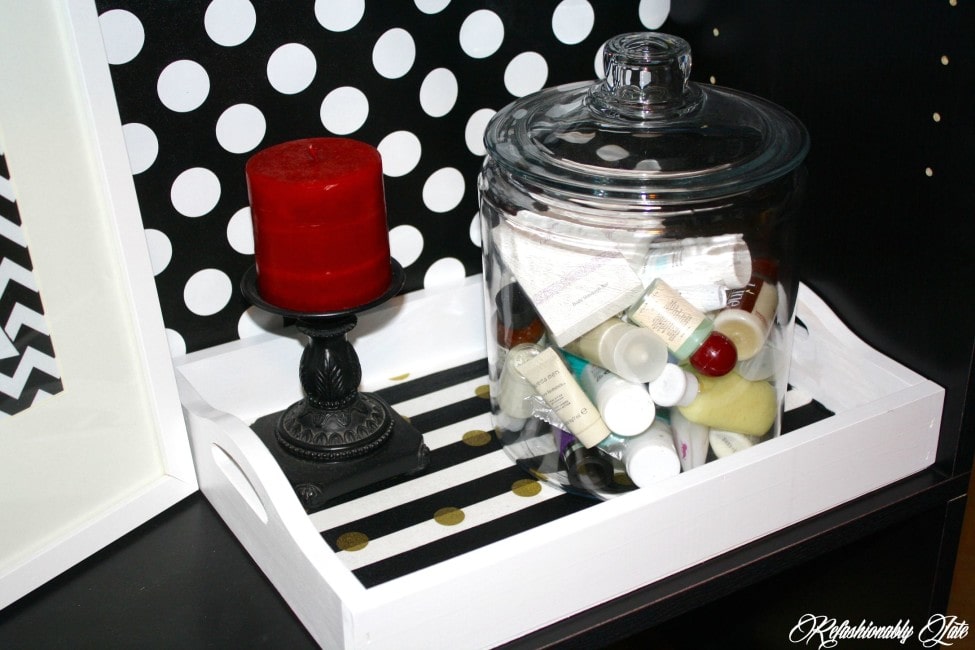
I decided to use my serving tray as decor in the guest room. I recently did a post on 7 Must-Haves for a Guest Room and I’m trying to incorporate those into the room. One item I really loved was taking a jar or vase and filling it with hotel shampoos and soaps for your guests. I am terrible at remembering to bring shampoo and conditioner when I travel and this would save me if every house had this! 🙂 Haha I know not everyone has this….but maybe they should?!

I started by sanding the tray as it was definitely “unfinished” like the title says. For $8.99 you can expect that but giving it a little sanding is not the end of the world. Once it was sanded I spray painted it with Rust-Oleum White Spray Paint. It needed a couple of coats because the wood soaked in the paint. Before I did the final coat of paint I gave it a light stand to make sure the tray was nice and smooth.

I originally wanted to paint stripes onto the tray but I had some leftover fabric from a chair I recovered and thought it would look great on the tray. I started by applying a generous layer of Mod Podge to the bottom of the tray.

I then laid the fabric on the top of the tray and smoothed it out and made sure there were no bubbles underneath the fabric. There was some excess fabric so I cut off the extra fabric with an razor blade.

After you use the razor blade make sure there are no strings left from the fabric. Before you do your top layer or mod podge it needs to be clean and smooth. Then you can apply your top coat layer of Mod Podge to protect your tray from any stains.

You are then left with a simple and easy tray makeover! If you ever get sick of the fabric you can mod podge a new fabric on top of it if you want. It’s a great addition to any room or space.


Now head to these other amazing blogs and see what they did with their unfinished serving tray. Aren’t these ladies so creative?

Have a great rest of your week and I’ll see you Friday with my Friday Favorites! Anyone else already ready for the weekend?!
Many outgoing links on Refashionably Late are affiliate links. I may earn a small commission to fund my Diet Mountain Dew drinking habit if you use these links to make a purchase. You will not be charged extra, and you’ll keep me supplied in caffeine. It’s a win for everyone, really. I only link to products I have tried and love! See my full disclosure here.


Hi, Ruthie ~ Your tray looks great, and I love that fabric! Such fun details! I’m sure your guest will love this special touch. :0)
Thanks Tiffany! It was such a fun and quick makeover!
This turned out great! I love the color combination and how it pops!
Thanks Emily! You can’t go wrong with black, white and gold in my opinion 🙂
Super cute Ruthie! Love your little spare room for guest! The fabric you picked is so cute and so you! Awesome job!
Thanks so much Sara! I love me some white, black and gold 🙂
Adorbs! I love it, and you know I love black and white. I really thought you had painted the stripes, but the fabric idea is genius. Thanks for sharing!
Thanks April! I love me some black and white too!
I love what you did with this tray Ruthie! It matches your blog!
Haha it does! I love me some black, white and gold!
Your tray turned out great and I cannot wait to see what you do with your guest room.
Oooo, I love that you used black and white – it looks perfect! And holy cats look at all those tray ideas!
Isn’t it fun to see how one item is used in so many different ways? Thanks I love black and white!
Ruthie I love what you did with the tray! The fabric inlay was great. It’s such a great idea to add it to your guest room! Pinned and shared.
Thanks so much Stephanie! Great minds think alike and use fabric 🙂
I love the classic black and white and fun pops of gold Ruthie!! It goes with your signature style beautifully.
Thanks so much Kathy! 🙂