
Hey everyone! Today I have two really great tutorials for you! I love Halloween and I love getting dressed up and decorating my home for the holiday. I decided to do things differently this year because I just wasn’t in the mood to make my pretty decor not-so-pretty since I have been working so hard on it. Lots of Halloween decor is scary looking and typically incorporates bright colors. I do have those decorations but I wanted a change. This year I wanted to make all my decor beautiful and elegant and I think I’ve done just that!
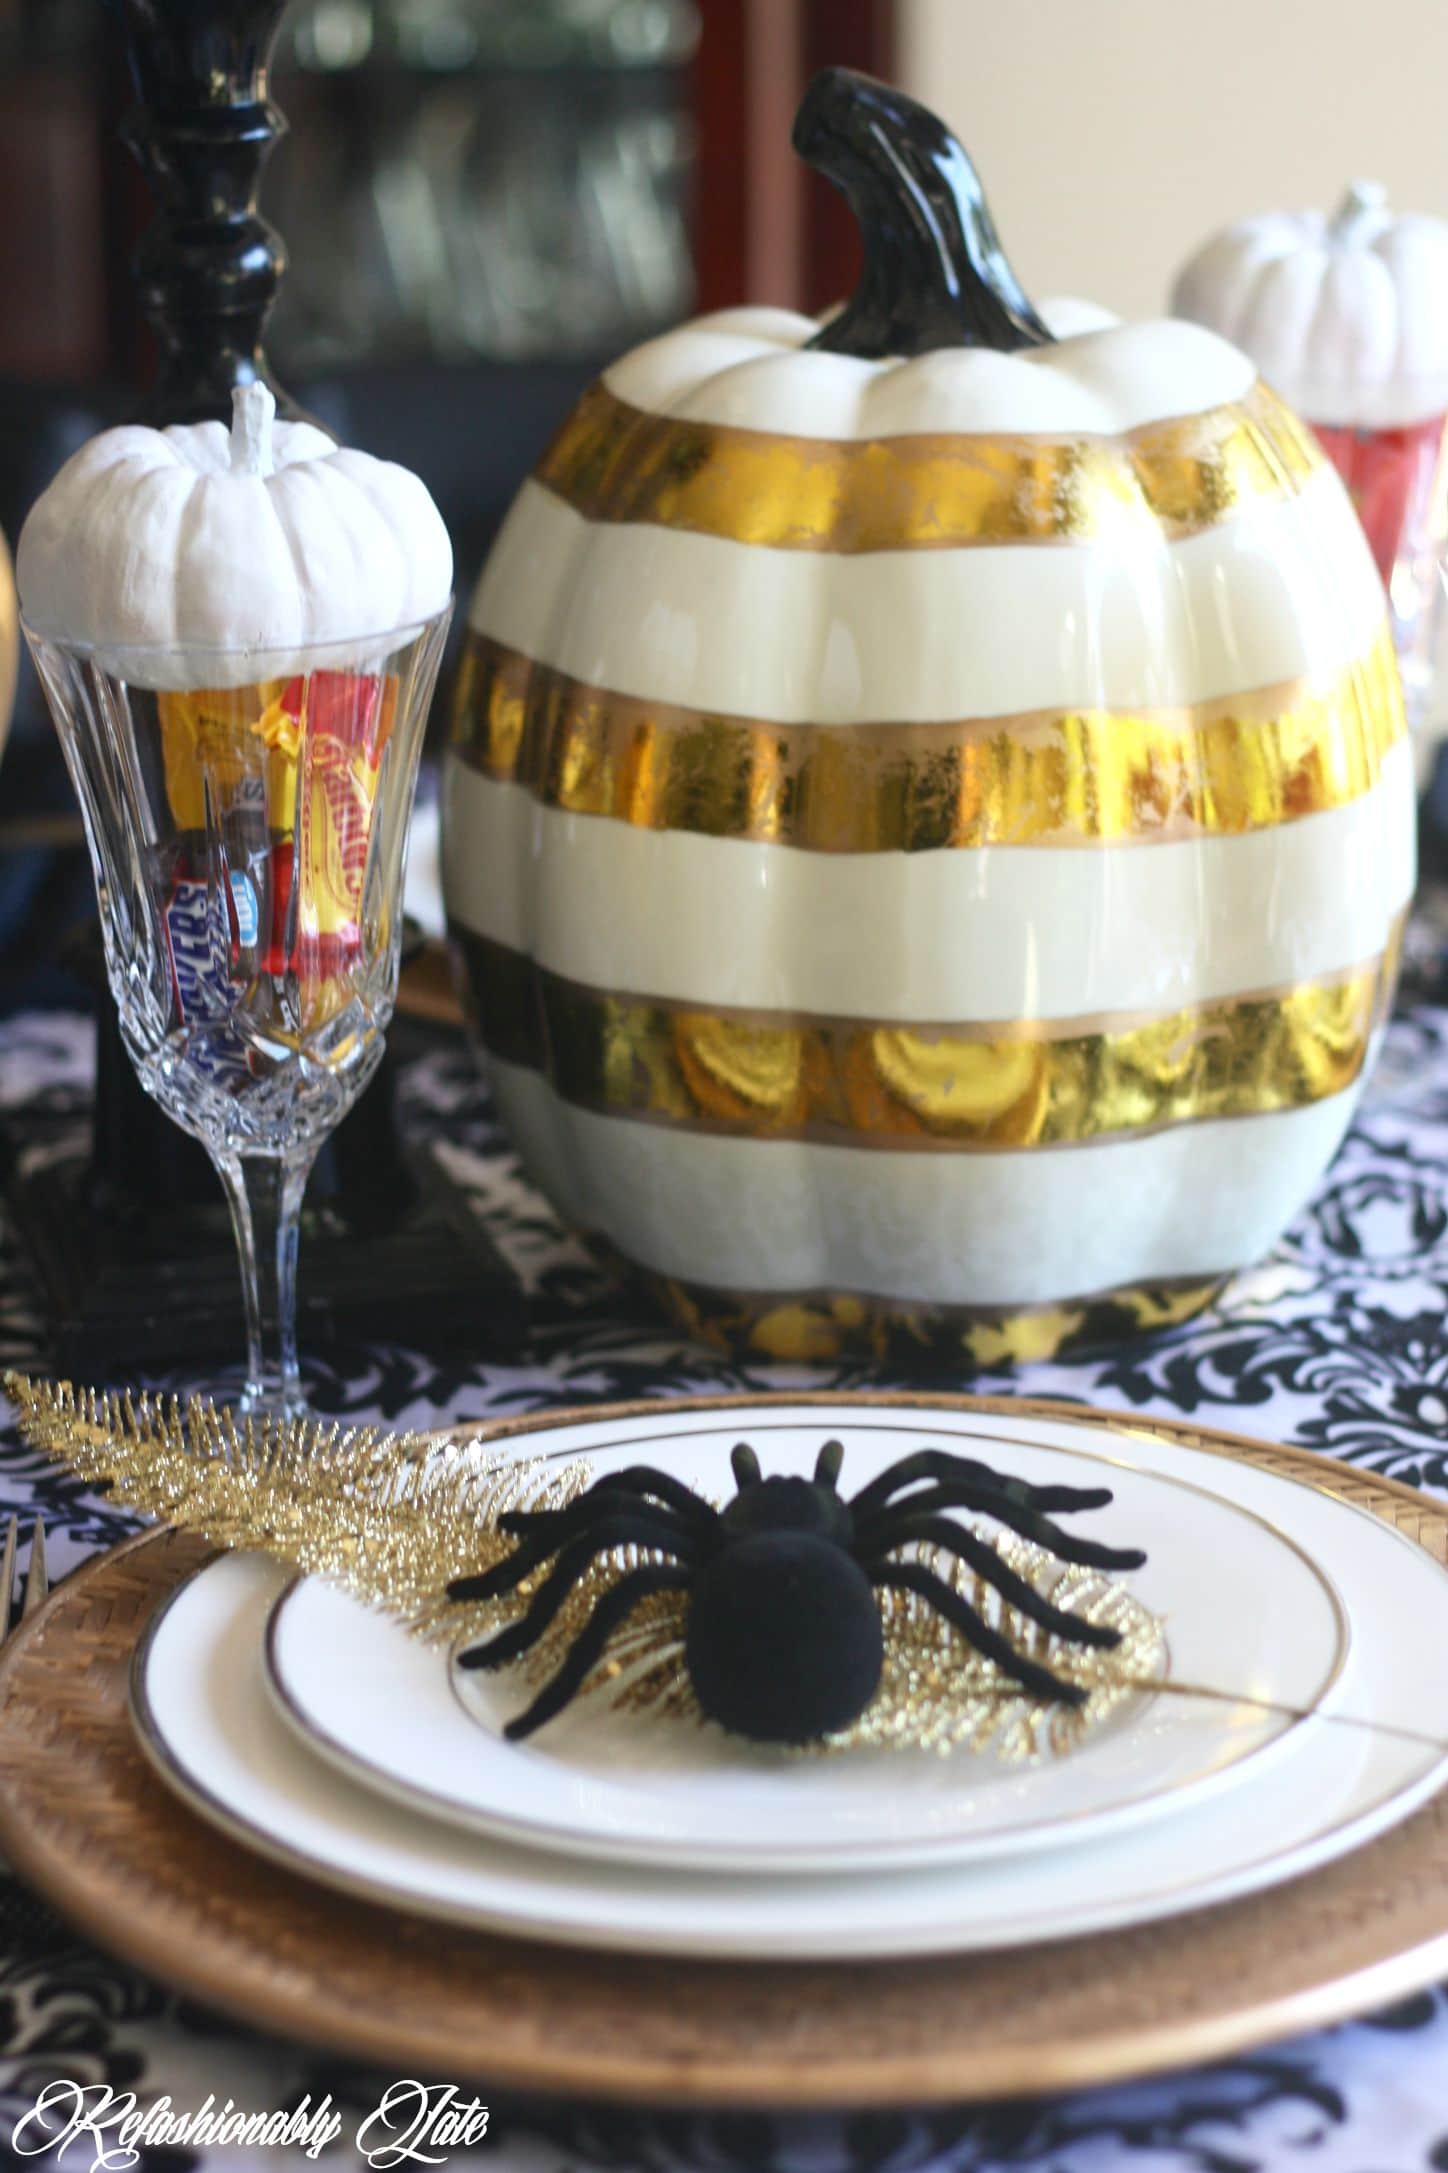
Halloween can be portrayed in beautiful ways too! I started creating my tablescape with using a damask tablecloth that I already owned. (It’s actually from my wedding 4 years ago.) It was the perfect backdrop to the pretty Halloween decor.

Halloween Dinner Party Tablescape
I created a beautiful Fall Tablescape a few weeks ago and I wanted to incorporate some of those decorative items into my Hall0ween tablescape. Chargers, gold pumpkins, white pumpkins, and gold candles were all used in my previous tablescape.
I shopped around my house for a little bit and grabbed some candlesticks to add to the table. From there you need to incorporate height and depth to the center to create a full and visually pleasing centerpiece. Therefore, a great way to do that is display something on a candlestick. As you can see I have candlesticks in varying sizes. Finally, I then added the pumpkins, owl, spray painted skull and candles to the top of the candlesticks.
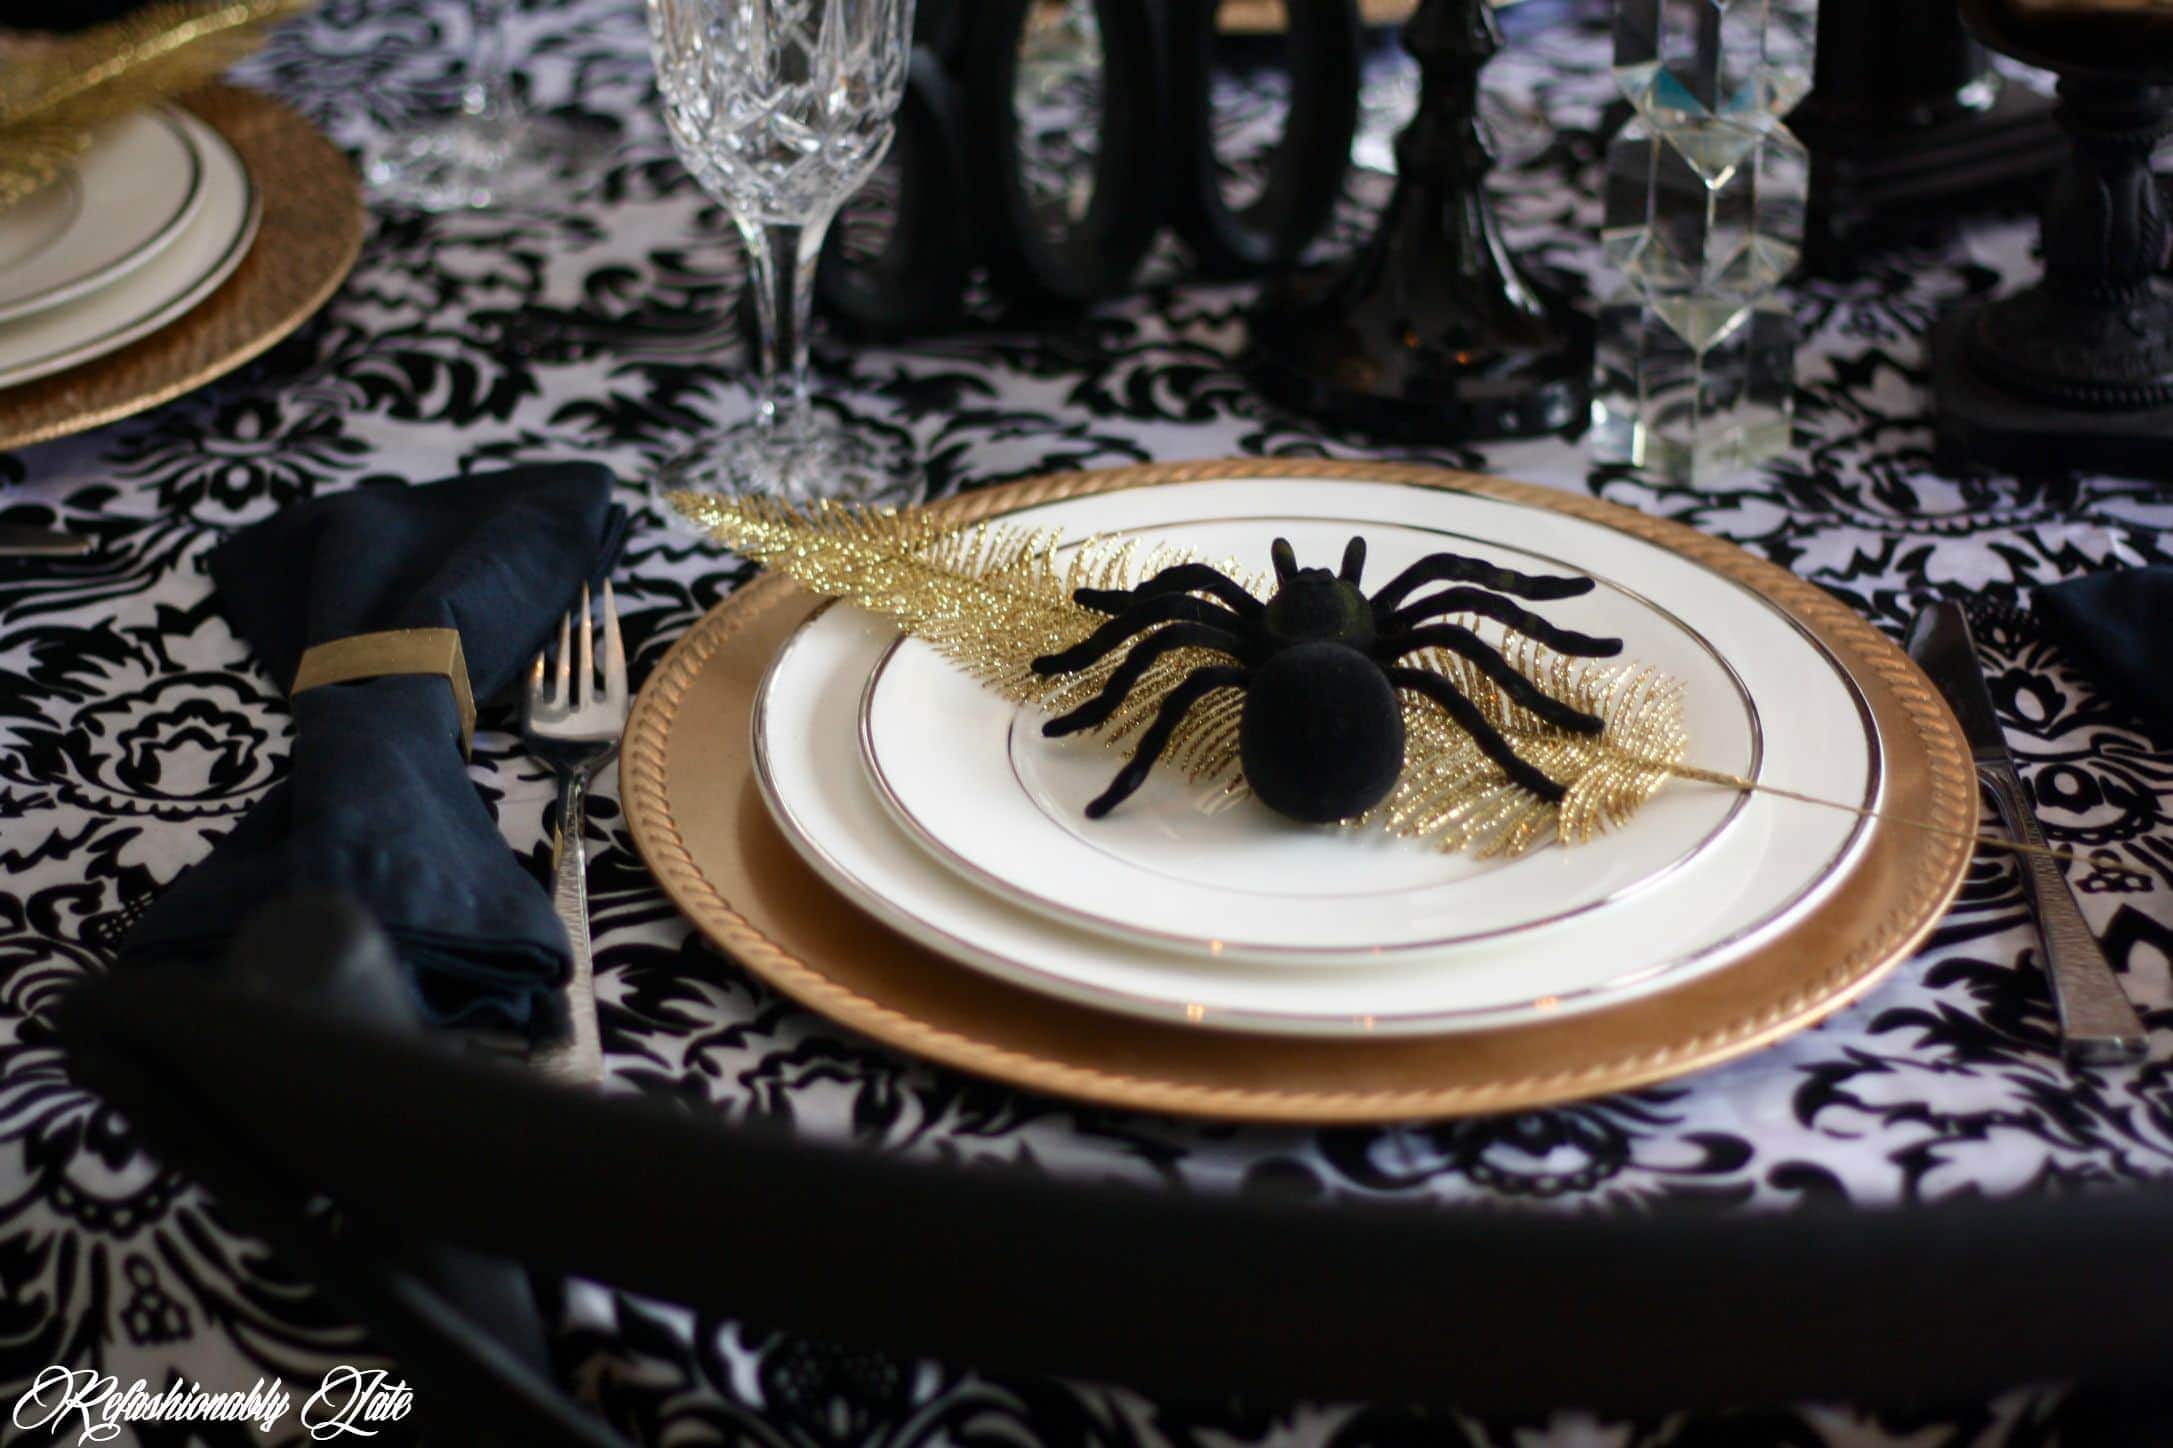
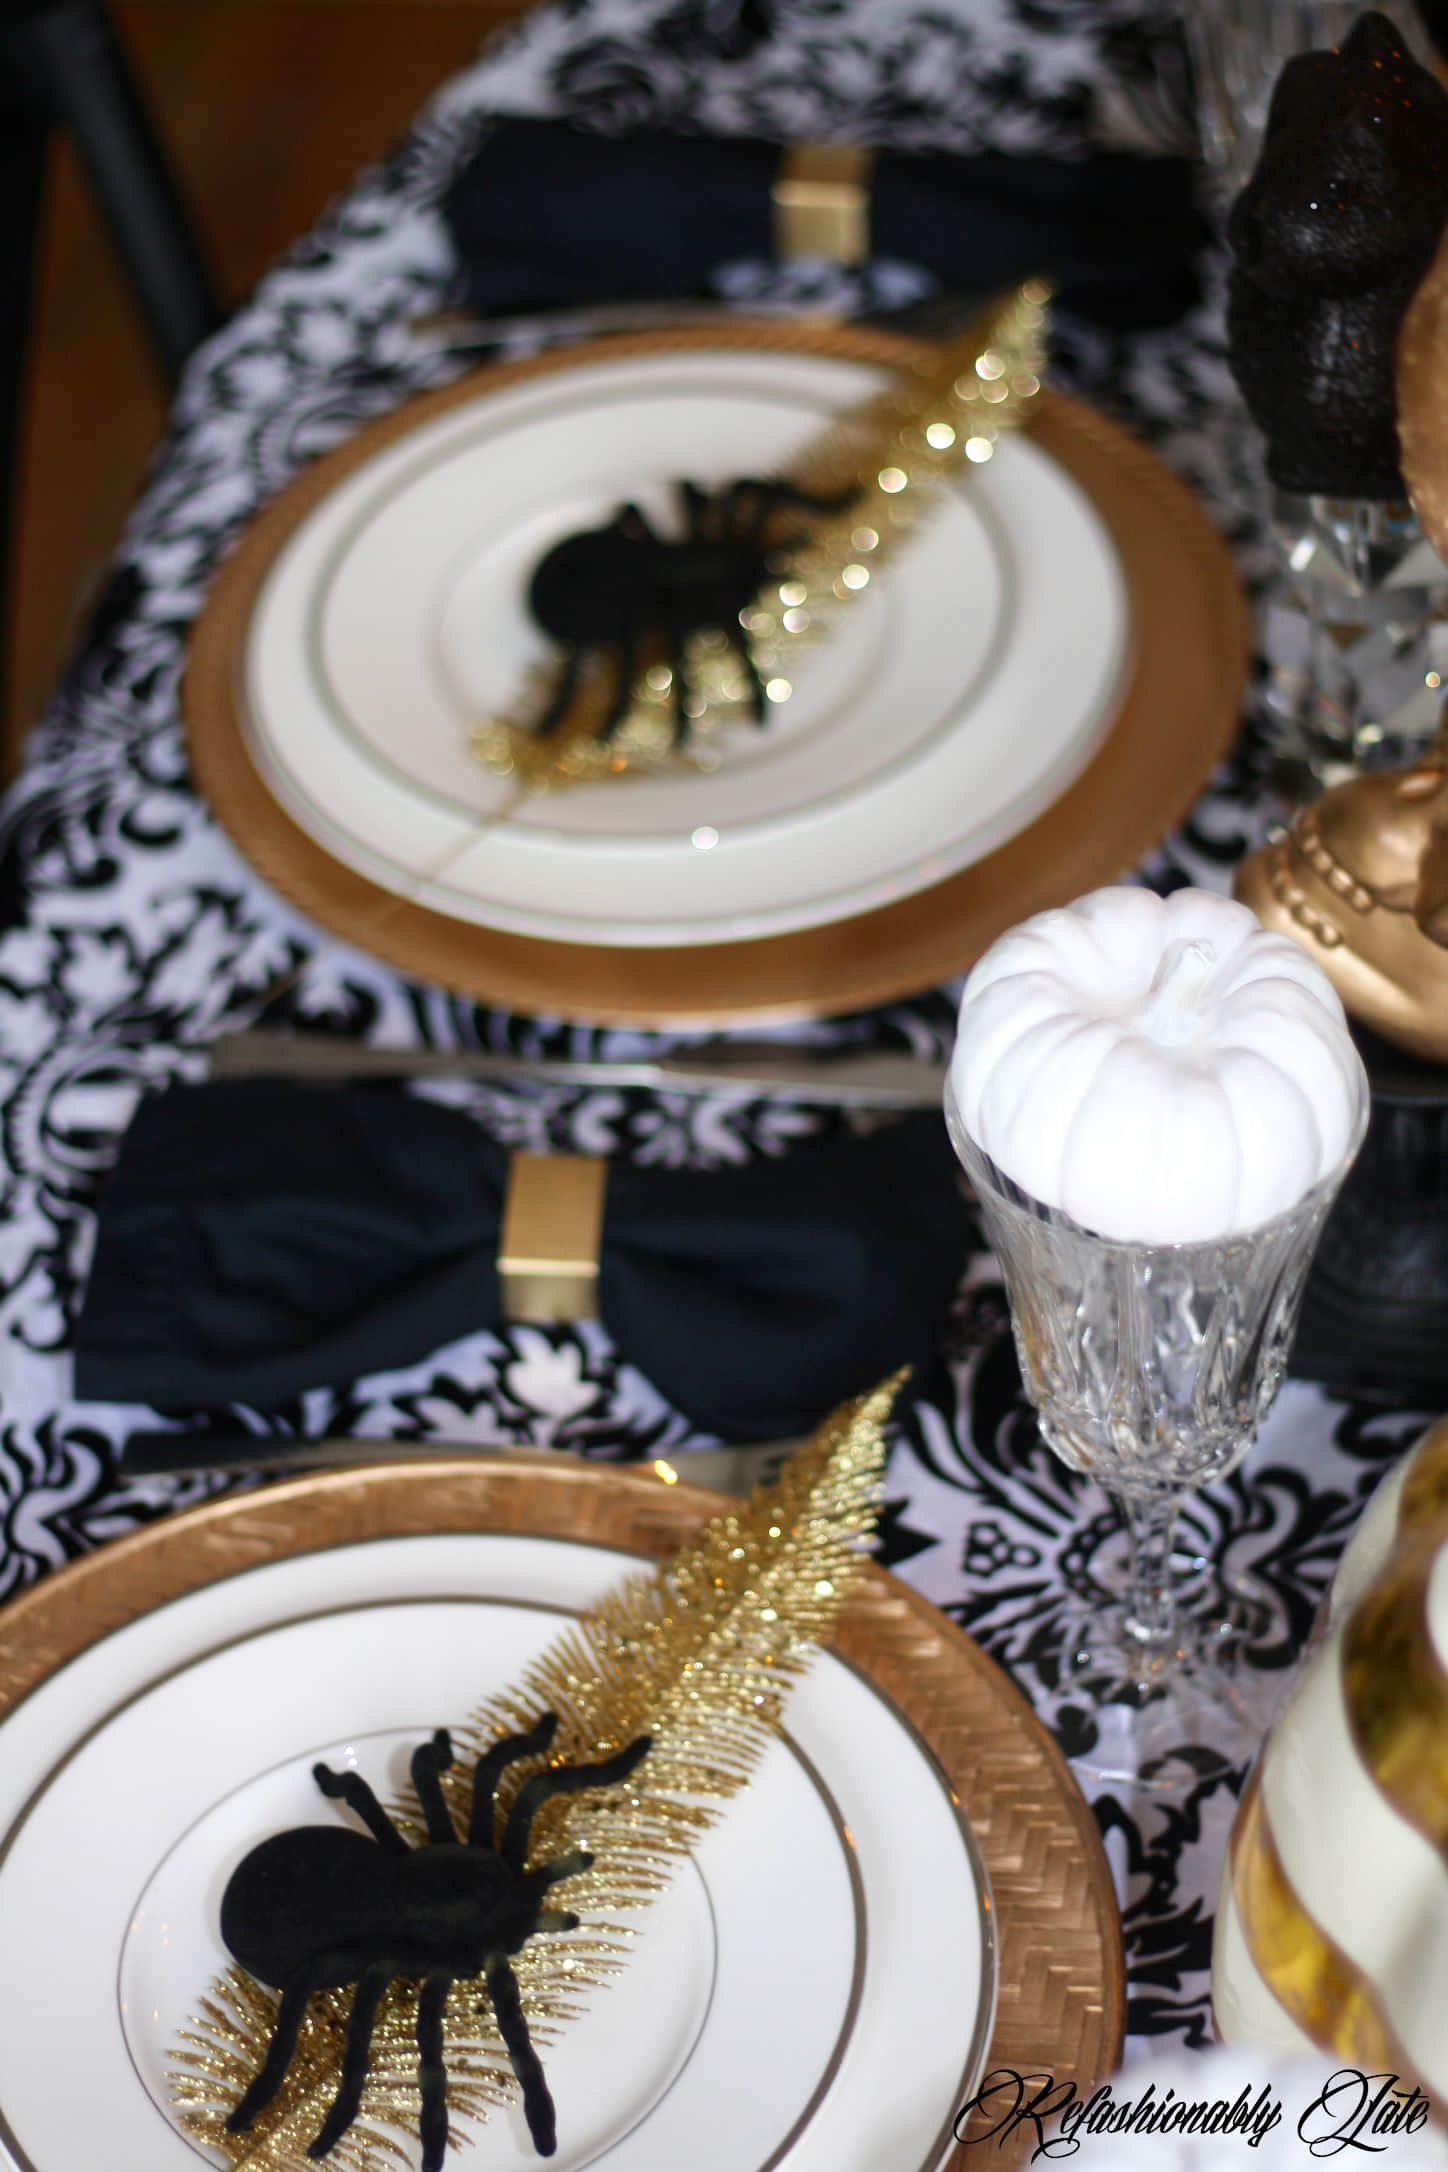
I created depth by putting the larger gold and white pumpkin on the right side of the table. A little spray paint (I love gold) is a great way to take any Halloween design and glam it up a bit! Don’t forget to decorate the plates! You can always set something on top of them to add a little extra touch to your table.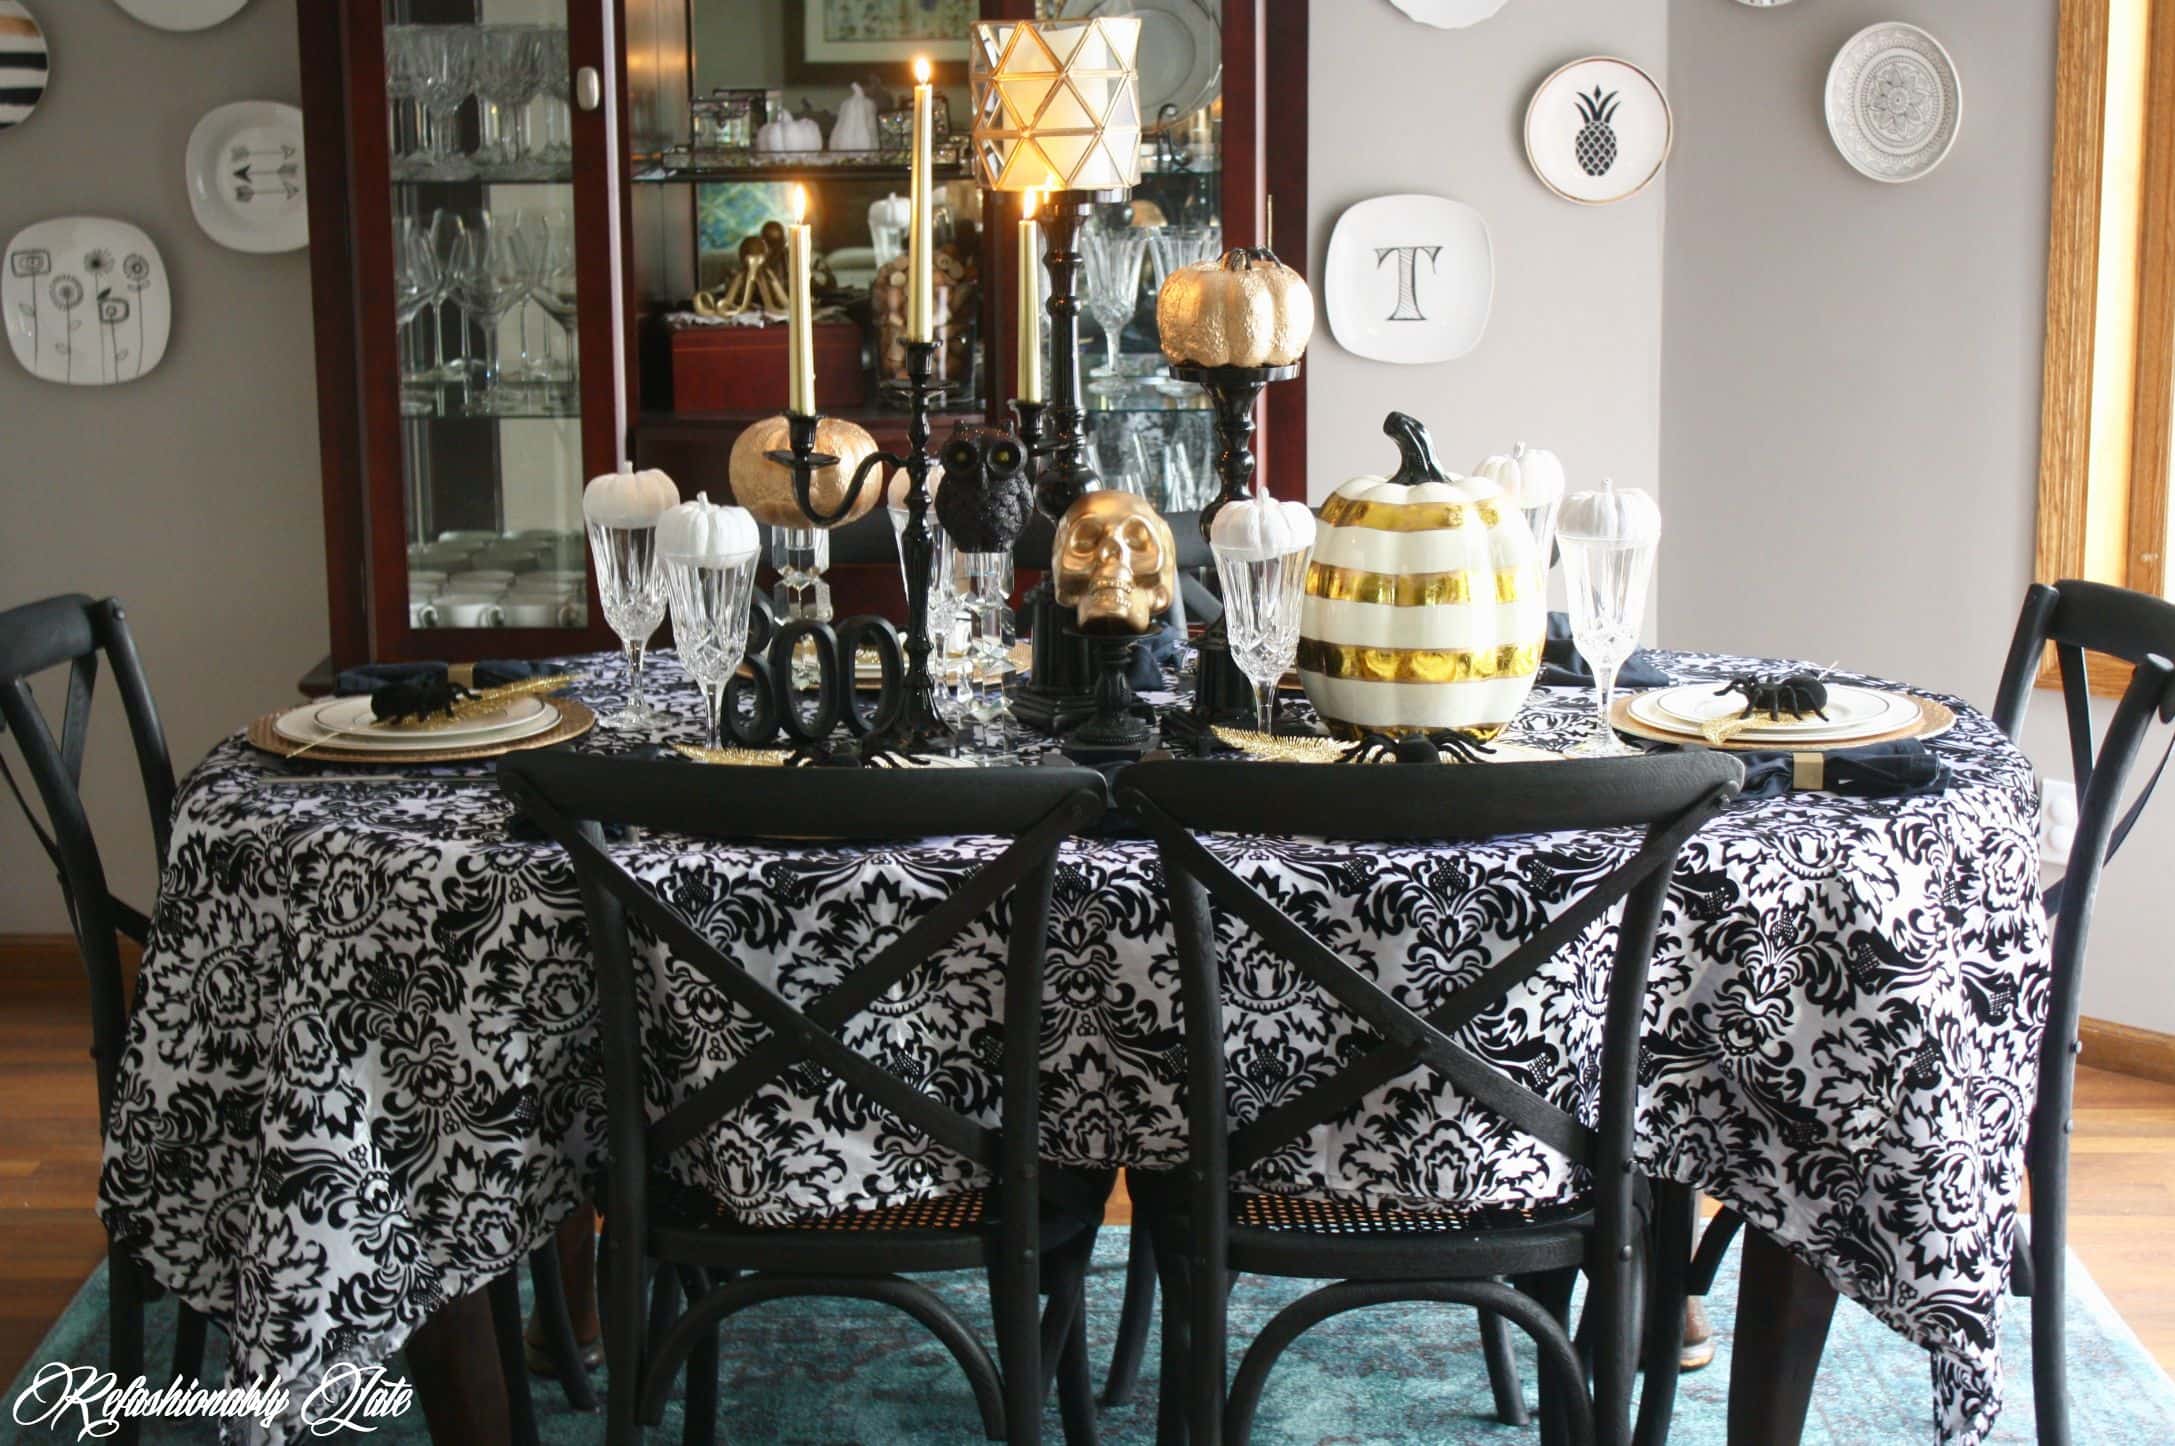
It is Halloween so you need to give your guests candy of course! A fun way to give them a little treat is by putting candy in the water glass or even having a bowl of candy on the table. Halloween is not complete without some sweet treats! 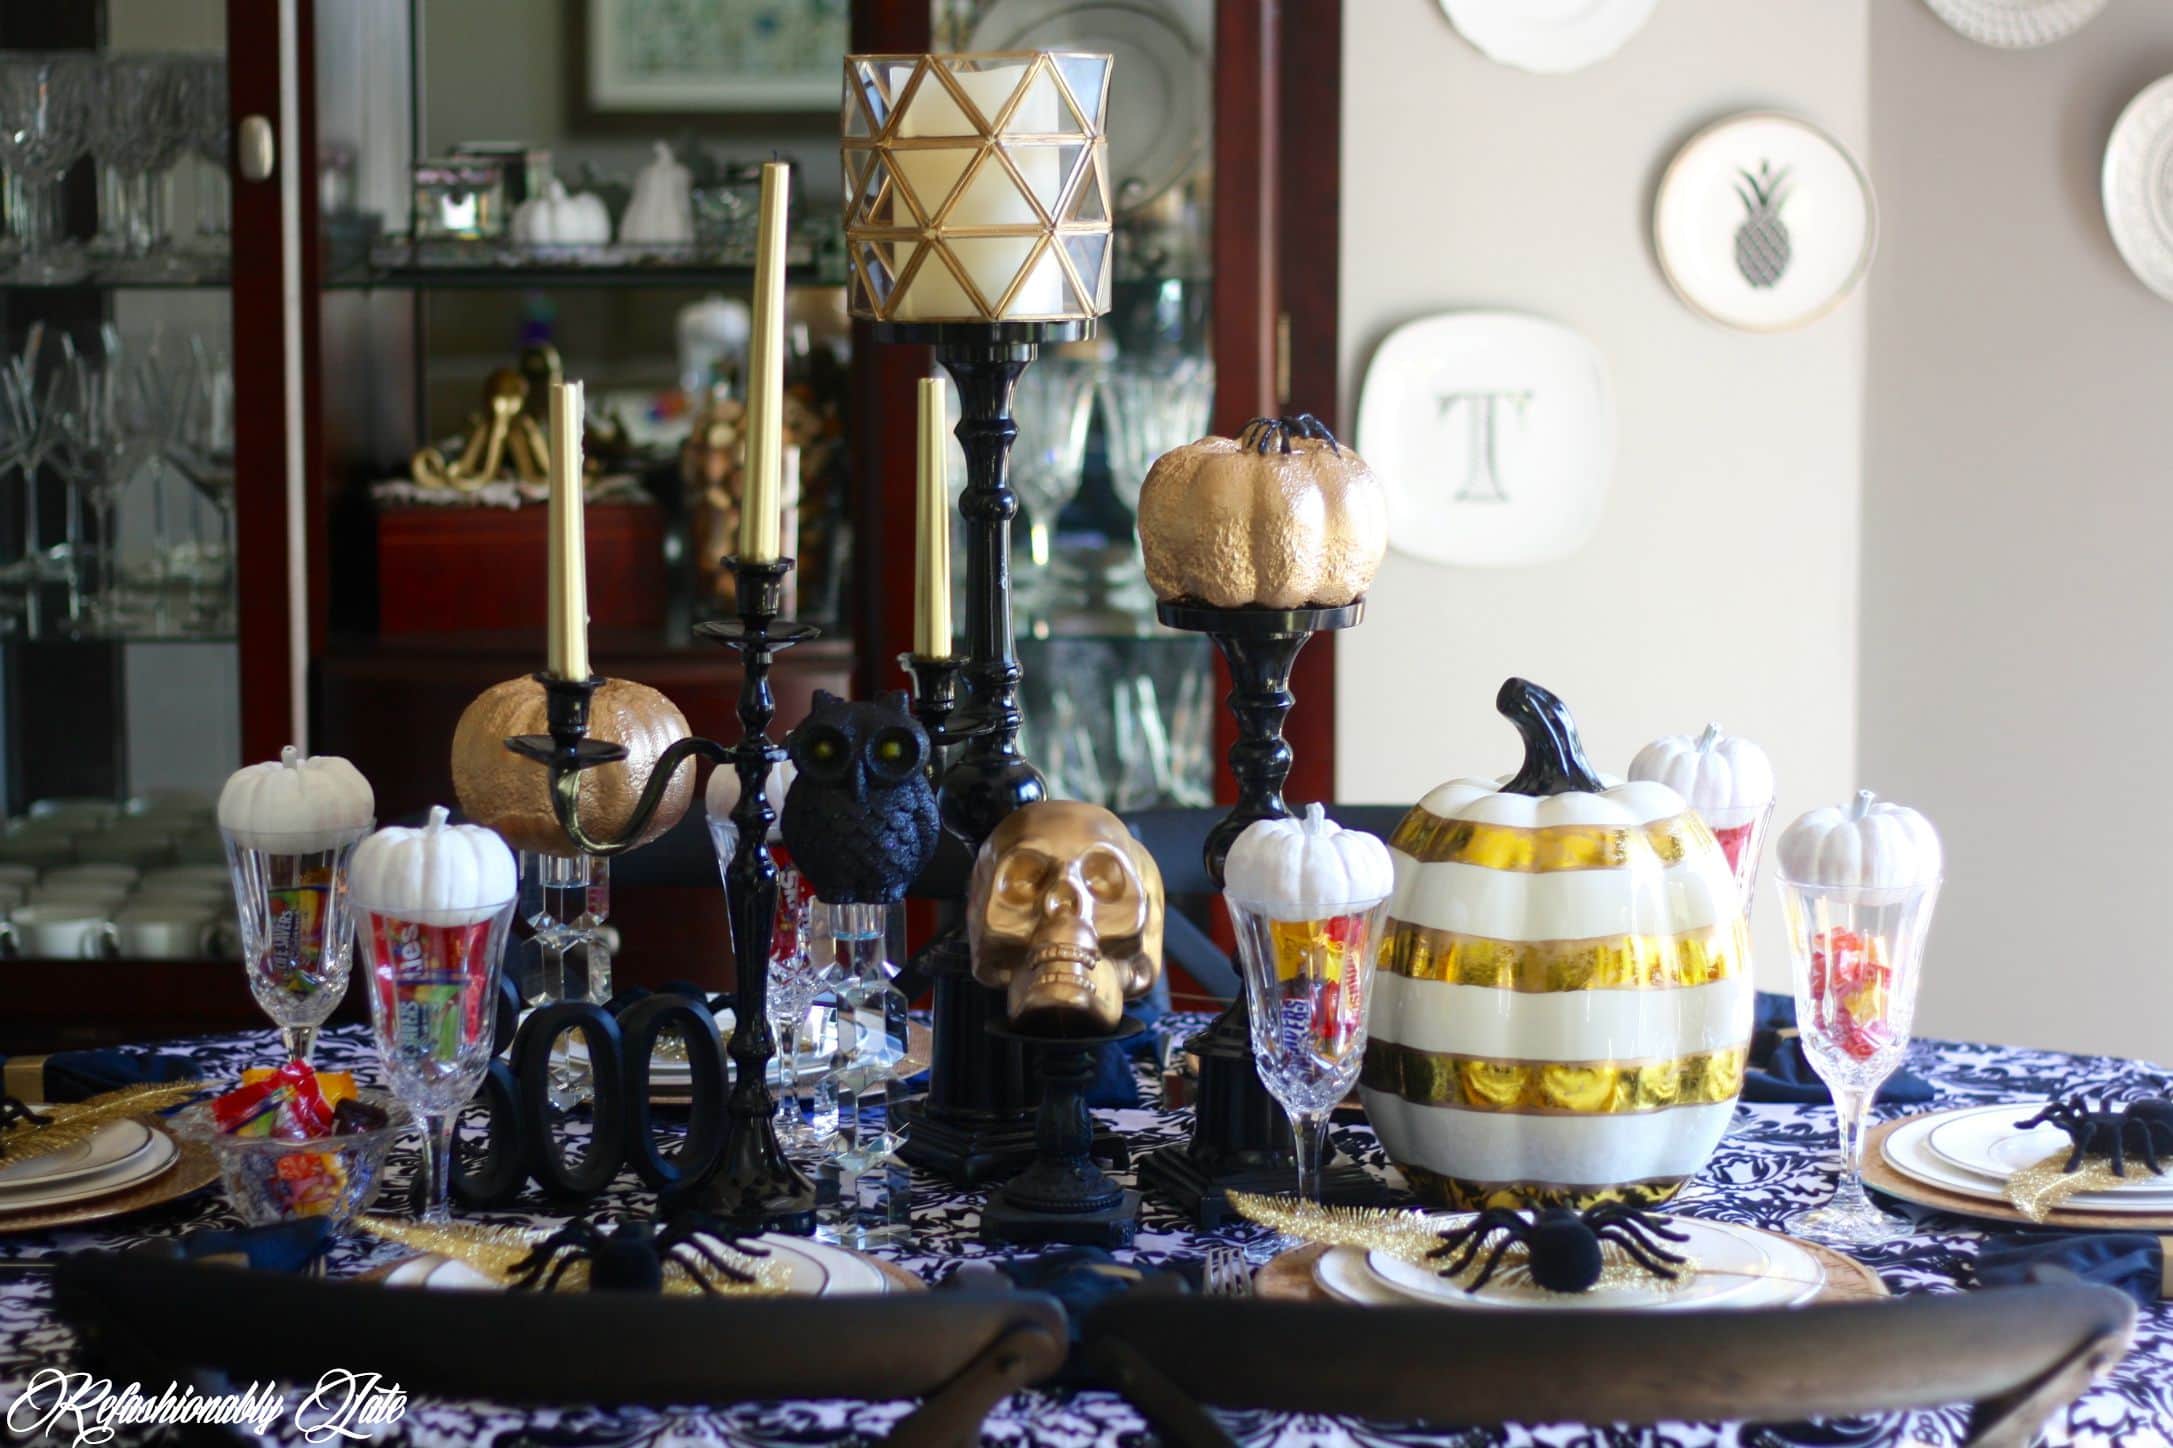
How to Make a Boo Kit
I wanted to accompany this Dinner Party with a fun way to treat your friends this Halloween season!
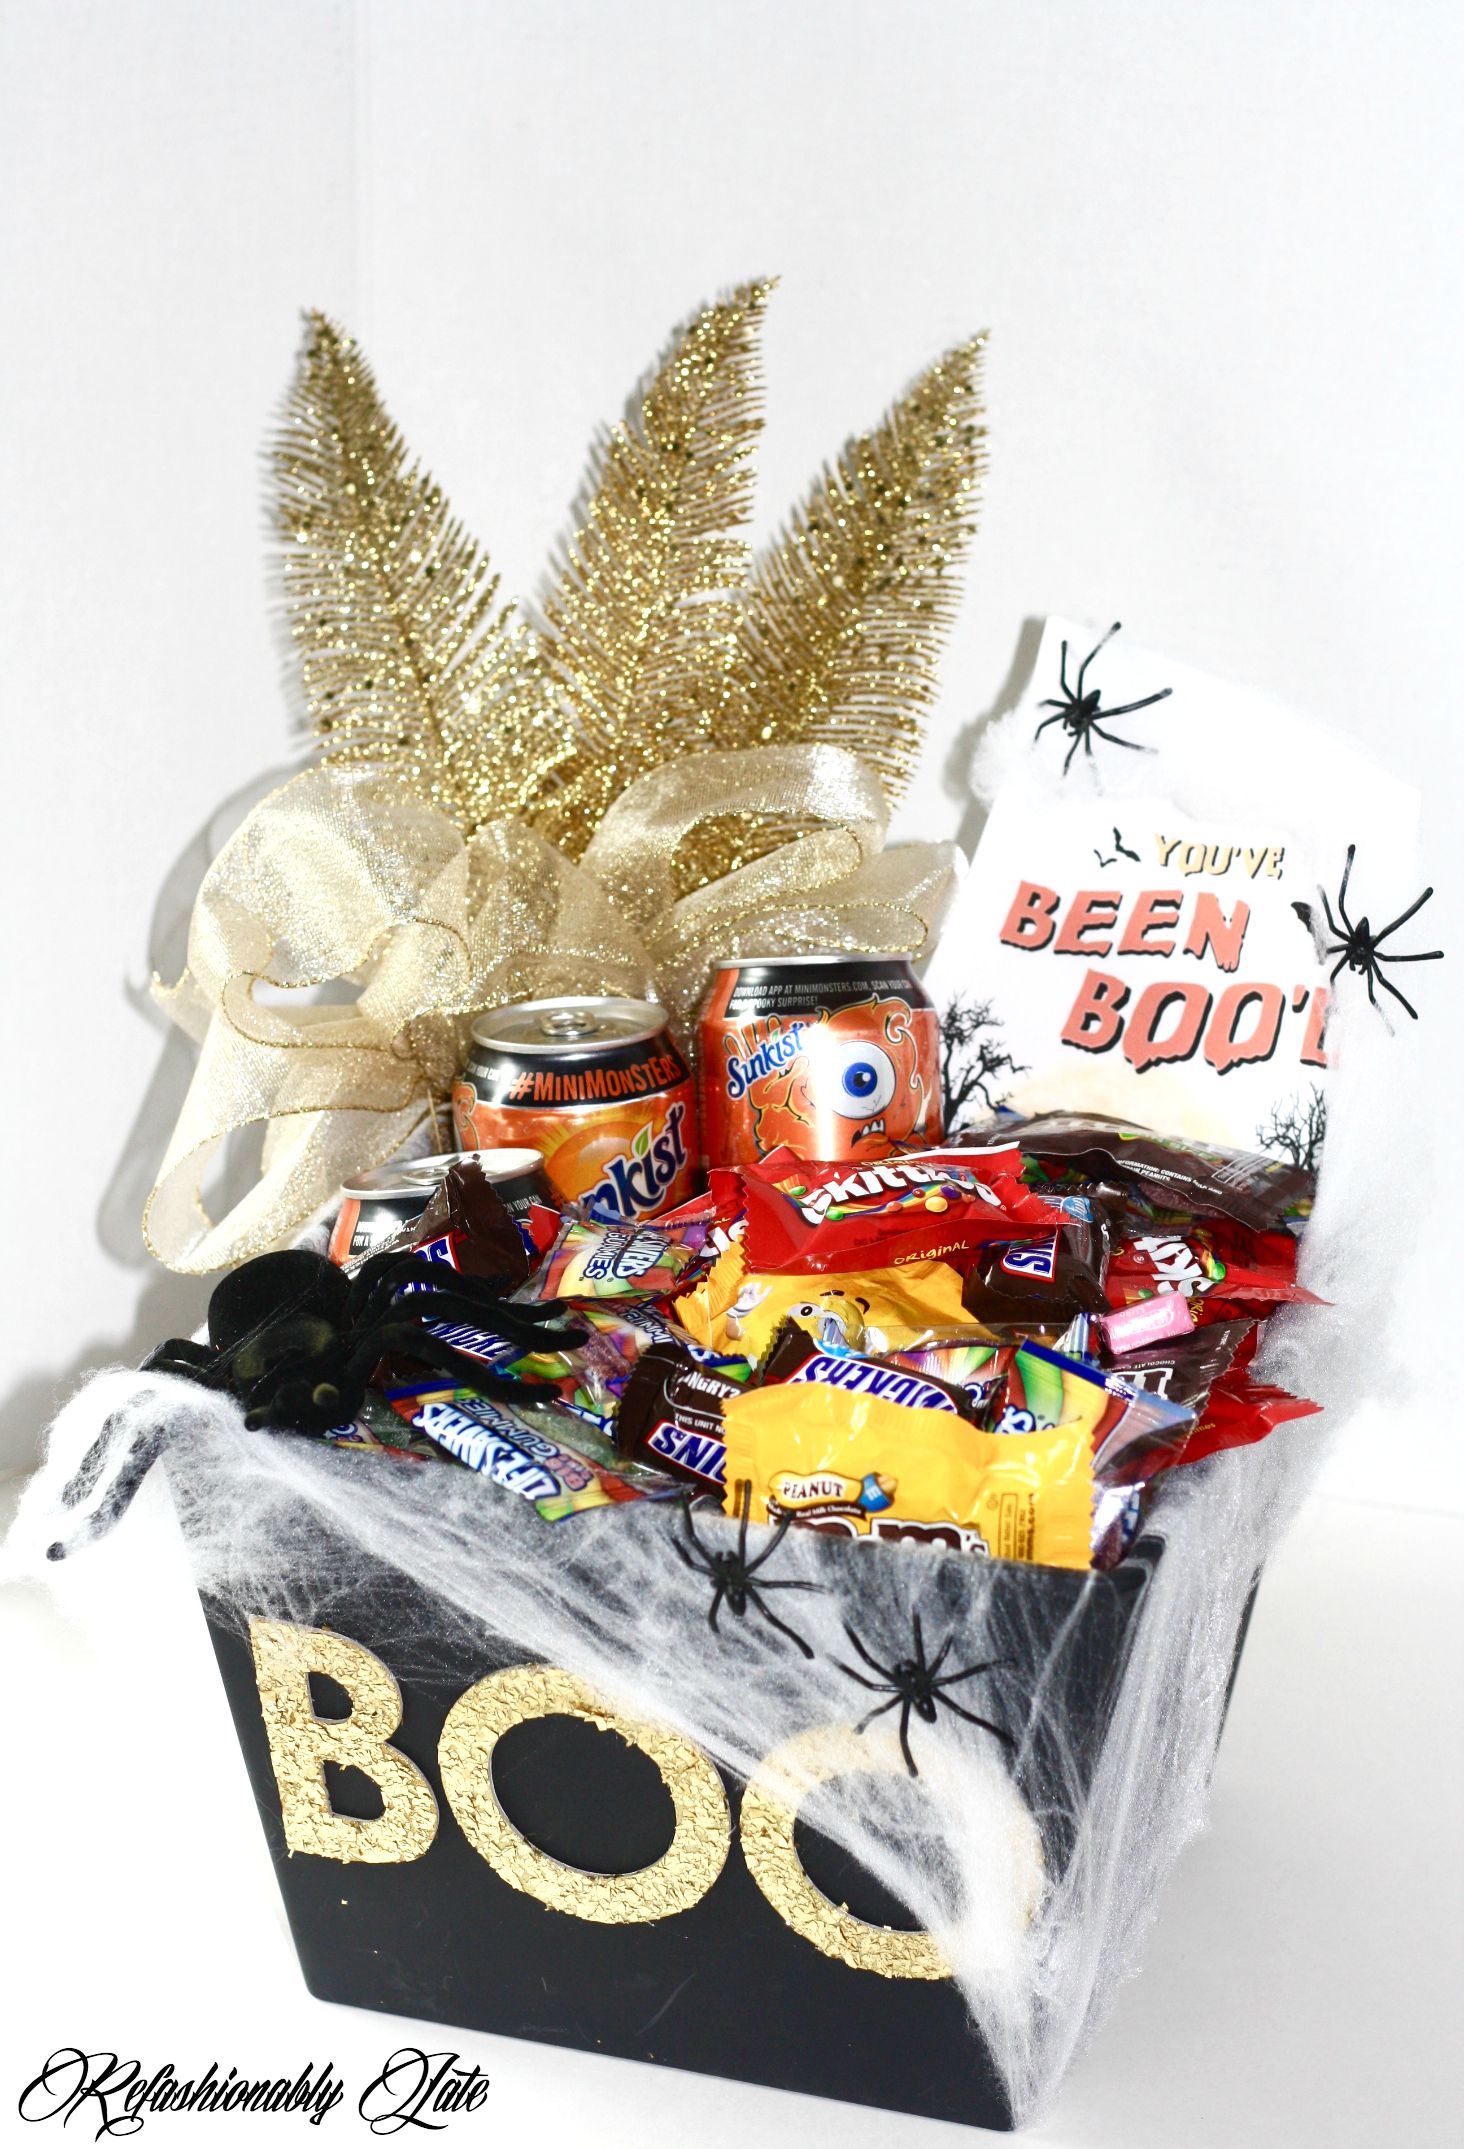
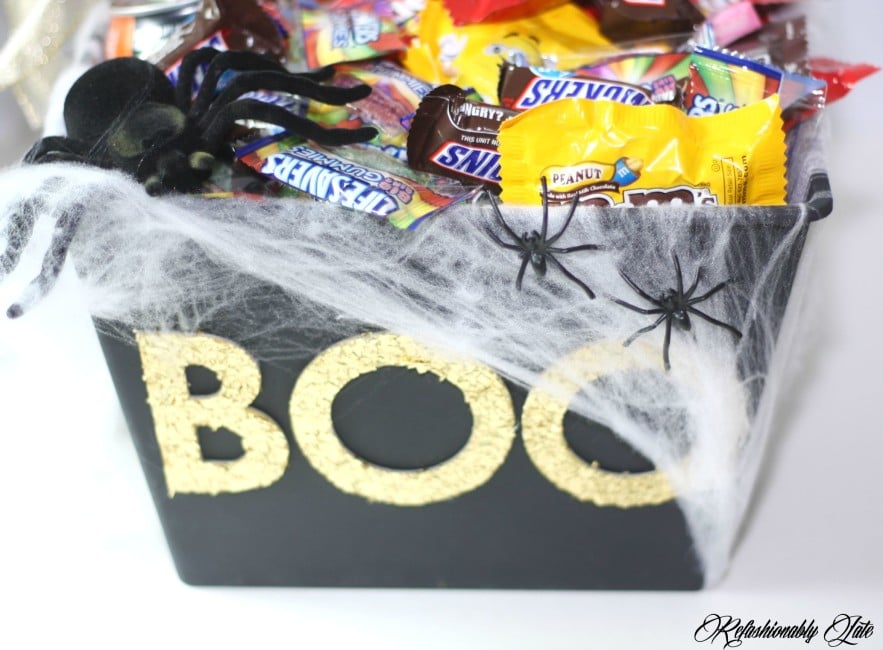
Making a BOO Kit of your own is a great way to pay it forward to somebody during the Halloween season. This is such a cool program where you BOO it forward. The idea of the whole thing is to create a BOO bundle and leave it on a doorstep, porch or desk for a deserving someone. Then you encourage that someone to BOO it forward. What an amazing way to make someone’s day by giving them an unexpected gift?
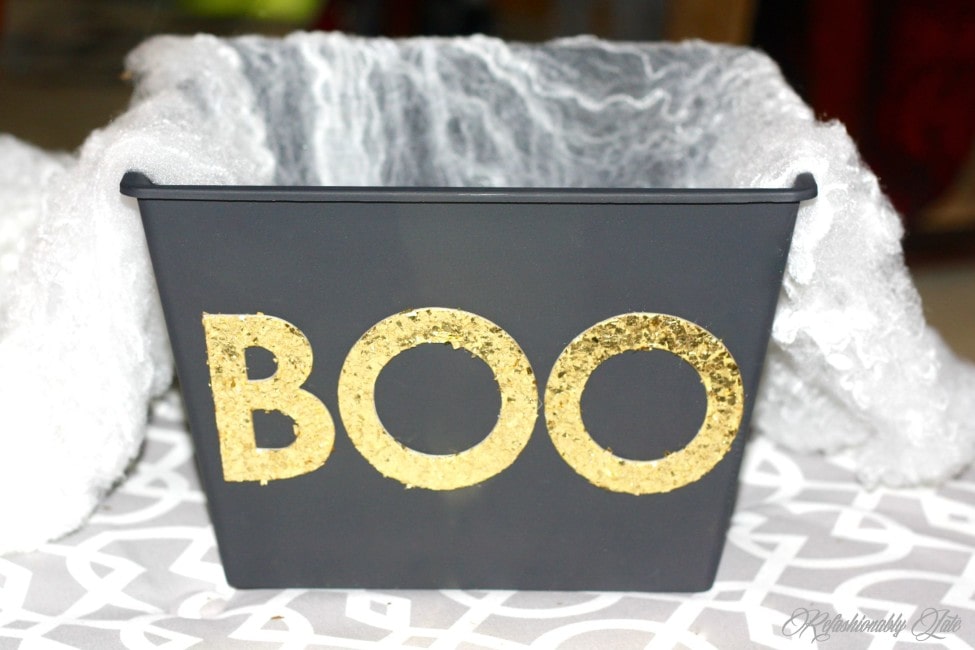
I created my own BOO kit with simple and inexpensive items. A small bucket, spray paint, fake spider webs, glitter letters, decorative ribbon, and feathers were used to fill it with goodies.
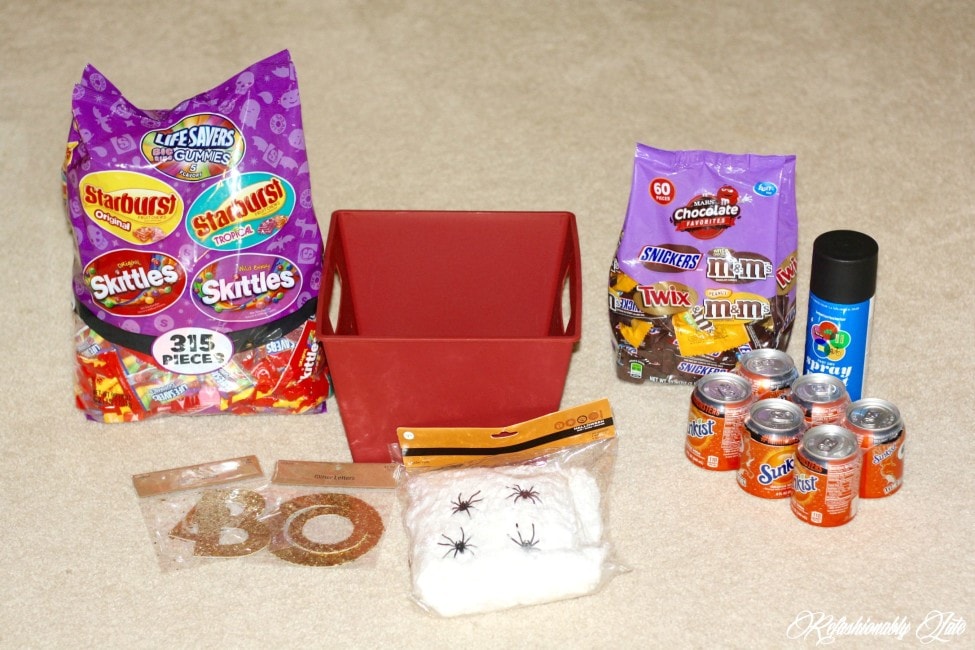
I started by spray painting the bucket black (you could avoid this step by buying a black bucket…they didn’t have any the day I went to the store). After it was dry then I glued the glitter letters onto the bucket with a hot glue gun. The next step to creating your own BOO kit is to lay the fake spider webs into the bucket and have it hang over. You will then add your candy to your bucket and some tissue paper to the bottom to create more “volume.”
Boo Kit Card
Once you’ve created the perfect tower of candy then you can add your BOO card to the kit.
- Print out this card.
- Cut out this “We’ve been BOO’d sign.
- Fold the “You’ve been BOO’d” greeting card (page 2) and tape openings together.
- Include the card and sign when gifting BOO bundles.
All the ingredients were in my boo kit and I still felt it needed a little extra something.

A few gold feathers and ribbon were added to glam it up a bit! I love how it turned out and it’s a great way to surprise a friend or loved one during the Halloween season!
Happy early Halloween everyone and have fun makeing your spooky and stylish Halloween decor! For more decor ideas to make check out my A Cricut Made Halloween, 15 Spooky & Adorable Halloween Crafts, Paint Your Own Halloween Pillow and 12 Amazing Halloween Crafts! So much to make so you better get to work! 😉
This shop has been compensated by Collective Bias, Inc. and its advertiser. All opinions are mine alone. #BOOitForward #CollectiveBias


Your party set up is just gorgeous! I love the idea of sticking some candy in the water glass, so fun! And the BOO kits look amazing but so easy. Thanks for sharing! [client]
Thank you so much Allison!
Such a cute BOO kit and I LOVE your tablescape. I definitely think I want to do something like this for my boys for dinner on Halloween!
Thanks Sydney! It’s always more fun to eat with a fun decorated table in my opinion!
Most fav. Halloween table-scape, ever! And… boo it forward?! How cute is that?!
Awe thanks Jen! I love how it turned out! And I LOVE the idea of BOO it forward too!
This is amazing! So spooktacular!!! I love all of the small details and work put into this. That little box of goodies looks yummy!
Thanks so much Emily! It was really fun to create!
Ruthie,
I can’t tell you how much I love this! It is everything I hope to for our house this year. Your design is such an inspiration! Thank you for sharing!
Cat
Thank you so much Cat!! That really means a lot! It’s so fun to decorate for the Holidays!
I love your tablescape! It is the perfect combination of spooky and elegant.
Thank you so much Sarah!