
I’m joining up with a few of my favorite ladies with the monthly create and share! I have also participated in a couple other months and I love how creative all of these ladies are! If you aren’t familiar with create and share, we all take a product and create our own “interpretation” of the product. How can we make it unique and make it our own?
Here are my previous projects:
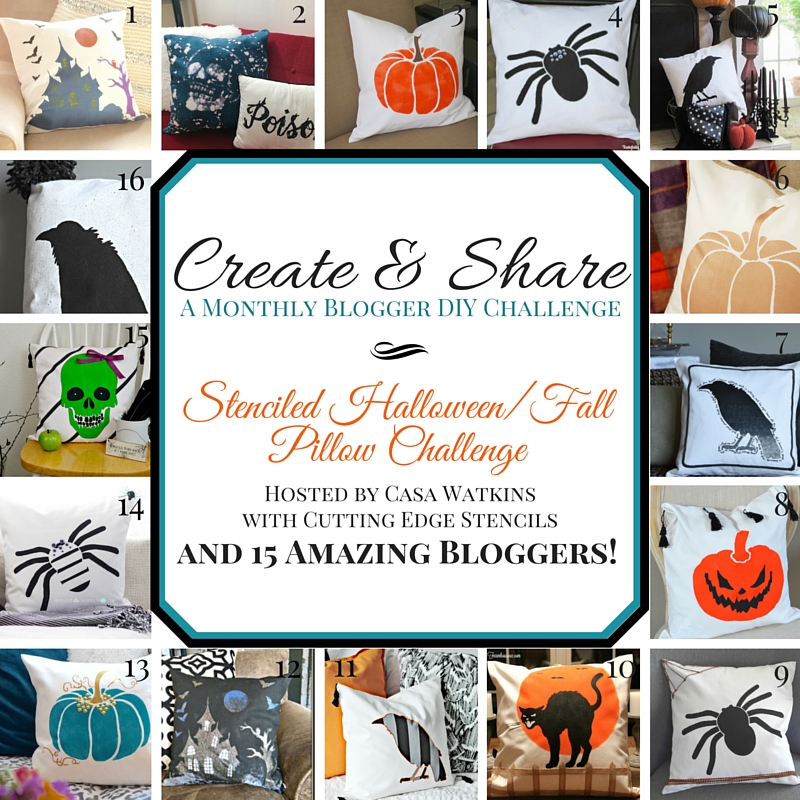
This month’s challenge we partnered with Cutting Edge Stencils and Paint-A-Pillow. They have this amazing line of Halloween/Fall stencils that you can use to design your own pillow or tote. I jumped at the opportunity to work with them again because I loved the stencil they provided for my Stenciled Lace Feature Wall post.
I was so excited when I received the pillow kit and couldn’t wait to get started! Make sure you get all of the extra pillow accessories if you want to add any embellishments to your pillow.

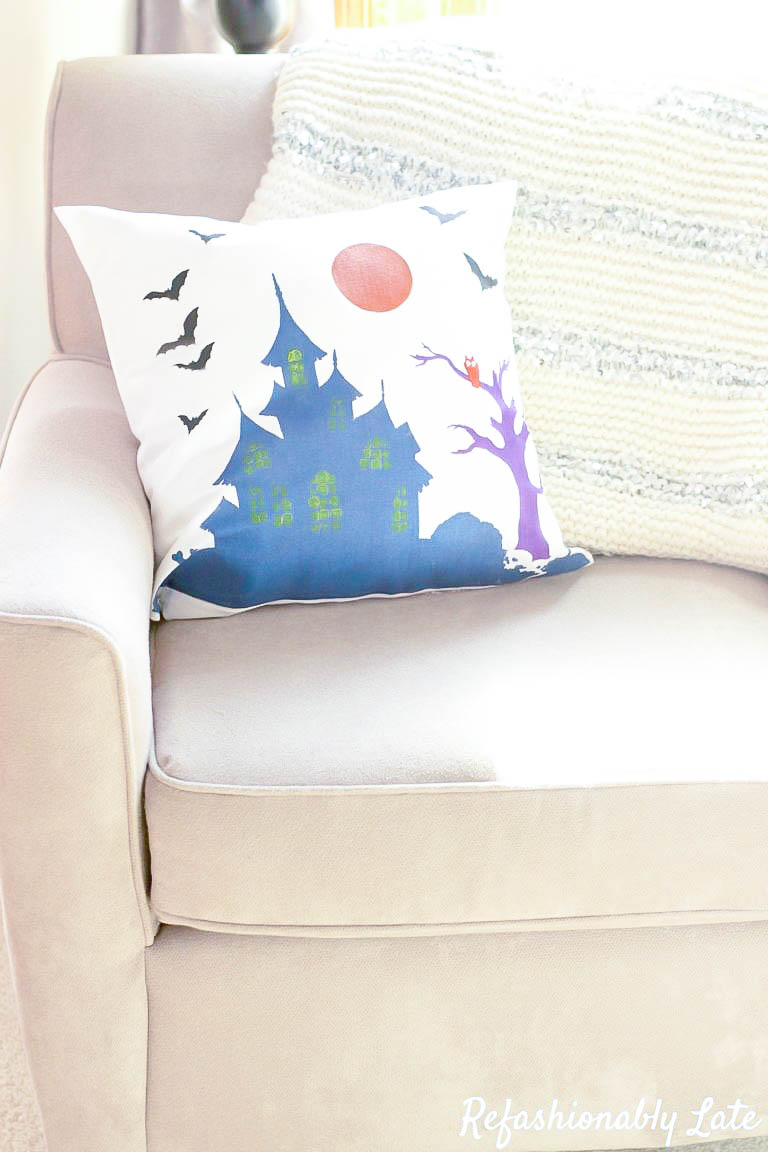
I started by choosing which color to use to paint my pillow. The design on the pillow didn’t allow for too many color choices. Orange and black are very traditional Halloween colors and I didn’t want to use them. I had this beautiful iridescent blue that I thought would be perfect for the haunted house portion of the pillow! The largest area of the pillow was the house so I used a foam roller for this portion of the project.


I used a small brush to stencil on the rest of the pillow areas. I went with a gorgeous bronze color for the moon, purple for the tree, and black for the bats. I also did a touch of orange with the owl sitting in the tree. When using the brush, make sure to dab it onto the pillow or use a circular motion to make sure it is being painted evenly.

When it was dry I put the extra stencil piece on top and stenciled in some dim windows on top of the house with yellow. I didn’t want it to look perfect so I wasn’t too picky about the application process of the windows. Two crystals were added for a final touch to the eyes of the owl. Glitz is kind of my thing so what a simple and small way to add a bit of sparkle to a project!

I love how it turned out and I can’t wait to work with Cutting Edge Stencils again and paint a pillow for them with a non-Halloween theme! Make sure to check out all of these amazing ladies pillows below and see how they made their pillows their own!
2. Domicile 37~DIY Bleached Out Skull Pillow
3. Green With Decor~A DIY Pillow for Fall
5. Pocketful Of Posies.~Painted Pillows
6. Old House to New Home~DIY Painted Pillow with Braided Trim
7. Flourish and Knot~Poe-etic Pillow
9. Our House Now a Home~Spider Pillow
11. Shabby Grace Blog~DIY Halloween Throw Pillow
12. Uncookie Cutter~Halloween Paint a Pillow
15. The House Down the Lane~Whimsical Stenciled Skull Pillow


I love the colors you chose Ruthie! Looks great!
Thanks, Sara!
This turned out great! I love the incandescent blue that you chose….a great mix of spooky and whimsy. love it.
Thanks Jessica! I love that blue color!
This came out great, I love all the colors!!
Thanks Stephanie!
Ruthie, this looks fabulous……I love the colors you used. The touch of gems for the owls eyes are perfect.
Thanks Bonnie! I love a little sparkle on everything I do! 🙂
Your pillow looks great! I love the colors your chose!
Thanks Amanda!
Hi, Ruthie ~ Your pillow looks amazing! I love all of the different colors you used and the windows on the haunted house just pop! It’s so fun seeing everyone’s take on a similar project. Great job!
Thanks Tiffany! Isn’t it fun to see what everyone did?!
Your pillow turned out great Ruthie! I love the windows in the house and owl in the tree the best. What a fun way to add some color to the black and orange holiday 🙂
Thanks Sydney! I’m super happy with how it turned out! I was excited to not use the typical colors 🙂
Love the stencil you chose! Cute idea to use crystals for the owl’s eyes too.
Thanks Amy! I love the touch of sparkle with the crystals!
I love your pillow Ruthie! It’s so spooky and fun! 🙂
Thanks Iris! 🙂
SO cute!!
Thanks Rose!
This turned out great! I love the colors you used in it!
Thanks Emily! 🙂
Love this very whimsical and spooky pillow – so perfect for Halloween. Cathy
Thank you so much Cathy!
This looks fantastic! I absolutely love all the detail you put into your pillow.
Thank you Sarah!
Ruthie, it looks great! I love that we went two totally different ways on our matching stencil. I love the different colors you used!
Yeah it’s so fun to see what others do with the same product!!
Great pillow Ruthie!!! Love the muted out windows. Added great dimension. Thanks for sharing your pretty pillow and thanks for participating in Create and Share this month. Tweeted
Thanks Stephanie! I always love participating in Create and Share!
I love your pillow! Using blue paint for the house was such a great idea!
Thanks Meg! 🙂